
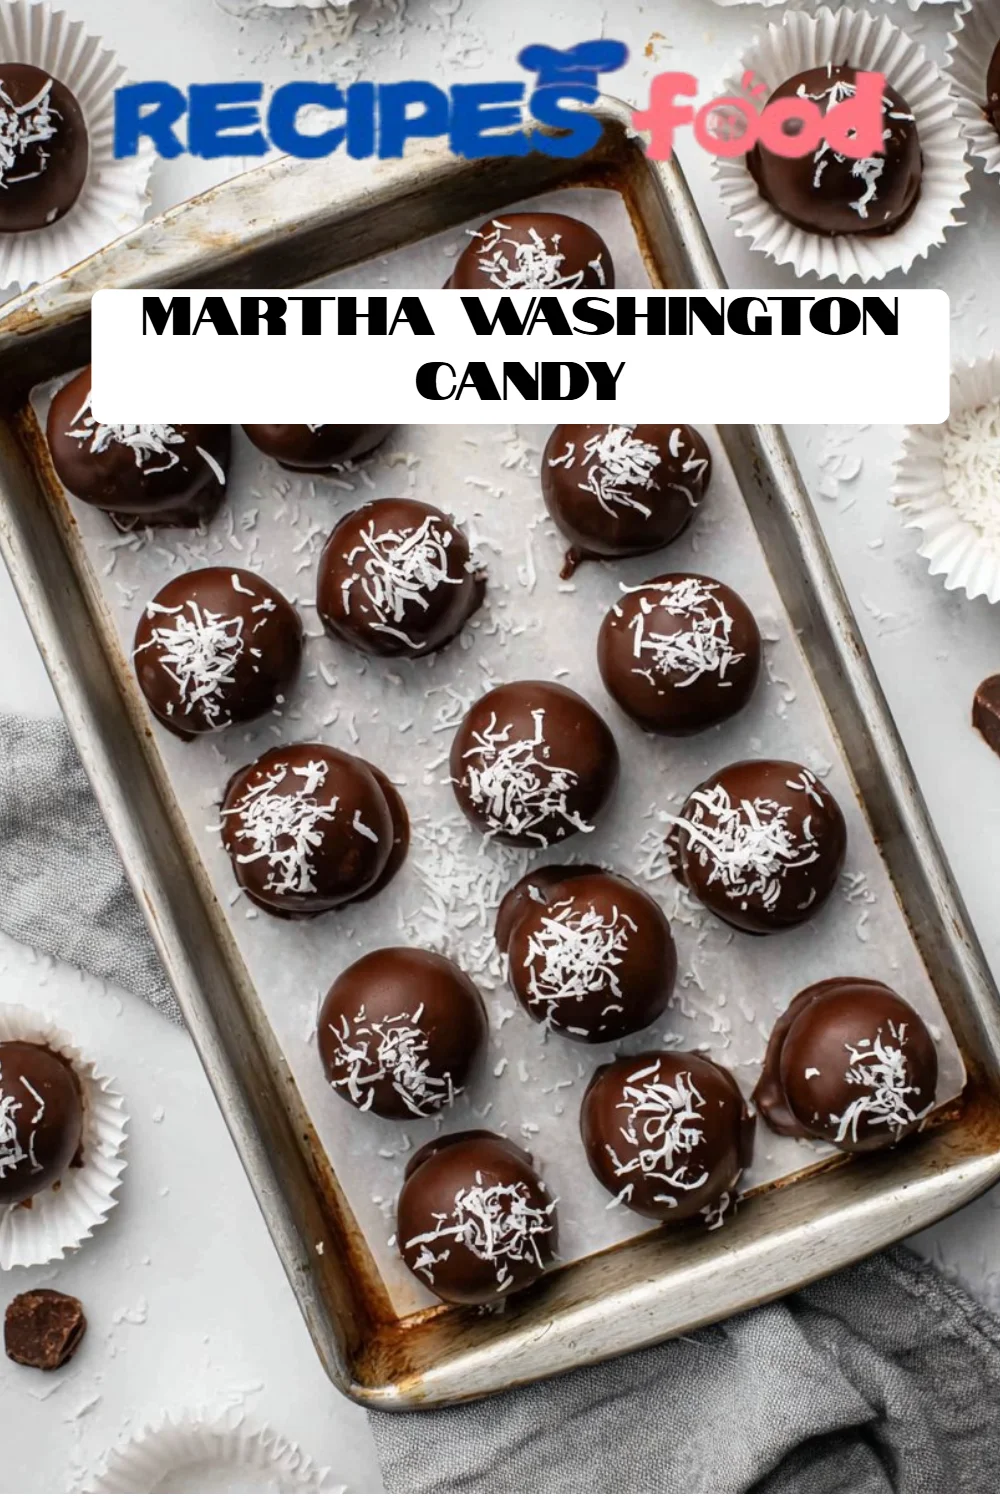
Delectable Martha Washington Candy: A Nostalgic Recipe You’ll Love to Make
Growing up, every holiday season was a culinary adventure in my grandmother’s kitchen, but one sweet treat always stood out: Martha Washington Candy. Each time she rolled balls of coconut and pecans, dipped them in rich chocolate, and presented them with a twinkle in her eye, my heart swelled with joy. These delightful morsels are more than just candy to me — they are a bridge to my past, a reminder of family gatherings filled with laughter and love. What makes these treats stand out from run-of-the-mill confections is their unique blend of rich flavors and undeniably comforting texture. Unlike store-bought options that can often be overly sugary or artificial-tasting, this homemade recipe is all about fresh, high-quality ingredients, allowing the distinct flavors of coconut and pecans to shine through.
In this post, I promise to guide you step-by-step through creating your own Martha Washington Candy. You’ll learn how to capture the essence of your memories and create new ones, all while delighting your friends and family. Let’s embark on this delightful journey together and whip up a batch of memories, one delicious bite at a time!
What are Martha Washington Candy?
Martha Washington Candy has a rich history that dates back to the 19th century. Legend has it that the candy was created in honor of our first First Lady, Martha Washington, who was known for her love of entertaining and delightful confections. These candies, often made by hand, reflect a charming era of homemade treats that evoke nostalgia.
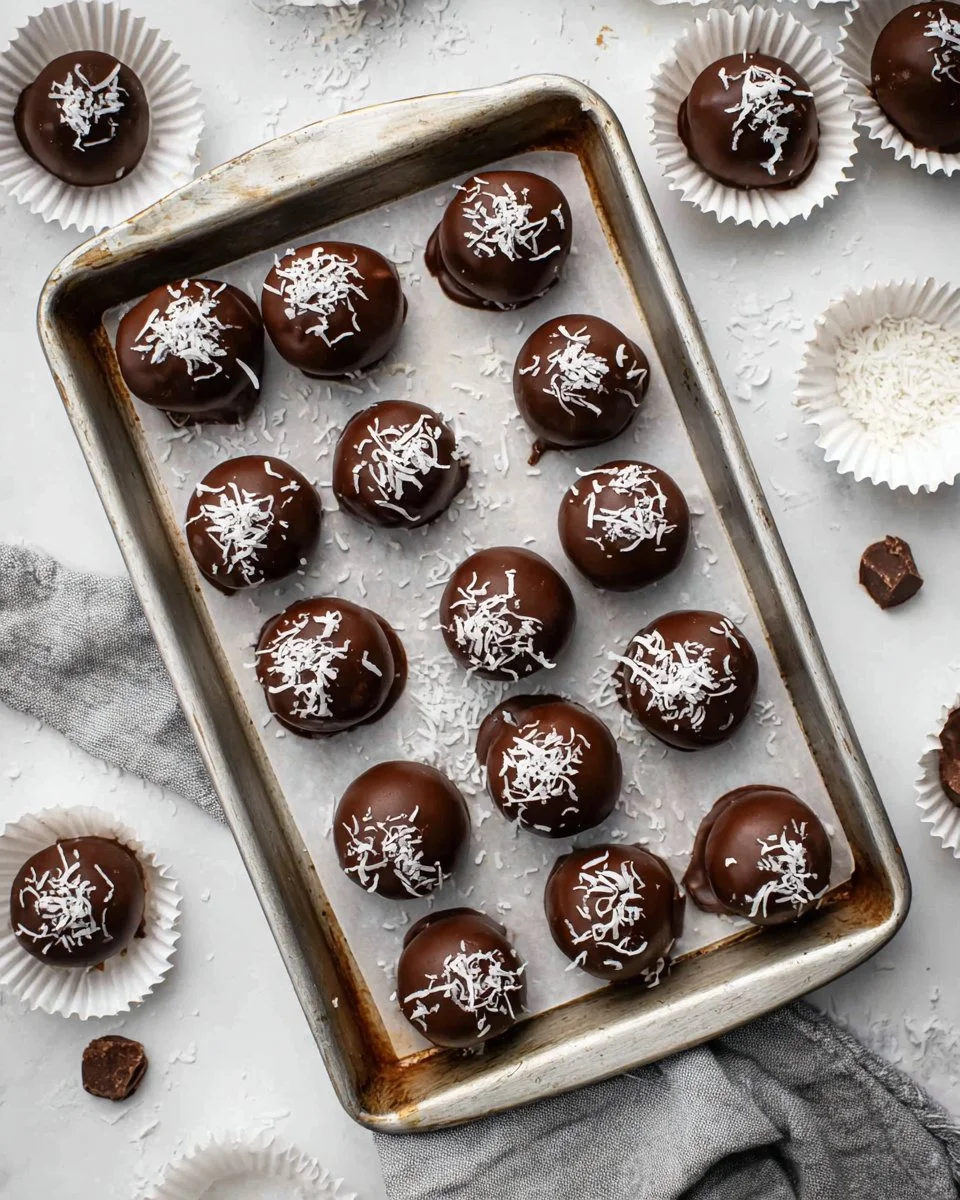
In terms of taste, Martha Washington Candy is a blissful combination of sweet shredded coconut and crunchy pecans, all enveloped in velvety semi-sweet chocolate. The texture contrasts are a dream — creamy and fudgy inside with a satisfying crunch from the nuts. What makes them truly unique is the secret ingredient of sweetened condensed milk, which binds everything together beautifully while adding that lovely, rich creaminess.
These candies are perfect for various occasions — holiday gift-giving, birthday celebrations, or simply to enjoy during a cozy night in. They also work wonderfully as party favors, bringing a touch of homemade warmth and charm to any gathering!
Why You’ll Love This Recipe
Homemade Goodness: Unlike store-bought versions, this recipe allows you to use high-quality ingredients that yield mouth-watering homemade treats. Each bite is bursting with flavor, making it hard to eat just one!
Cost-Effective Treat: Making Martha Washington Candy at home is significantly cheaper than buying gourmet versions from the store. You’ll be amazed at how a few pantry staples can create something so indulgent.
Customization: Feel free to mix things up! Want to swap out pecans for walnuts? Or add a splash of almond extract to enhance the flavor? This recipe is versatile; play around with the ingredients to create your own signature twist.
Simple Yet Impressive: While the recipe appears to be intricate, it’s actually quite straightforward. Perfect for beginner bakers or those who might feel intimidated in the kitchen. You’ll feel like a pro when serving them.
Time Well Spent: Though they may take a few hours to chill, most of that time is hands-off. Perfect for multitasking while the fridge works its magic — maybe you can catch a favorite show or read a few chapters of that book you’ve been meaning to finish!
By the end of this post, you’ll not only have step-by-step instructions to create these delectable treats, but also the knowledge to elevate your candy-making game!
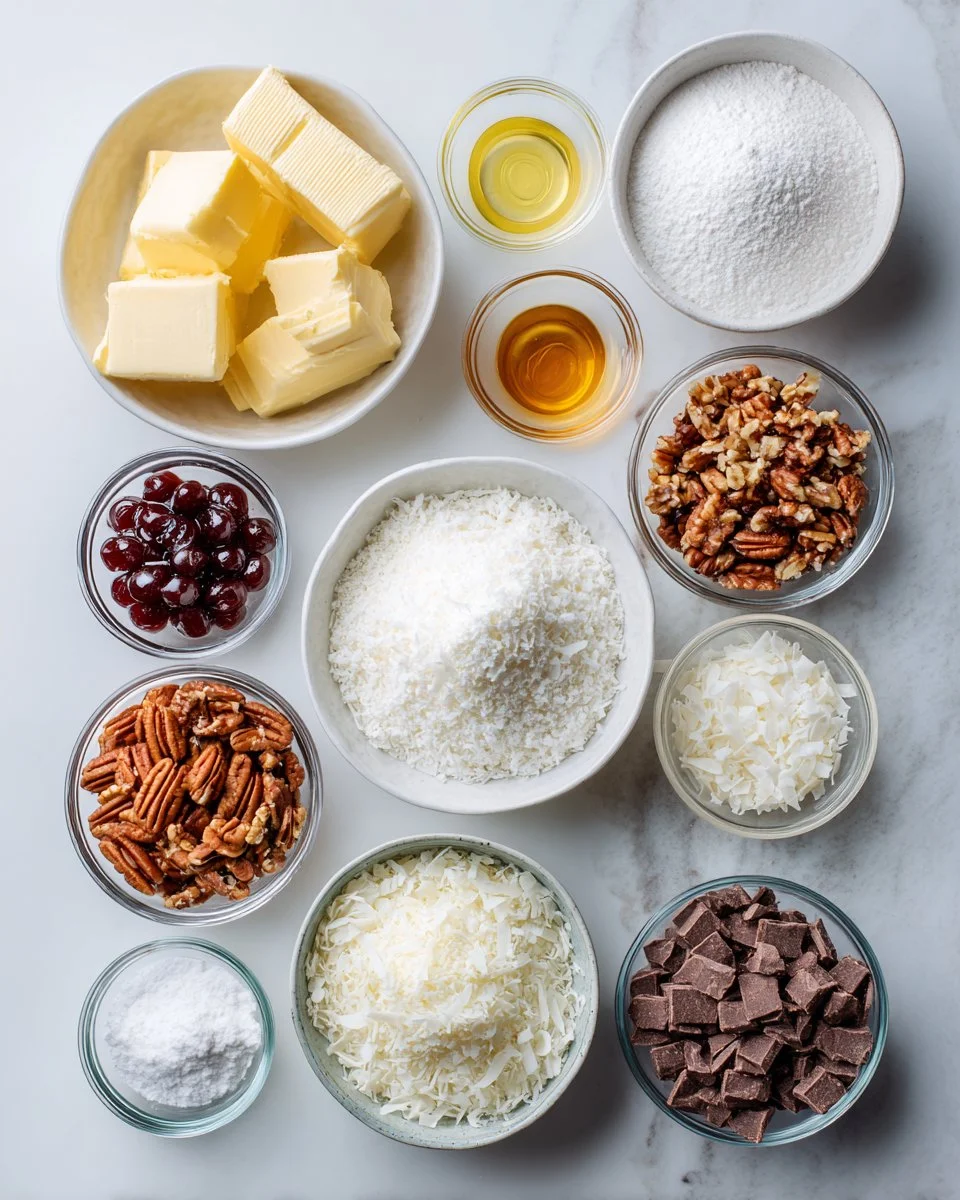
Ingredients
1 cup unsalted butter, softened
Use high-quality butter for the best flavor. If you prefer a dairy-free option, coconut oil can be used in a pinch!4 cups confectioners’ sugar
Sifted for a smooth texture; store any leftovers in an airtight container to avoid clumping.1 can sweetened condensed milk (14 ounces)
Essential for adding creaminess and binding the ingredients together.2 cups shredded sweetened coconut
Opt for organic coconut for a more authentic flavor.2 cups pecans, chopped
To add a delicious crunch! Feel free to toast them beforehand for extra flavor.2 teaspoons vanilla extract
Pure vanilla extract is recommended to give a rich, aromatic flavor.1 jar maraschino cherries, drained, chopped (6 ounces)
These add a burst of sweetness and color; make sure to drain them thoroughly.6 cups semi-sweet chocolate chips
Use high-quality chocolate like Ghirardelli or Guittard for the best melting experience.2 tablespoons vegetable oil
To thin the chocolate for a smooth coating.Coconut flakes for garnish (optional)
Adds an extra touch when decorating your candy!
Prep Notes:
- Make sure your butter is at room temperature for easy mixing.
- Gather everything before you start to streamline the process!
Step-by-Step Instructions
Beat the Mixture: In a stand mixer, combine the softened butter and confectioners’ sugar until smooth and creamy, approximately 2-3 minutes on medium speed. (Chef’s tip: Scrape down the sides often to ensure everything is well-combined!)
Mix in Essentials: Add the sweetened condensed milk, shredded coconut, chopped pecans, and vanilla extract to the mixture. Mix until well incorporated — about 1 minute.
Add Some Sweetness: Gently fold in chopped maraschino cherries using a spatula to keep the cherries whole and colorful.
Let it Chill: Refrigerate the mixture for 3 hours or overnight. (Pro tip: Overnight chilling results in better flavors and a firmer texture.)
Prepare your Workspace: Line a baking sheet with parchment paper to keep the candies from sticking when you dip them in chocolate.
Shape your Candies: Scoop the chilled mixture into 1-inch balls and return to the refrigerator while you prepare the chocolate coating.
Melt the Chocolate: In a microwave-safe bowl, melt the chocolate chips and vegetable oil together in 20-second increments. Stir frequently until fully melted and smooth. (Tip: Avoid overheating; chocolate can seize up!)
Dip Away: Using a fork or toothpick, dip each chilled candy ball into the chocolate, allowing any excess to drip off before placing it on the prepared baking sheet.
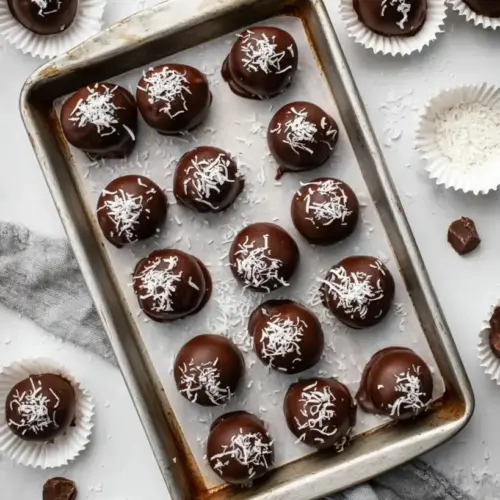
Add Finishing Touches: If you’d like, sprinkle coconut flakes over the dipped candies while the chocolate is still wet.
Let Them Set: Allow the chocolate to set at room temperature or refrigerate for faster results.
Store for Enjoyment: Once set, store your delightful candies in an airtight container in the refrigerator to keep them fresh.
Expert Tips & Tricks
Storage Recommendations: Keep the candies in an airtight container in the fridge for up to two weeks. If you want to freeze them, layer parchment between candies and store them in a freezer-safe container. They’ll last up to 3 months!
Make-Ahead Instructions: You can make the candy mixture ahead of time and bake per instructions right before serving. The flavors get even better after a day or two in storage.
Troubleshooting: If your chocolate is chunky or not melting smoothly, you may have overheated it. Just add a little more vegetable oil to help it along.
Elevate Flavors: Consider adding a pinch of sea salt to the melted chocolate for a lovely contrast against the sweetness.
Watch the Temperature: Melting chocolate should be gentle; too much heat can cause it to seize. When in doubt, go low and slow with the microwave.
Serving Suggestions
Martha Washington Candy is a beautiful addition to any dessert platter! Serve them alongside coffee, hot cocoa, or tea for a delightful pairing. To present them nicely, place the candies in colorful cupcake liners on a festive tray — perfect for parties or family gatherings. They make for a sweet homemade gift, too, especially around the holidays!
Variations & Substitutions
Different Nuts: Swap out pecans for walnuts or almonds for a unique twist.
Seasonal flavors: In the fall, add a touch of pumpkin spice or maple syrup to the mixture. For summer, a splash of orange zest can provide a refreshing citrusy quality.
Dietary Restrictions: You can easily make this recipe gluten-free by using gluten-free chocolate chips and ensuring the confectioners’ sugar is free from additives.
Dairy-Free Option: Use coconut cream instead of butter to maintain the creaminess of the mixture.
Nutrition & Storage Info
- Prep Time: 20 minutes
- Cook Time: 10 minutes
- Total Time: 3 hours (including chilling)
- Yield: Approximately 30 pieces
- Estimated Calories per Serving: 150 per piece (depending on size and chocolate used)
Storage Instructions: Store in an airtight container in the fridge for up to two weeks. Freeze for up to three months in a freezer-safe container.
FAQ Section
Can I use different kinds of chocolate?
Absolutely! Feel free to experiment with milk chocolate or white chocolate, depending on your taste preferences.How long do these candies last?
Martha Washington Candy can last about two weeks in the refrigerator or up to three months if frozen.Can I make them without nuts?
Yes! Simply omit the nuts or substitute them with more coconut to maintain volume.Do I have to refrigerate them?
Yes, refrigeration helps maintain their shape and texture, especially in warmer temperatures.What can I use instead of maraschino cherries?
Dried cherries or cranberries would make a great alternative if you’re looking for something less sugary.Can I add flavors to the chocolate coating?
Absolutely! You could add a touch of peppermint extract during the melting process for a seasonal twist.What is the best way to dip the candy without making a mess?
Use a fork to dip and tap gently on the edge of the bowl to remove excess chocolate.Can I use low-fat condensed milk?
It’s best to stick with regular sweetened condensed milk for the best texture and flavor.How can I tell if the chocolate has set?
Chocolate will appear shiny and firm to the touch. It should not feel sticky or soft.Can I double the recipe?
Yes! This recipe can easily be doubled if you’re preparing for a large gathering or holiday celebration.

Conclusion
Making Martha Washington Candy is more than just a baking project; it’s a way to connect with cherished memories and create new ones that your friends and family will love. There’s something incredibly satisfying about crafting these delights in your kitchen, and I can’t wait for you to try them! If you do, please share your thoughts and stories; I’d love to hear how they turned out for you! And if you’re curious, check out other related recipes on my blog for more sweet creations! Happy baking!
Martha Washington Candy
Ingredients
Candy Base
- 1 cup unsalted butter, softened Use high-quality butter for the best flavor. Can use coconut oil as a dairy-free option.
- 4 cups confectioners' sugar Sifted for a smooth texture.
- 1 can (14 ounces) sweetened condensed milk Essential for adding creaminess.
- 2 cups shredded sweetened coconut Opt for organic coconut for better flavor.
- 2 cups pecans, chopped Can toast them beforehand for extra flavor.
- 2 teaspoons vanilla extract Pure vanilla extract is recommended.
- 1 jar (6 ounces) maraschino cherries, drained, chopped Drained thoroughly for best results.
Chocolate Coating
- 6 cups semi-sweet chocolate chips Use high-quality chocolate for better melting.
- 2 tablespoons vegetable oil To thin the chocolate for a smooth coating.
Garnish
- Coconut flakes for garnish (optional) Adds an extra touch when decorating.
Instructions
Preparation
- In a stand mixer, combine the softened butter and confectioners' sugar until smooth and creamy, approximately 2-3 minutes on medium speed.
- Add in the sweetened condensed milk, shredded coconut, chopped pecans, and vanilla extract. Mix for about 1 minute.
- Gently fold in the chopped maraschino cherries using a spatula.
- Refrigerate the mixture for 3 hours or overnight for better flavor.
Candy Formation
- Line a baking sheet with parchment paper.
- Scoop the chilled mixture into 1-inch balls and keep them in the refrigerator.
Chocolate Coating
- Melt the chocolate chips and vegetable oil in a microwave-safe bowl in 20-second increments, stirring frequently.
- Dip each chilled candy ball into the melted chocolate using a fork, letting excess chocolate drip off before placing on the parchment paper.
- Sprinkle coconut flakes over the dipped candies if desired.
- Let the candies set at room temperature or refrigerate for faster results.
Storage
- Store candies in an airtight container in the refrigerator for up to two weeks.
- For freezing, layer parchment between candies and store in a freezer-safe container for up to three months.