

Crispy Salt and Pepper Chicken: The Irresistible Delight You Can’t Resist!
When I think of comfort food, I immediately think of my family’s famous Salt and Pepper Chicken. This dish brings back warm memories of gathering around the dinner table, sharing laughter, and competing to get the juiciest, most perfectly fried pieces, inevitably leading to a few playful arguments! My grandmother had a way of melding the simple ingredients of salt, pepper, and chicken into a masterpiece of textures and flavors that I’ve tried to replicate countless times.
What sets this recipe apart from others is its impeccable balance of seasoning and that gorgeous crispy crust that gets everyone excited for dinner. It’s easy to whip up, doesn’t require fancy techniques, and is a surefire way to make anyone feel at home. While many recipes out there try to over-complicate this dish, I’m here to reveal my straightforward approach that guarantees mouthwatering results.
In this post, I’ll share my secrets, cooking techniques, and everything you need to know to perfect your very own Salt and Pepper Chicken. Ready to impress yourself and your loved ones? Let’s dive in!
What are Salt and Pepper Chicken?
Originating from Asian cuisine, Salt and Pepper Chicken has found its way into hearts (and stomachs) across the globe. The beauty of this dish lies in its simplicity; it’s all about enhancing the natural flavors of chicken with just a few basic ingredients.
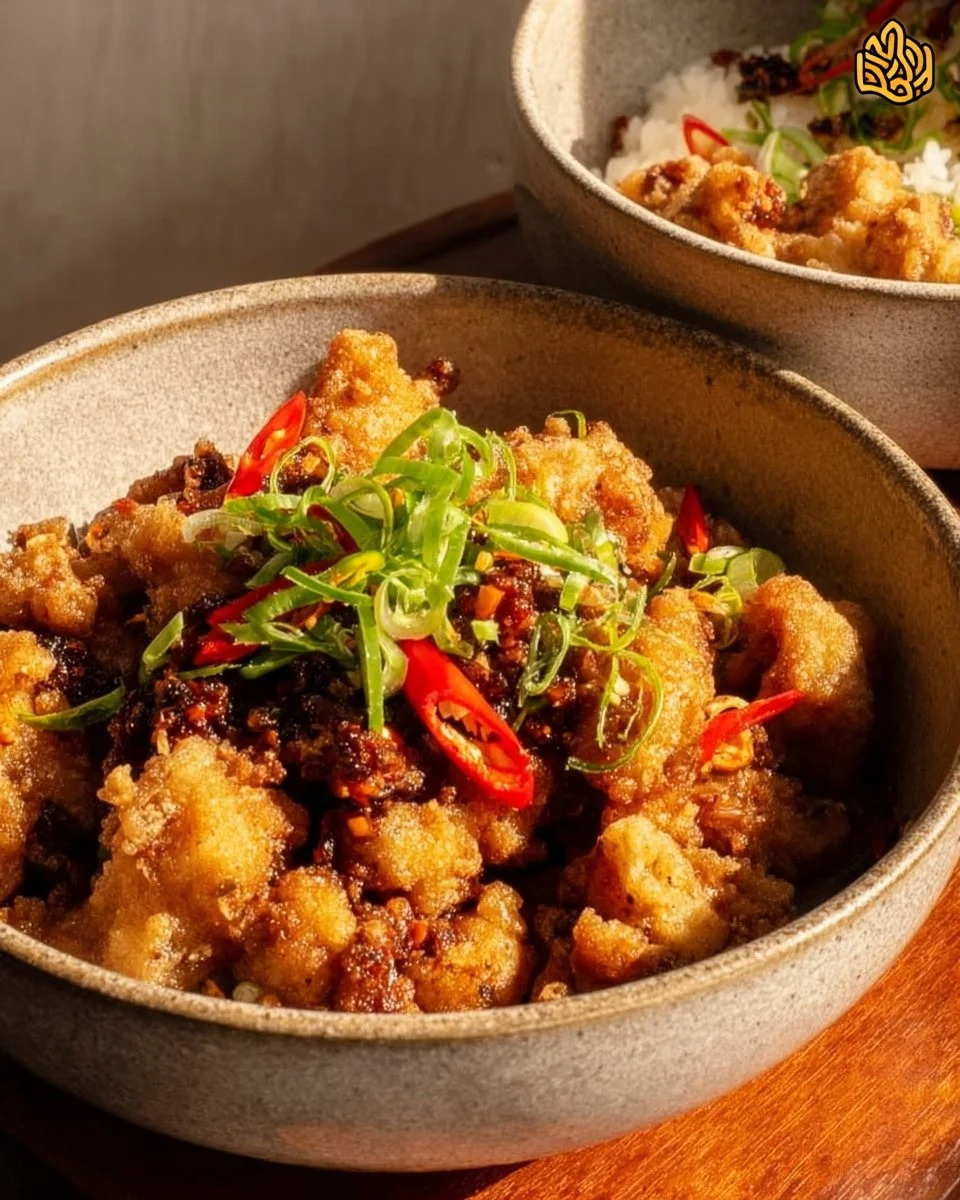
Imagine tender chicken pieces coated in a crisp, golden crust, seasoned with just the right amount of salt and pepper—all while married with fragments of aromatic garlic and a hint of freshness from green onions. The result? A symphony of flavors and textures that keeps you coming back for more!
Typically enjoyed as a main dish or appetizer, Salt and Pepper Chicken is perfect for quick weeknight dinners or festive gatherings. Whether you’re firing up the stove for family night or prepping for a get-together with friends, this dish is sure to elevate any occasion!
Why You’ll Love This Recipe
1. Bite-Sized Joy: Truly, what’s more satisfying than crispy, juicy chicken bites? They pack a punch with every bite, making them perfect for both adults and kids alike!
2. Restaurant-Quality at Home: Why settle for carryout when you can recreate that crunchy exterior and juicy interior in your own kitchen? This recipe rivals your favorite Chinese restaurant (and has the added bonus of home-cooked love!).
3. Budget-Friendly: With just a handful of essential ingredients, this Salt and Pepper Chicken recipe is not only delicious but also wallet-friendly. You’ll find that cooking at home saves you money without compromising on flavor!
4. Versatile: Not only can you switch up seasonings to match your flavor palette, but you can also customize it with additional veggies or sauces. Want to throw in some colorful bell peppers or a side of sweet chili sauce? Go for it!
5. Easy Peasy: Whether you’re a kitchen newbie or a seasoned pro, this recipe is straightforward and does not require hours in the kitchen. It’s as simple as seasoning, frying, and savoring.
Ingredients
Here’s what you’ll need to create your sensational Salt and Pepper Chicken:
4 Chicken Breasts: For best results, choose fresh, organic chicken; it makes a noticeable difference in flavor.
1 teaspoon Salt: I love using kosher salt for its texture and better distribution.
1 teaspoon Black Pepper: Freshly ground black pepper brings out a bolder flavor.
1 cup All-Purpose Flour: Helps achieve that coveted crispy crust. Use gluten-free flour if you need to cater to dietary restrictions.
1 cup Vegetable Oil: For frying, I recommend vegetable or canola oil because they have a high smoke point.
2 cloves Garlic (minced): Adds a punch of flavor and aroma—don’t skip it!
1 tablespoon Green Onions (chopped): A fresh, crunchy garnish that complements the dish perfectly!
Prep Notes:
Allow your chicken breasts to sit at room temperature for 20-30 minutes prior to cooking for even cooking.
If you prefer less mess while frying, consider using an oil splatter screen.
Step-by-Step Instructions
Season the Chicken: Generously sprinkle salt and black pepper on both sides of the chicken breasts. Let sit for about 10 minutes to allow the flavors to deepen.
Chef’s Tip: Use your hands to rub the seasonings in thoroughly for best results!
Dredge in Flour: Coat each chicken piece in all-purpose flour, shaking off any excess. This layer is crucial for achieving that crispy crunch.
Common Mistake to Avoid: Don’t skip shaking off excess flour; too much can lead to an uneven crust!
Heat the Oil: In a large skillet, pour in the vegetable oil and heat over medium-high heat. You want the oil to shimmer, indicating it’s hot enough for frying.
Visual Cue: When the oil begins to bubble lightly, it’s time to fry!
Fry the Chicken: Carefully place the chicken pieces into the hot oil. Cook for about 5-7 minutes on each side, or until golden brown and cooked through.
Cooking Tip: Avoid crowding the pan to maintain the necessary oil temperature.
Drain and Cool: Once cooked, remove the chicken from the skillet and place it on a stack of paper towels to drain.
Chef’s Tip: If your chicken pieces are thicker, consider using a meat thermometer to ensure the internal temperature reaches 165°F (75°C).
Garnish and Serve: Before serving, drizzle with minced garlic and sprinkle with chopped green onions for that added beauty and flavor!
Expert Tips & Tricks
Perfect Crust: After dredging, let the chicken sit for 10 minutes before frying to allow the flour to adhere better.
Storage: Leftovers can be stored in an airtight container in the fridge for up to 3 days. Reheat in the oven to retain crispiness—it’s worth it!
Make-Ahead: You can prep the chicken and season it a day before. Just cover and refrigerate, then proceed to fry when you’re ready.
Troubleshooting: If your chicken isn’t browning properly, make sure your oil is hot enough before adding the chicken.
Oil Temperature: If using a thermometer, the ideal frying temperature is around 350°F (175°C).
Serving Suggestions
Serve this crispy Salt and Pepper Chicken alongside steamed jasmine rice, stir-fried vegetables, or a light salad for a balanced meal. You can also present it on a large platter with vibrant dipping sauces, like sweet chili or soy sauce, to inspire your guests to dig in.
This dish is fantastic for a cozy family gathering or a lively dinner party. Think casual Fridays and movie nights—it’s the perfect finger food!
Variations & Substitutions
Different Seasonings: Try adding a pinch of cayenne pepper for heat or swap in some lemon pepper for a fresh twist.
Dietary Adjustments: For a healthier spin, bake the chicken in the oven at 400°F (200°C) for about 20 minutes—still delicious!
Seasonal Flavors: During the autumn months, incorporate a dash of nutmeg or sage for a seasonal take!
Nutrition & Storage Info
- Prep time: 15 minutes
- Cook time: 15 minutes
- Total time: 30 minutes
- Yield: 4 servings
- Estimated Calories per Serving: Approximately 350 calories
- Storage Instructions: Keep in the fridge for up to 3 days. For longer storage, freeze for up to 2 months.
FAQ Section
Can I use boneless thighs instead of breasts?
Yes! Chicken thighs work excellently and provide a richer flavor.What dipping sauces pair well?
Sweet chili sauce, soy sauce, or a spicy mustard complement these chicken bites beautifully.Can I make this in advance?
Yes, you can season your chicken ahead of time, but I recommend frying it fresh for a crispy texture.How do I know when the chicken is done?
The chicken should be golden brown, and if you use a meat thermometer, the internal temperature should be 165°F (75°C).What if my chicken is still pink inside?
Return it to the pan, ensuring it cooks through entirely—it’s important for safety!Can I bake instead of fry?
Absolutely! Bake at 400°F (200°C) for roughly 20 minutes for a healthier alternative.What about leftovers?
Store in an airtight container for up to 3 days in the fridge—the crispness is best when reheated in the oven.Can I use whole wheat flour?
Yes, whole wheat flour can be a delightful substitute, though it may impart a nuttier flavor.How can I make this gluten-free?
Use a gluten-free all-purpose flour blend for dredging the chicken.What sides go well with this dish?
Steamed vegetables, fried rice, or a fresh salad make great companions!
Conclusion
This is not just a recipe; it’s a journey filled with cherished memories and family flavors. I hope you give this Salt and Pepper Chicken a try and invite your loved ones to enjoy it with you. There’s something magical about creating a dish that turns an ordinary evening into a special occasion.
I’d love to hear how your version turns out—feel free to leave feedback and comments! And if you’re looking for related recipes, don’t miss my other weekend favorites like crispy fried rice or flavorful Asian-inspired salads. Happy cooking!
Salt and Pepper Chicken
Ingredients
Main Ingredients
- 4 pieces Chicken Breasts For best results, choose fresh, organic chicken.
- 1 teaspoon Salt Kosher salt is recommended for texture.
- 1 teaspoon Black Pepper Use freshly ground for bolder flavor.
- 1 cup All-Purpose Flour Use gluten-free flour if needed.
- 1 cup Vegetable Oil High smoke point oil is recommended.
- 2 cloves Garlic (minced) Adds flavor and aroma.
- 1 tablespoon Green Onions (chopped) For garnish.
Instructions
Preparation
- Generously sprinkle salt and black pepper on both sides of the chicken breasts. Let sit for about 10 minutes.
- Coat each chicken piece in all-purpose flour, shaking off any excess.
Cooking
- In a large skillet, pour in the vegetable oil and heat over medium-high heat.
- Carefully place the chicken pieces into the hot oil. Cook for about 5-7 minutes on each side or until golden brown.
- Once cooked, remove the chicken from the skillet and place it on paper towels to drain.
Finishing Touches
- Drizzle with minced garlic and sprinkle with chopped green onions before serving.