
Irresistible Old-Time Fudge: A Sweet Journey Back to Family Traditions
Growing up, I often found myself in my grandmother’s kitchen, where the warm, sweet aroma of melting chocolate would fill the air. The centerpiece of these delightful afternoons was always her legendary Old-Time Fudge, a treat so rich and creamy that it quickly became synonymous with comfort and love. I still remember the look of pure joy on my family’s faces as they savored each chewy bite. Since those days, I’ve perfected my own recipe, and I can’t wait to share it with you!
What makes my Old-Time Fudge stand out from the rest? It’s not just the melt-in-your-mouth texture or the rich chocolate flavor—it’s the memories I’ve infused into each batch. Unlike store-bought versions that can taste overly processed, this homemade fudge captures the essence of tradition with simple, wholesome ingredients. Plus, it’s incredibly easy to make and requires no special equipment.
In this post, I promise you’ll discover the secrets to creating your very own Old-Time Fudge masterpiece. Whether you’re making it for a family gathering, as a thoughtful gift, or just to satisfy your sweet tooth, this recipe is sure to create lasting memories. So, roll up your sleeves, and let’s dive into this sweet journey together!
What Are Old-Time Fudge?
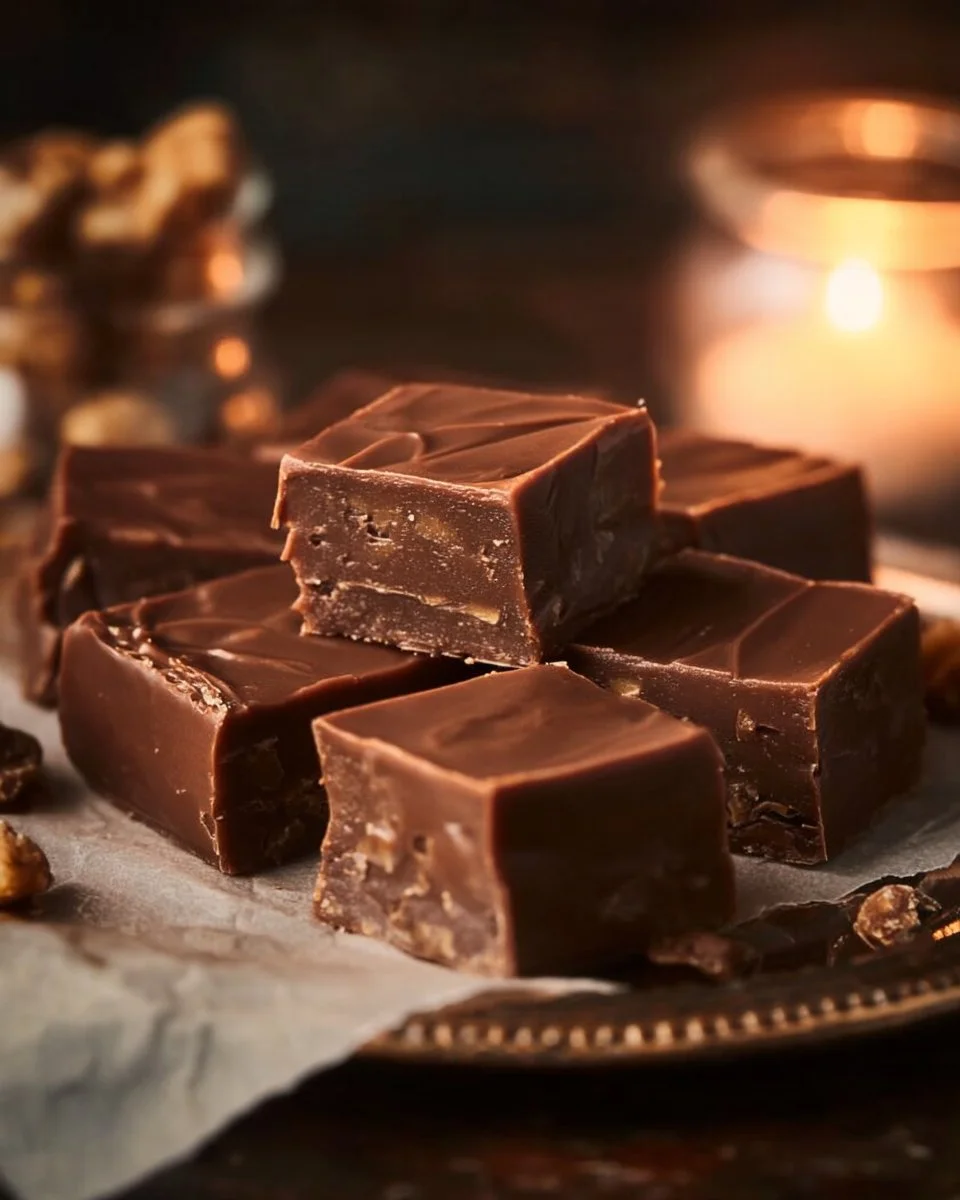
Old-Time Fudge is more than just a dessert; it’s a nostalgic piece of history that many families cherish. This dreamy confection has roots that trace back to the late 19th century in the United States, gaining popularity for its rich and velvety texture. Traditionally made with just a handful of simple ingredients, Old-Time Fudge boasts a luscious chocolate taste that melts effortlessly in your mouth.
The unique charm of Old-Time Fudge lies in its creamy consistency combined with a slight chewiness, which sets it apart from other chocolate treats. It’s neither too hard nor too soft, striking that perfect balance that makes you want to come back for another piece—endless bliss in every bite!
Perfect for holidays, birthdays, or just as a spontaneous treat, Old-Time Fudge is the ideal sweet for showcasing your love and creativity. Whether it’s the culmination of a rainy day or a centerpiece for your dessert table, this fudge is sure to evoke smiles and warmth among family and friends.
Why You’ll Love This Recipe
Nostalgic Delight: Each bite of this Old-Time Fudge is like a warm hug. It’s not just a recipe; it’s a way to connect with those cherished moments—whether it’s sharing with loved ones or enjoying a quiet evening at home.
Cost-Effective: Unlike store-bought fudge that can cost a fortune, making your own is incredibly budget-friendly. This recipe costs mere cents per serving, allowing you to indulge without breaking the bank.
Customization: While my recipe calls for nuts, you can easily switch things up! Add in your favorite flavors—think sea salt, different types of chocolate, or even a hint of peppermint for the holidays. The possibilities are endless.
Easy Process: This fudge is a breeze to whip up—perfect for novice bakers and seasoned pros alike. With basic kitchen tools and minimal ingredients, you’ll be rewarded with a delicious treat without all the fuss.
Quick to Make: With only a few steps and minimal hands-on time, you can easily make this fudge in less than an hour, allowing your sweet cravings to be satisfied in no time!
Ingredients
- 2 cups granulated sugar (for sweetness—organic sugar works well too)
- 1/2 cup unsweetened cocoa powder (you want the rich stuff here—look for Dutch-processed for a deeper flavor)
- 1/2 cup milk (whole milk gives a creamier texture, but feel free to substitute with almond or oat milk)
- 1/4 cup butter (unsalted, room temperature for easy mixing)
- 1 teaspoon vanilla extract (real vanilla extract is a game changer)
- 1 cup chopped nuts (optional) (pecans or walnuts are my favorites!)
Note: Make sure all your ingredients are at room temperature for the best results!
Step-by-Step Instructions
Combine Ingredients: In a medium saucepan, combine sugar, cocoa powder, milk, and butter. Stir everything together until well mixed.
Heat Up: Cook over medium heat, stirring constantly. Keep an eye on it until the mixture comes to a rolling boil, which usually takes about 5-7 minutes. You’ll know it’s ready when you see those big bubbles popping up!
Boil Like a Pro: Once boiling, stop stirring and let it bubble for 4-5 minutes. This step is crucial as it allows the fudge to thicken. You’ll want to keep an eye on the temperature—aim for around 234°F (soft ball stage) to ensure a perfect fudge consistency.
Finish It Off: Remove from heat and quickly stir in your vanilla extract and nuts, if you’re using them. This is where the fudge starts to get that intoxicating aroma!
Grease and Pour: Pour the hot mixture into a greased 8×8 inch pan. Let it cool at room temperature for about 2 hours. Once set, you can cut it into delightful squares.
Chef’s Tips
- Common Mistakes to Avoid: Make sure to stir constantly at the beginning; if you let it burn, the fudge won’t turn out as creamy.
- Visual Cues: You’ll want the mixture to start pulling away from the sides of the pan—that’s a sign it’s ready!
- Quality Matters: Use high-quality cocoa powder and vanilla for the best flavor.
Expert Tips & Tricks
Storage Recommendations: After cooling, store your fudge in an airtight container. This will keep it fresh for up to 2 weeks at room temperature or 3-4 weeks in the refrigerator.
Make-Ahead Instructions: Fudge can be made ahead of time, and it actually tastes better after a couple of days as the flavors deepen. Perfect for prepping holiday gifts!
Troubleshooting: If your fudge is too soft, it likely didn’t boil long enough. Don’t fret—you can always reheat gently and boil it a little longer.
Chocolate Lovers Tip: Want a more pronounced chocolate flavor? Substitute half of the granulated sugar with brown sugar. It’ll add a delicious hint of caramel!
Nuts or No Nuts: If you prefer a nut-free option, feel free to leave them out or replace them with mini chocolate chips for a double chocolate experience!
Serving Suggestions
Old-Time Fudge is delightful all on its own, but why not elevate the experience? Consider serving it alongside a scoop of vanilla ice cream for a delicious sundae. Or, pair it with fresh fruit—strawberries and raspberries complement the rich chocolate perfectly.
For presentation, dust a platter with cocoa powder and arrange the fudge squares on top, garnished with a sprinkling of sea salt or crushed nuts. This makes for a stunning dessert display at any gathering!
Variations & Substitutions
- Different Flavors: Swap out cocoa for white chocolate to create a luscious white fudge! Add in some crushed peppermint candies for a festive twist.
- Dietary Adaptations: For gluten-free fudge, ensure that your cocoa powder is certified gluten-free. For a vegan version, substitute dairy milk and butter with plant-based alternatives.
- Seasonal Options: In the fall, add pumpkin spice or cinnamon. During the holidays, mix in crushed candy canes for a winter wonderland treat!
Nutrition & Storage Info
- Prep Time: 10 minutes
- Cook Time: 15 minutes
- Total Time: 25 minutes
- Yield: about 16 servings
- Estimated Calories: 100 calories per square
- Storage: Keep at room temperature in an airtight container for up to two weeks, or refrigerate for up to a month. Freeze for longer storage, up to 3 months.
FAQ Section
Can I use a microwave to make fudge?
While traditional methods yield the best results, you can melt the ingredients in a microwave, stirring every 30 seconds until melted. Then follow with boiling on the stove.What can I do if my fudge didn’t set properly?
If the fudge is too soft, gently reheat and bring to a boil again. Test the soft ball stage (234°F) to ensure it sets nicely.Can I use organic sugar?
Absolutely! Organic granulated sugar works great and adds a slight difference in flavor.Is there a way to make this fudge lower in sugar?
You can experiment by using sugar substitutes like erythritol or monk fruit sweetener, but be cautious of their melting properties to ensure your fudge sets.How should I cut my fudge?
A sharp knife works best. If it sticks, warm the knife under hot water, dry it, and then cut.Can I melt chocolate instead of using cocoa powder?
Yes, but adjust the sugar down, as chocolate already contains sugar.What are some creative ways to package this fudge?
Use cute boxes or mason jars for gifting! Add a ribbon and a handwritten note for a personal touch.How long does the fudge last?
At room temperature, the fudge can last for up to two weeks, while refrigerated can last up to a month.Can I layer fudge with other flavors?
Yes! Simply pour one flavor, allow it to cool slightly, then add another layer on top!Is the fudge gluten-free?
Yes, this recipe is gluten-free unless you use ingredients that contain gluten.
Conclusion
This Old-Time Fudge recipe is more than just a sweet treat; it’s a journey through cherished memories and timeless traditions. Whether you’re making it for a special occasion or just for yourself, I hope you feel the love and warmth that it brings.
I encourage you to try making this delightful fudge, and I would love to hear your thoughts—what memories did it spark for you? Feel free to share your experiences in the comments below! Don’t forget to check out my other sweet treats on the blog for more delicious inspirations! Happy fudging!

Old-Time Fudge
Ingredients
Main Ingredients
- 2 cups granulated sugar organic sugar works well too
- 1/2 cup unsweetened cocoa powder look for Dutch-processed for a deeper flavor
- 1/2 cup milk whole milk gives a creamier texture; can substitute with almond or oat milk
- 1/4 cup butter unsalted, room temperature for easy mixing
- 1 teaspoon vanilla extract real vanilla extract is a game changer
- 1 cup chopped nuts optional; pecans or walnuts are my favorites
Instructions
Preparation
- In a medium saucepan, combine sugar, cocoa powder, milk, and butter. Stir everything together until well mixed.
- Cook over medium heat, stirring constantly until the mixture comes to a rolling boil, about 5-7 minutes.
- Once boiling, stop stirring and let it bubble for 4-5 minutes. Aim for around 234°F (soft ball stage) for a perfect fudge consistency.
- Remove from heat and quickly stir in the vanilla extract and nuts, if using.
- Pour the hot mixture into a greased 8x8 inch pan. Let it cool at room temperature for about 2 hours, then cut it into squares.