

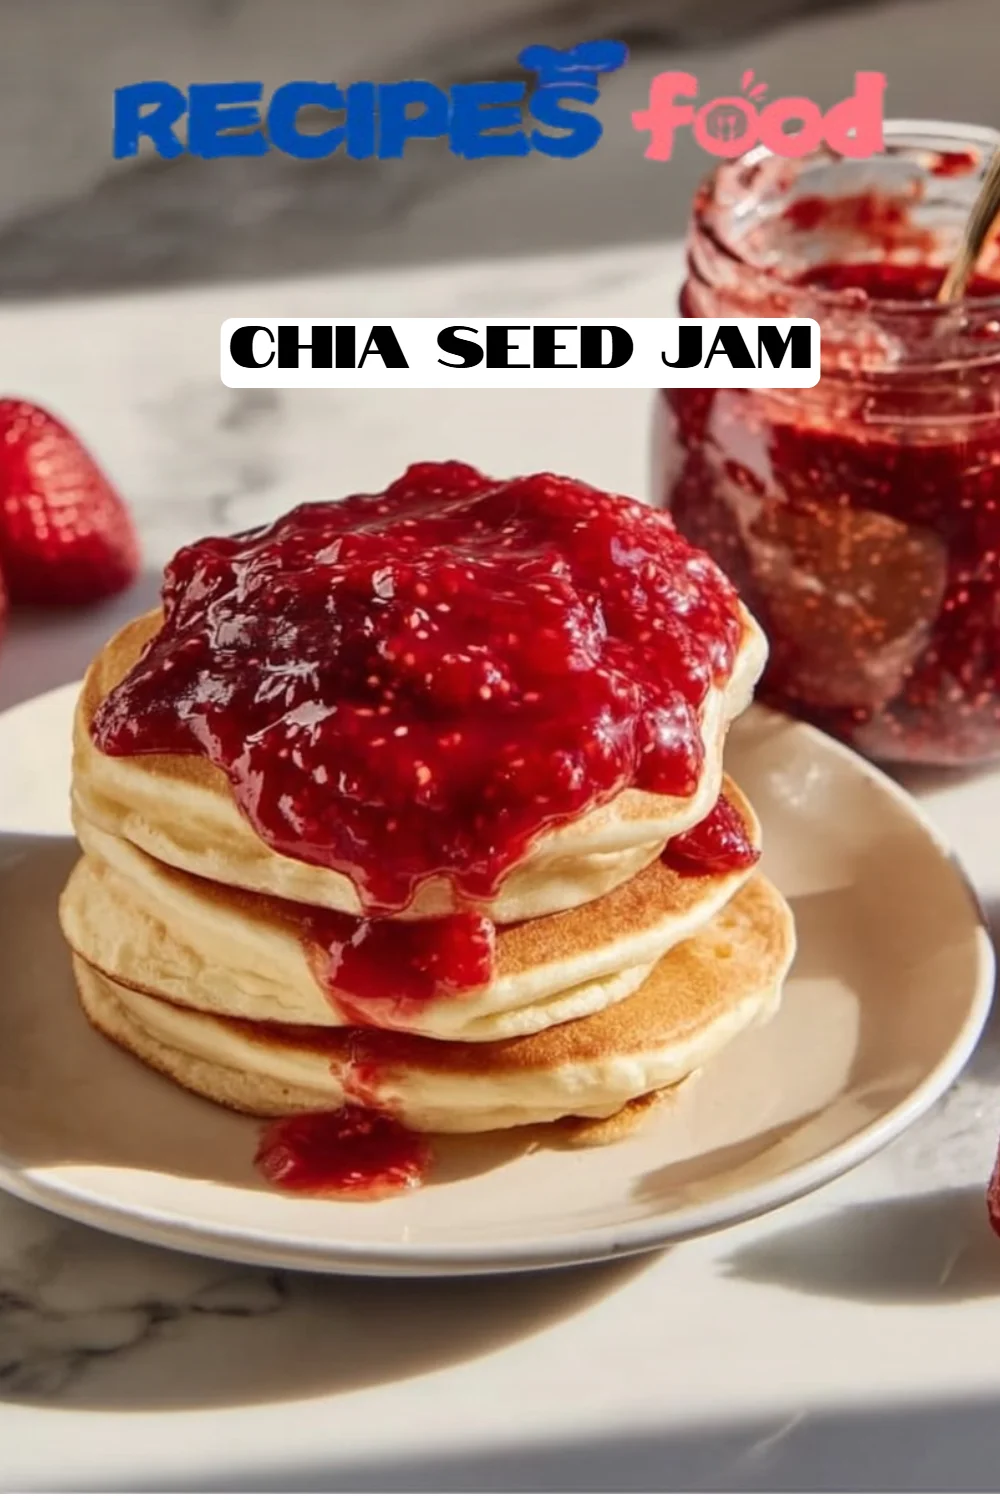
Effortlessly Delicious: Homemade Chia Seed Jam Recipe
Picture this: a sunny Saturday morning, the smell of freshly brewed coffee wafting through the air, and the excitement of spreading something delightful on your toast. It was during one of those cozy weekends that I discovered the magic of Chia Seed Jam. What sets it apart? It’s not just about bypassing high-fructose syrups from the grocery store; it’s about creating something utterly special—and realistic—for my family.
You see, my childhood was filled with memories of jars brimming with homemade jams, lovingly concocted by my grandmother, who believed that a good breakfast could brighten anyone’s day. When I stumbled upon the concept of chia seed jam, I felt a bit like an alchemist, turning simple berries into something extraordinary. This jam is not just a spread; it’s a nutritious, delightful, and versatile companion that captures the essence of fruity goodness without any fuss.
In this recipe, I’ll show you how to create your very own chia seed jam that’s bursting with flavor and can be easily customized to suit your tastes. So, roll up your sleeves and get ready to embark on a jam-making adventure that’ll connect you to both the past and the present.
What Are Chia Seed Jam?
Chia seed jam is a delightful spread made by combining fresh fruit with chia seeds, which are little nutritional powerhouses. Originating from the tiny seeds of the Salvia hispanica plant, chia seeds were cherished by ancient civilizations like the Aztecs and Maya for their energy-boosting properties and rich nutritional value.
The taste is simple yet vibrant, allowing the freshness of the berries to shine, while the chia seeds give the jam a pleasant texture, adding a subtle crunch and thickening it up beautifully. What makes this jam unique is not needing any pectin or tons of sugar; the chia seeds provide a natural gelling effect. It’s an easy way to preserve the flavor of seasonal fruits, making it the perfect treat anytime you want to indulge in a fruity spread on toast, yogurt, or pancakes.
So why make chia seed jam? It’s simple—whipping this up in your kitchen means you’re in control of the sweetness and flavors, and it’s a quick project to tackle during a lazy afternoon. Plus, it’s a fantastic way to get creative with fruits that are in season!
Why You’ll Love This Recipe
Easy and Quick: Making chia seed jam is incredibly straightforward and requires minimal ingredients. In just about 30 minutes, you can have a homemade spread ready to go! Forget the complex recipes—this is as easy as cooking can get!
Healthy and Nutritious: Unlike traditional jams that can be loaded with added sugars and preservatives, this chia seed jam uses natural sweeteners and fresh fruit, making it a healthier alternative. You can even substitute honey with agave syrup for a vegan option!
Versatile Flavor Combinations: The beauty of chia seed jam lies in its adaptability. While this recipe focuses on the classic berry flavors, you can try experimenting with different fruits or even mixing them! The possibilities are endless.
Cost-effective: Have you ever skimmed over the price tags of store-bought organic jams? With this chia seed jam, you’ll save money while still enjoying the quality and freshness you crave.
Customizable to Your Taste: You have full control of the sweetness level and can make delicious adjustments. Not feeling lemon? Leave it out. Want to ramp up the sweetness? Just add a little more honey!
This recipe offers simplicity in preparation and brings the rewarding sense of doing something homemade into your kitchen—what’s not to love?
Ingredients

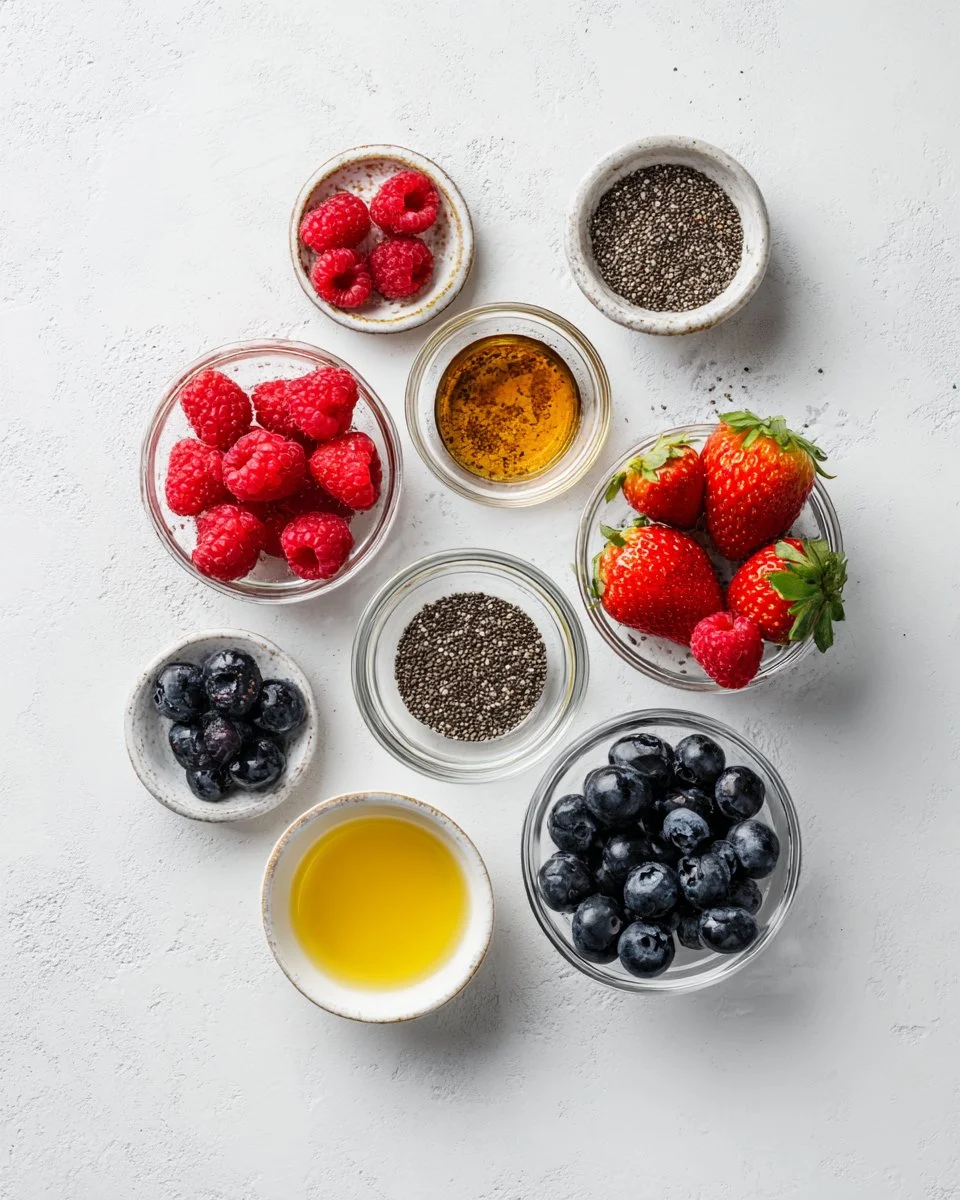
1 cup fresh berries (raspberries, strawberries, blueberries, or a mix!)
- Quality Tip: Use organic berries when possible for the best flavor and health benefits.
2 tablespoons chia seeds
- Brand Recommendation: I love using Nutiva Organic Chia Seeds for their outstanding quality!
2 tablespoons natural sweetener (honey, maple syrup, or agave syrup)
- Substitution Tip: For a lower-glycemic option, try agave syrup.
1 teaspoon lemon juice (optional)
- Adds a lovely brightness to balance the sweetness!
Prep Notes:
- Make sure the berries are at room temperature before use for optimal flavor extraction.
- Measure out your sweetener and lemon juice ahead of time for smooth sailing!

Step-by-Step Instructions
Prep Your Berries:
- Rinse your fresh berries gently under cold water and pat them dry with a clean towel. If you’re using strawberries, chop them into quarters.
Cook the Berries:
- In a medium saucepan over medium heat, combine the fresh berries (about 1 cup) and your chosen sweetener (2 tablespoons).
- Cook for about 5–10 minutes, mashing the berries with a fork as they cook. You want to break them down until they’re juicy and fragrant.
Add Chia Seeds:
- Stir in 2 tablespoons of chia seeds and bring the mixture to a lively simmer.
- Reduce the heat and let it cook for an additional 10 minutes, stirring occasionally. You’ll notice the jam will start thickening—this is exactly what we want!
Finish with Flavor:
- Remove from heat and, if using, stir in 1 teaspoon of lemon juice for that delightful zing.
Cool Down:
- Allow the jam to cool for about 10-15 minutes. This thickens it even more!
Store:
- Pour your chia seed jam into a jar with a tight-fitting lid and store in the refrigerator for up to two weeks.
Chef’s Tips:
- Timing is Everything: Make sure not to overcook; the jam should remain vibrant in color.
- Visual Cue: The jam will be ready when it’s sticky and coats the back of a spoon.
Common Mistakes to Avoid:
- Too Much Heat: Avoid boiling; a gentle simmer is best.
- Insufficient Cooling: Patience is key! Let it cool to achieve the perfect consistency.
Expert Tips & Tricks
Storage Recommendations: Store your chia seed jam in an airtight jar in the fridge for up to two weeks. If you’re looking to keep it longer, try freezing it in small portions!
Make-ahead Instructions: Feel free to make this jam ahead of time! It’s fantastic on toast, pancakes, and yogurt, making it perfect for busy mornings or brunch gatherings.
Troubleshooting: If your jam isn’t thickening as expected, simply let it simmer a little longer. If it gets too thick, adding a splash of water will help.
Serving Suggestions
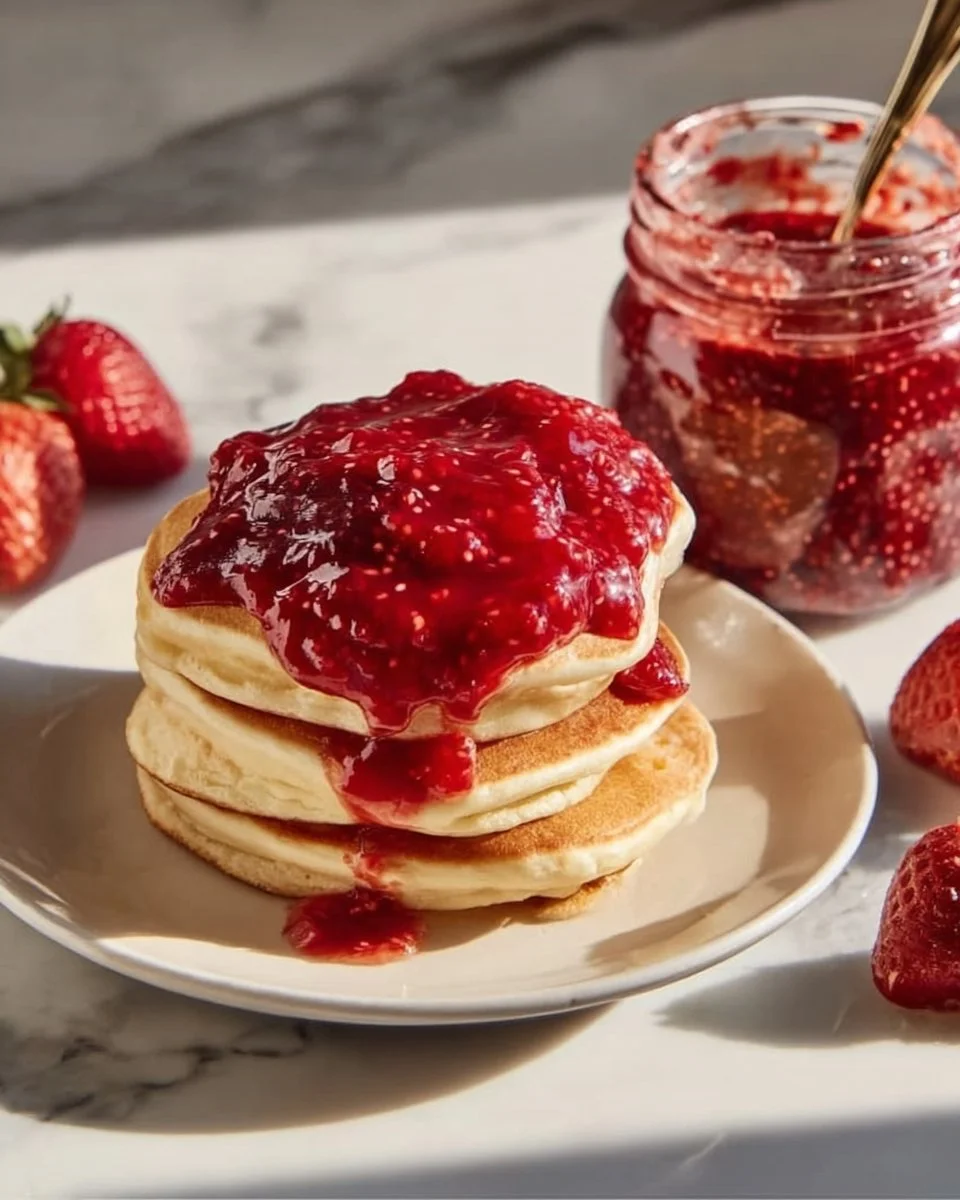
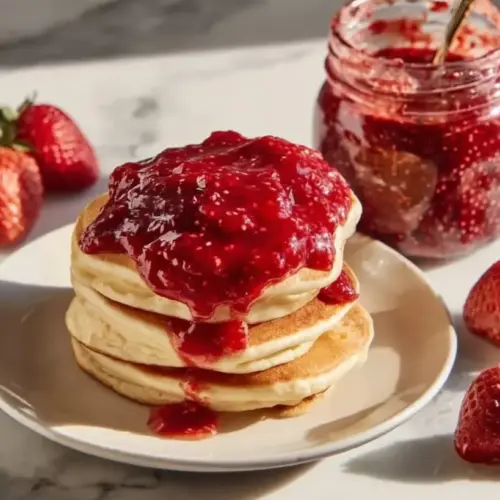
Nothing says “good morning” quite like a warm slice of toast slathered in your homemade chia seed jam. Try pairing it with creamy Greek yogurt topped with granola for a delightful breakfast. It’s also an excellent addition to cheese boards—impress your guests by serving this beautiful jam with a variety of cheeses or drizzle it over a cheesecake for that extra touch.
Variations & Substitutions
The beauty of this recipe is in its versatility!
Flavor Combinations: Consider making a mixed berry chia seed jam by combining strawberries, blueberries, and blackberries. Or get adventurous—try peach or mango in the summer!
Dietary Adaptations: This recipe can easily be made vegan with maple syrup or agave, and you can also use low-sugar sweeteners to cater to dietary needs.
Seasonal Variations: In the fall, consider adding spices like cinnamon or pumpkin pie spice to your jam for a seasonal twist!
Nutrition & Storage Info
- Prep Time: 10 minutes
- Cook Time: 20 minutes
- Total Time: 30 minutes
- Yield: About 2 cups
- Estimated Calories: 50-70 per serving, depending on the fruit and sweetener chosen.
Storage Instructions:
- Store in the fridge for up to 2 weeks or freeze for longer shelf life (up to 3 months). It’s great to have on hand whenever the craving hits!
FAQ Section
Can I use frozen berries for this jam?
Yes! Just thaw them first, and you can follow the same steps.Is it necessary to add lemon juice?
While optional, lemon juice brightens the flavor beautifully.How long will the jam last in the fridge?
The chia seed jam will keep for about two weeks if stored in an airtight container.Can I double this recipe?
Absolutely! Just use a larger saucepan to accommodate the increased volume.What are some good fruits to use?
Berries (strawberries, blueberries, raspberries), peaches, and even apples work wonderfully!Can I adjust the sweetness?
Yes! Feel free to increase or decrease the sweetener according to your taste.What should I do if my jam is too thick?
Simply add a splash of water and stir, then simmer for a couple of minutes longer.Is it possible to skip the sweetener altogether?
While it can be done, the jam may taste quite tart without it.Can I use this jam in baking?
Definitely! It makes an excellent filling for pastries or as a topping.Where can I find chia seeds?
Most grocery stores and health food stores carry chia seeds, often found in the bulk section or health aisle.
Conclusion
This homemade chia seed jam is not just a recipe; it’s a little jar of joy, capturing the essence of juicy berries and the nostalgia of cherished breakfast memories. I encourage you to try making it at home. Trust me, once you do, you’ll wonder why you ever settled for store-bought!
I would love to hear about your experiences with this recipe! Drop a comment below and let me know how your jam turns out. And if you’re craving more delicious ideas, don’t miss my other jam recipes on this blog—they’re just as easy and delightful!
Happy cooking!
Chia Seed Jam
Ingredients
For the Jam
- 1 cup fresh berries (raspberries, strawberries, blueberries, or a mix) Use organic berries when possible for the best flavor and health benefits.
- 2 tablespoons chia seeds I love using Nutiva Organic Chia Seeds for their outstanding quality!
- 2 tablespoons natural sweetener (honey, maple syrup, or agave syrup) For a lower-glycemic option, try agave syrup.
- 1 teaspoon lemon juice (optional) Adds a lovely brightness to balance the sweetness!
Instructions
Preparation
- Rinse your fresh berries gently under cold water and pat them dry with a clean towel. If you’re using strawberries, chop them into quarters.
- In a medium saucepan over medium heat, combine the fresh berries and your chosen sweetener. Cook for about 5–10 minutes, mashing the berries with a fork as they cook until they are juicy and fragrant.
- Stir in chia seeds and bring the mixture to a lively simmer. Reduce heat and let it cook for an additional 10 minutes, stirring occasionally.
- Remove from heat and stir in lemon juice (if using) for that delightful zing.
- Allow the jam to cool for about 10-15 minutes to thicken.
- Pour the chia seed jam into a jar with a tight-fitting lid and store in the refrigerator for up to two weeks.