
Irresistibly Decadent Red Velvet Brownies: A Chocolate-Loves-You Kind of Delight!
There’s something magical about the scent of baking brownies that takes me back to my childhood. Growing up, my family had a little tradition of indulging in decadent desserts every Sunday after dinner. But the highlight was always my mom’s special Red Velvet Brownies—ooey-gooey chocolatey bites that were rich in flavor and affection. The vibrancy of the red coupled with a soft, chewy texture made every bite heavenly.
What sets my rendition apart from other recipes is the perfect balance between rich cocoa and creamy sweetness, making these brownies not just a treat, but an experience full of nostalgia. You won’t just taste the flavor; you’ll also feel a wave of comfort as memories of family gatherings come rushing back to you.
In this blog post, I’ll share my cherished recipe for Red Velvet Brownies, where I’ll guide you through the process of creating these deliciously memorable treats. You’ll learn the secrets to achieving the perfect texture, the best ingredient substitutions, and how to customize them for any occasion. Trust me, these brownies are sure to steal the show!
What Are Red Velvet Brownies?
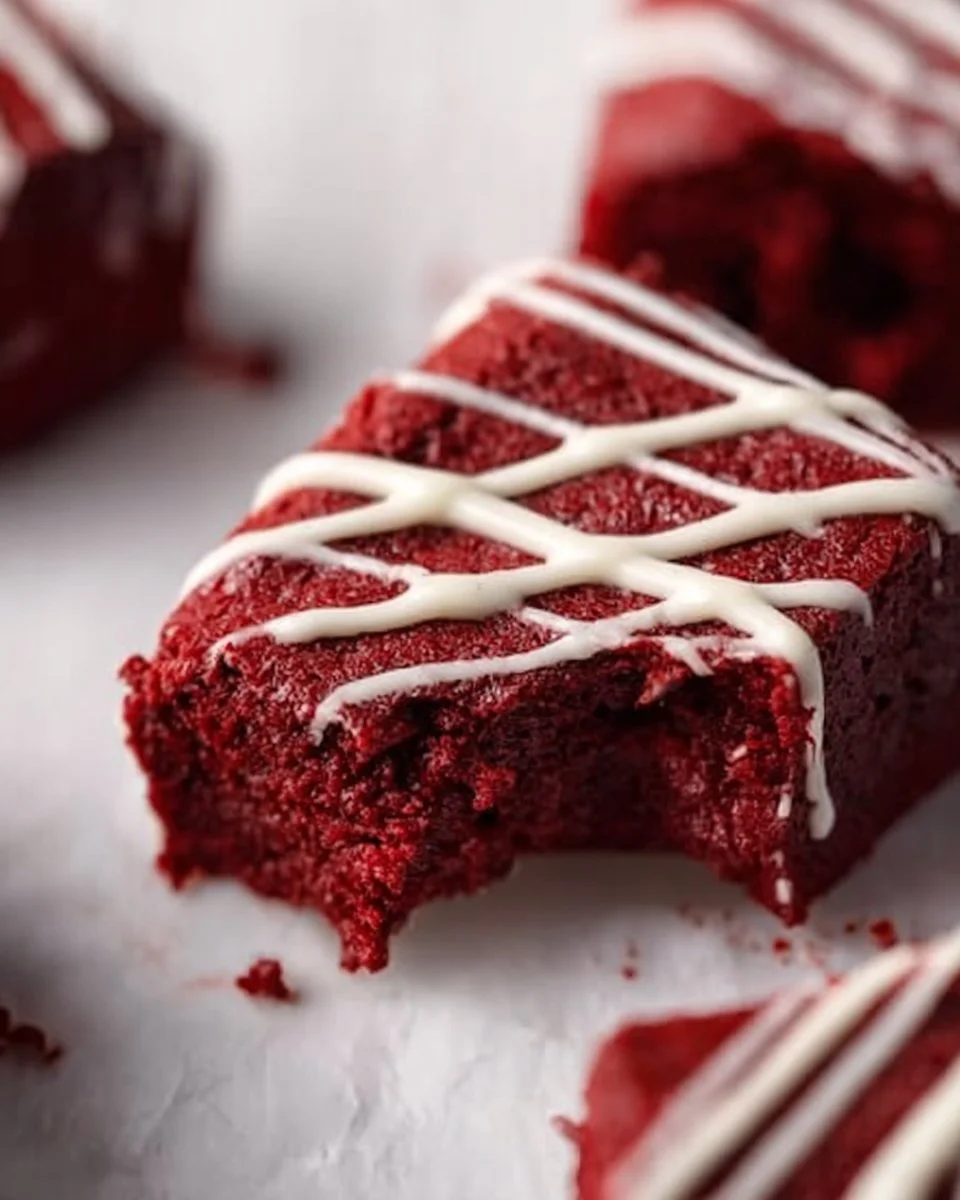
Red Velvet Brownies are a delightful twist on the classic red velvet cake, known for its iconic red coloring and rich cocoa flavor. Originating from the American South in the early 19th century, red velvet was traditionally made with cocoa powder and buttermilk, giving it a unique crumb and flavor profile. This recipe transforms those elements into a fudgy brownie—think of it as a cross between a loving hug and a delicious dessert.
With their soft, dense texture and a gentle hint of cocoa mingling with the buttery goodness, these brownies are the epitome of indulgence. The added bonus? They often come drizzled with white chocolate, providing a perfect contrast to the deep red base. Make them for parties, birthdays, or just a cozy night in—it’s hard to resist these beauties, no matter the occasion!
Why You’ll Love This Recipe
Irresistible Flavor: The combination of cocoa powder and red food coloring creates a deliciously rich brownie that’s not overly sweet yet utterly satisfying. While store-bought versions often skimp on flavor and texture, these homemade treats capture the essence of indulgence.
Cost-Effective: With simple ingredients you likely have on hand, you’ll save money compared to buying individual brownies from a café. Plus, homemade always wins in the taste department!
Customizable: Whether you adore adding nuts, chocolate chips, or even a cream cheese swirl, this brownie base is a blank canvas. You can modify it to suit your taste preferences or dietary needs—feel free to experiment!
Quick and Easy: Unlike layered cakes that require intricate assembly, these Red Velvet Brownies can be whipped up in under an hour! With minimal cleanup, you can enjoy your tasty reward even faster.
Perfect for Sharing: The rich, velvety texture makes them a hit at gatherings and parties. People will rave about how scrumptious they are, and you’ll get all the credit—just try not to blush too much when you hear their compliments!
Ingredients
Gathering quality ingredients is the first step to baking bliss! Here’s what you’ll need for these scrumptious Red Velvet Brownies:
- 3/4 cup unsalted butter, melted: For moistness. Ensure it’s at room temperature.
- 2 oz chopped semi-sweet chocolate bar: For extra rich chocolate flavor—I’m a fan of Ghirardelli!
- 1 & 1/4 cup granulated sugar: Balances the flavors while adding sweetness.
- 2 large eggs: Room-temperature eggs help create a fluffy batter.
- 2 teaspoons vanilla extract: Use pure vanilla for the best flavor.
- 1 teaspoon white vinegar: This acid adds tang and enhances the red color.
- 1/2 tablespoon red gel food coloring: A must-have for that stunning color; add a bit more for extra vibrancy!
- 2 tablespoons unsweetened cocoa powder: Provides the chocolatey depth of flavor.
- 1 & 1/4 cup all-purpose flour: Creates a structure without being too dense.
- 1/4 teaspoon salt: Balances sweetness.
- 1/2 cup white chocolate chips (optional): For added sweetness, you can mix them into the batter or drizzle them on top!
Notes on Ingredients:
- Use high-quality chocolate for the best results. I recommend using a brand like Ghirardelli for semi-sweet chocolate.
- For allergies or dietary preferences, feel free to substitute with vegan butter or egg replacements like flax eggs.
Step-by-Step Instructions
Let’s bake those luscious Red Velvet Brownies! Follow these detailed steps for a perfect finish:
Preheat Your Oven: Preheat your oven to 350°F (175°C) and line an 8×8 inch baking pan with parchment paper, allowing some overhang for easy brownie removal later.
Melt Ingredients: In a large microwave-safe mixing bowl, combine the melted butter and chopped chocolate bar. Microwave in 30-second increments, stirring until fully melted and smooth.
Combine with Sugar: Add granulated sugar to the chocolate mixture and mix until combined.
Incorporate Eggs: Add the eggs one at a time, beating well after each addition. Stir in vanilla extract, white vinegar, and red gel food coloring.
Sift Dry Ingredients: In a separate bowl, sift together cocoa powder, flour, and salt. This step helps create a lighter texture.
Mix Everything: Gradually add dry ingredients to the wet mixture, mixing until just combined—overmixing can result in dense brownies. If desired, gently fold in white chocolate chips.
Pour and Spread: Pour the brownie batter into your prepared 8×8 pan, spreading evenly with a spatula.
Bake: Bake in the preheated oven for approximately 30-35 minutes. To check for doneness, insert a toothpick into the center. It should come out with a few moist crumbs, not wet batter.
Cool and Slice: Allow the brownies to cool completely in the pan before lifting them out using the parchment paper. Cut into squares, and for an extra flourish, drizzle melted white chocolate on top before serving.
Chef’s Tips:
- Visual Cue: The brownies should be slightly puffed and the edges may begin to pull away from the sides of the pan.
- Avoid Dry Brownies: Keep an eye on the baking time, as ovens can vary. It’s better to underbake slightly than overbake!
Always add 
tag before FAQ.
Expert Tips & Tricks
Storage: Store brownies in an airtight container at room temperature for up to three days or in the fridge for up to a week. They freeze well too—just wrap them tightly in plastic wrap and place in a freezer bag.
Make-Ahead: You can prepare the batter a day in advance and store it in the fridge. Allow it to come to room temperature before baking.
Troubleshooting Overcooking: If your brownies seem too dry, baking for just a minute or two less can yield fudgier results.
Adding More Flavors: Consider swirling in a chocolate ganache or cream cheese frosting for an ultra-decadent treat.
Batch Variations: Feel free to scale the recipe! Just maintain the same proportions to keep the flavor profile balanced.
Serving Suggestions
These Red Velvet Brownies are delightful on their own, but why not elevate the experience? Serve them warm with a scoop of vanilla ice cream and a drizzle of chocolate sauce for a dreamy dessert that’s perfect for impressing guests. For a cozy night in, pair them with a tall glass of cold milk or a steaming cup of coffee. They’re a wonderful addition to any festive occasion—whether at a birthday, holiday gathering, or just a regular Tuesday!
Variations & Substitutions
- Flavor Combinations: Try adding peppermint extract for a seasonal twist during the holidays or a pinch of cayenne for a spicy kick.
- Gluten-Free: Substitute all-purpose flour with a 1:1 gluten-free flour blend, and ensure your chocolate is also gluten-free.
- Seasonal Additions: Swap out the white chocolate for melted peanut butter or caramel sauce when the season calls for it.
Nutrition & Storage Info
- Prep Time: 15 minutes
- Cook Time: 30-35 minutes
- Total Time: 50 minutes
- Yield: 16 brownies (serving size: 1 brownie)
- Estimated Calories per Serving: Approximately 200 calories.
- Storage Instructions: Room temperature for up to 3 days, fridge for 1 week, or freezer for up to 3 months.
FAQ Section
Can I use cocoa powder instead of a chocolate bar?
Yes! Using cocoa powder is a fine substitution; just ensure to keep the butter to maintain moisture.Can I omit the food coloring?
While it’s a crucial aspect for the traditional red velvet look, the flavor will remain delightful without it.How do I know when my brownies are done?
A toothpick must come out with a few moist crumbs attached but no wet batter.Can I add nuts to the recipe?
Absolutely! Walnuts or pecans add a lovely crunch; just fold them in with the chocolate chips if you choose to include them.Do I need to chill the brownies before cutting?
No, but letting them cool completely helps achieve cleaner cuts.Can I double the recipe?
Yes! Just use a larger pan and keep an eye on the baking time.What can I use instead of white vinegar?
Lemon juice is a great substitute and will not affect the flavor.Do I have to use unsweetened cocoa powder?
Yes, unsweetened cocoa will give a balanced flavor—sweetened cocoa would make them overly sweet.How can I store leftover brownies?
An airtight container keeps them fresh at room temperature, or you can refrigerate or freeze them for later enjoyment.Can these be made dairy-free?
Sure! Use vegan butter and a dairy-free chocolate bar to keep them entirely dairy-free.
Always add 
tag after Directions.
Conclusion
These Red Velvet Brownies are not just a dessert; they’re a celebration of flavor, nostalgia, and comfort. Their unique texture, rich cocoa essence, and beautiful color make them a standout treat for any occasion. I encourage you to give this recipe a try and see for yourself just how delightful they can be!
I’d love to hear your thoughts! Share your feedback or any variations you tried in the comments below. And don’t forget to check out other delectable recipes on my blog. Happy baking!
Red Velvet Brownies
Ingredients
Brownie Ingredients
- 3/4 cup unsalted butter, melted Ensure it’s at room temperature.
- 2 oz chopped semi-sweet chocolate bar Use a brand like Ghirardelli for extra rich chocolate flavor.
- 1 1/4 cup granulated sugar Balances the flavors while adding sweetness.
- 2 large eggs Room-temperature eggs help create a fluffy batter.
- 2 teaspoons vanilla extract Use pure vanilla for best flavor.
- 1 teaspoon white vinegar This acid adds tang and enhances the red color.
- 1/2 tablespoon red gel food coloring A must-have for that stunning color.
- 2 tablespoons unsweetened cocoa powder Provides chocolatey depth.
- 1 1/4 cup all-purpose flour Creates structure without being too dense.
- 1/4 teaspoon salt Balances sweetness.
- 1/2 cup white chocolate chips (optional) Can mix into the batter or drizzle on top.
Instructions
Preparation
- Preheat your oven to 350°F (175°C) and line an 8x8 inch baking pan with parchment paper.
- In a large microwave-safe mixing bowl, combine melted butter and chopped chocolate bar. Microwave in 30-second increments, stirring until fully melted and smooth.
- Add granulated sugar to the chocolate mixture and mix until combined.
- Add the eggs one at a time, beating well after each addition. Stir in vanilla extract, white vinegar, and red gel food coloring.
- In a separate bowl, sift together cocoa powder, flour, and salt.
- Gradually add dry ingredients to the wet mixture, mixing until just combined and gently fold in white chocolate chips if desired.
- Pour the brownie batter into your prepared 8x8 pan, spreading evenly with a spatula.
Baking
- Bake in the preheated oven for approximately 30-35 minutes. To check for doneness, insert a toothpick into the center. It should come out with a few moist crumbs.
- Allow the brownies to cool completely in the pan before lifting them out using the parchment paper. Cut into squares and drizzle melted white chocolate on top before serving.