

Irresistible Strawberry Kiss Cookies: The Sweetest Treat for Any Occasion
As a kid, there was nothing more magical than the smell of freshly baked cookies wafting through the house on a Saturday afternoon. My grandmother would often whip up a batch of her famous Strawberry Kiss Cookies, filling the kitchen with a delightful medley of sweet and fruity aromas. Each cookie was a tiny morsel of joy, complete with an unmistakable chocolate center that made me smile from ear to ear. Fast forward to today, and here I am, sharing my take on this cherished recipe that has a special place in my heart.
What makes these Strawberry Kiss Cookies unique is the way they perfectly blend the flavors of strawberry and chocolate, creating a delightful contrast that’s both comforting and satisfying. They’re not just a cookie; they’re a memory of family gatherings, laughter, and love. This recipe elevates the traditional idea of a cookie by infusing it with the sweet, nostalgic flavors of strawberries and chocolate kisses, setting it apart from the store-bought versions that often feel bland and uninspired.
In this post, I promise to guide you through every step of making these delectable Strawberry Kiss Cookies, sharing tips and tricks that will ensure your cookies turn out perfectly every time. Whether you’re baking for a special occasion or just indulging yourself, these cookies will evoke that same unparalleled warmth and happiness I felt as a child.
What Are Strawberry Kiss Cookies?
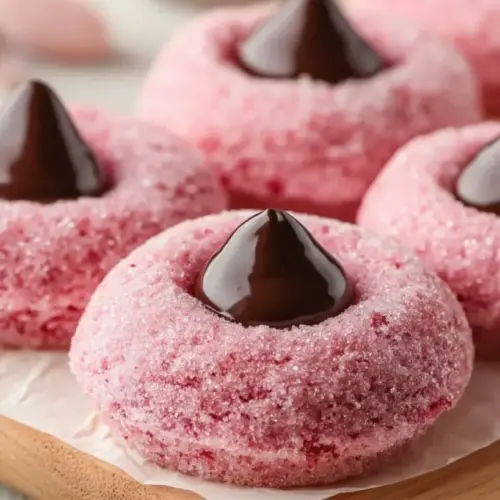
Strawberry Kiss Cookies have their origin in the classic cookie realm, but they take a delicious twist with the addition of strawberry-flavored gelatin. Unlike standard cookies, these have a vibrant pink hue and an irresistible sweet strawberry flavor, thanks largely to the gelatin mix that lends a fruity essence to each bite. The texture is soft and chewy on the inside with a slight crispness on the outside, ensuring a delightful eating experience.
These cookies are typically made with a simple, familiar set of ingredients, but it’s the beautiful melding of flavors that truly sets them apart. The moment you take a bite and encounter the rich chocolate kiss at its core, you’re transported back to that cozy kitchen filled with laughter and love. Perfect for springtime gatherings, birthdays, or simply as a sweet treat after a long day, these cookies are incredibly versatile and enjoyable year-round.
Why You’ll Love This Recipe
Unmatched Flavor: The combination of strawberry and chocolate creates a flavor profile that outshines any store-bought cookie. Trust me, once you try these, you won’t want anything else!
Cost-Effective: Making these Strawberry Kiss Cookies at home is budget-friendly, allowing you to enjoy gourmet flavors without breaking the bank. A typical batch will cost you less than what you’d pay for a few cookies at a bakery.
Easy to Customize: Not only can you swap the chocolate kisses for other candies, like caramel or peanut butter cups, but you can also experiment with different extracts! Imagine the delicious smell of almond or coconut wafting through your kitchen as you bake—yum!
Simple Process: This recipe is beginner-friendly, taking only about 30 minutes of active prep time (plus chilling). You’ll be rewarded with delicious cookies that make you look like a pro in the kitchen.
Perfect for Sharing: Honestly, what better way to bring people together than with a plate of freshly baked Strawberry Kiss Cookies? They’re a hit at any gathering, and everyone will be asking for your secret recipe!
Ingredients
- 1 cup (226g) unsalted butter, softened (let it sit at room temperature until creamy)
- 1 cup (200g) granulated sugar
- 1 large egg, at room temperature (helps with even mixing)
- 1 tsp vanilla extract
- 1/2 tsp almond extract (optional for an extra layer of flavor)
- 2 cups + 2 tbsp (280g) all-purpose flour, sifted
- 1 tsp baking powder
- 1/4 tsp salt
- 1 package (3 oz) strawberry-flavored gelatin mix
- 1/4 cup powdered sugar, for dusting
- 24-30 chocolate kiss candies, unwrapped (use the classic chocolate ones or mix it up with seasonal flavors)
Ingredient Notes:
- Quality Ingredients: Use high-quality butter and flour for the best results. If you can find organic options, they can enhance both flavor and texture.
- Substitutions: If you’re out of almond extract, feel free to skip it or try other extracts like orange or hazelnut to add a unique twist.
- Prep: Ensure your butter is softened completely. If you forget to take it out ahead of time, microwave it in 10-second bursts until just soft.
Step-by-Step Instructions
Prepare the Dough
Mix Butter and Sugar: In a large mixing bowl, beat the softened butter and granulated sugar until light and fluffy, about 2-3 minutes. The mixture should turn a pale yellow and be noticeably airy.
Add Wet Ingredients: Incorporate the egg, vanilla extract, and almond extract (if using), beating until well combined. The mixture will be creamy and smooth.
Mix in Gelatin: Gradually add the strawberry-flavored gelatin powder, mixing until fully incorporated. The dough should turn a lovely pink color at this point.
Combine Dry Ingredients: In a separate bowl, whisk together the flour, baking powder, and salt. Gradually add the dry mixture to the wet mixture, mixing on low speed until a soft, pink dough forms. If the dough feels too soft or sticky, add 1-2 extra tablespoons of flour.
Shape & Chill the Cookies
Roll the Dough: Scoop about 1 tablespoon of dough and roll it between your palms to form a smooth ball.
Chill: Place the dough balls on a lined baking sheet and chill in the refrigerator for at least 1 hour (or up to overnight for best results). (This step is vital for preventing the cookies from spreading too much during baking!)
Bake
Preheat the Oven: Preheat your oven to 350°F (175°C).
Arrange Cookies: Once chilled, arrange the dough balls on a parchment-lined baking sheet, spaced about 2 inches apart.
Bake: Bake for 11-13 minutes, or until the edges look set and slightly firm. They may appear soft in the center, but they’ll firm up as they cool.
Add the Chocolate Kisses: After removing from the oven, let the cookies sit on the baking sheet for 2 minutes before adding the chocolate kisses. While the cookies are still warm, gently press a chocolate kiss into the center of each one, allowing the heat to help stick it without melting too much.
Cool Completely: Transfer the cookies to a wire rack and let them cool completely. This step allows the chocolate to set perfectly.
Dust with Powdered Sugar: To avoid getting powdered sugar on the chocolate, dust the cookies FIRST, then press in the kisses.
Chef’s Tips
- Timing: Give yourself a solid 30 minutes of prep time and 12 minutes of baking to have perfectly soft Strawberry Kiss Cookies.
- Visual Cues: Look for edges that set but a soft center—this is a sign of cookie perfection!
Expert Tips & Tricks
Storage: Keep cookies in an airtight container at room temperature for up to a week. For longer storage, freeze them in a single layer in a zip-top bag; they’ll last up to 3 months.
Make-Ahead: You can prepare the dough in advance and keep it in the fridge for up to 2 days, or freeze the shaped balls of dough to bake fresh cookies as needed.
Troubleshooting: If your cookies spread too much or aren’t holding shape, consider chilling the dough longer before baking.
Serving Suggestions
Serve your Strawberry Kiss Cookies alongside a tall glass of cold milk or a steaming cup of tea. For a festive touch, stack a few on a pretty plate and sprinkle some edible flowers around them. These cookies are perfect for birthday parties, holiday gatherings, or just as a treat for yourself after a long day.
Variations & Substitutions
Flavor Combinations: Feeling adventurous? Try swapping strawberry with raspberry or lemon gelatin for a different fruity twist!
Dietary Adjustments: To make these cookies gluten-free, substitute all-purpose flour with a gluten-free blend. For a vegan option, replace butter with coconut oil and the egg with a flax egg or applesauce.
Seasonal Variations: During summer, try adding fresh strawberries or crushed berries into the dough for an even more delightful flavor.
Nutrition & Storage Info
- Prep Time: 30 minutes
- Cook Time: 11-13 minutes
- Total Time: Approximately 1 hour 30 minutes (including chilling)
- Yield: About 24-30 cookies
- Calories: Approximately 120 calories per cookie (varies depending on size)
Storage Instructions: Keep cookies in an airtight container at room temperature for about a week. To freeze, wrap them securely in plastic wrap and place them in a zip-top freezer bag; they’ll stay fresh for up to three months.
FAQ Section
Can I use fresh strawberries instead of gelatin?
- While fresh strawberries would add a delicious flavor, they might alter the cookie’s texture and moisture level. If you want to experiment, you could reduce the butter by a small amount to compensate.
What can I use instead of chocolate kisses?
- You can replace chocolate kisses with other chocolate candies, caramel candies, or even a fun twist with peanut butter candies.
Why are my cookies spreading too much?
- Overmixing the dough or not chilling it long enough can lead to spreading. Make sure to chill the dough thoroughly to keep your cookies fluffy and thick.
Can I make the dough ahead of time?
- Absolutely! You can prepare the dough in advance and refrigerate it for up to two days or freeze shaped balls of dough for future baking.
What if I don’t have almond extract?
- The almond extract is optional, so feel free to leave it out or substitute with another flavor like lemon or hazelnut.
Is there a gluten-free version?
- Yes! Substitute the all-purpose flour with a gluten-free flour blend.
How do I store leftovers?
- Keep leftover cookies in an airtight container at room temperature. If you want to keep them longer, you can freeze them for up to three months.
Can I use margarine instead of butter?
- While you can use margarine, the flavor and texture may vary. Unsalted butter is preferred for optimal taste.
How do I know when the cookies are done baking?
- The edges should feel firm and set, while the center looks slightly soft but not gooey. They will continue to firm up on the baking sheet as they cool.
What if the dough is sticky?
- If the dough feels overly sticky, you can add 1-2 tablespoons of extra flour until it’s manageable.
(constant reminder to insert 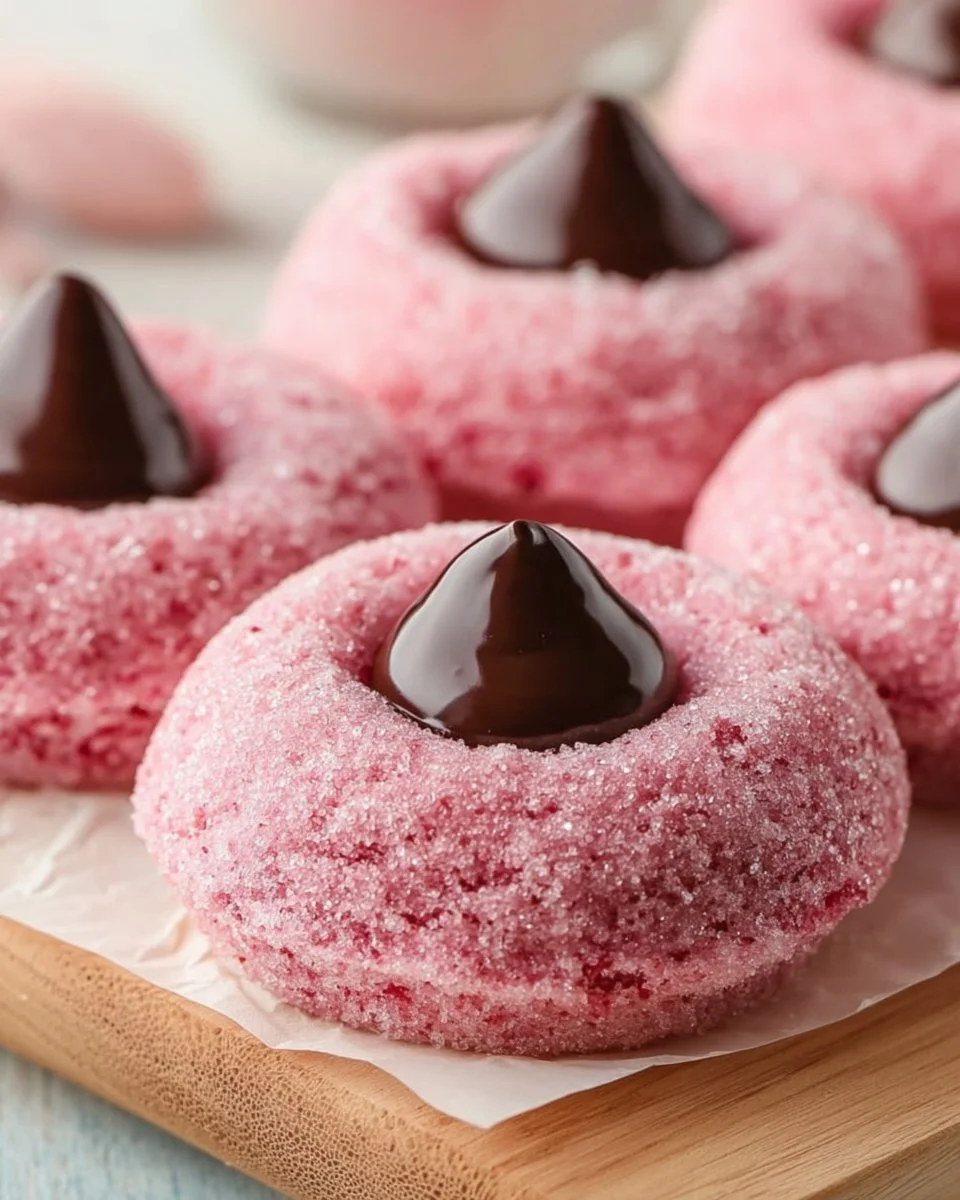
and 
tags respectively)
Conclusion
These Strawberry Kiss Cookies are more than just a tasty treat; they’re a nostalgic trip down memory lane and a way to create new memories with your loved ones. I encourage you to give this recipe a try! Your family and friends will thank you, and who knows—you might just develop a lifelong love for these delightful cookies along the way. I’d love to hear your feedback and any variations you come up with. Don’t forget to check out my other cookie recipes for more delicious inspiration! Happy baking! 🍓❤️
Strawberry Kiss Cookies
Ingredients
For the Cookie Dough
- 1 cup unsalted butter, softened Let it sit at room temperature until creamy.
- 1 cup granulated sugar
- 1 large egg, at room temperature Helps with even mixing.
- 1 tsp vanilla extract
- 1/2 tsp almond extract Optional for an extra layer of flavor.
- 2 cups + 2 tbsp all-purpose flour, sifted
- 1 tsp baking powder
- 1/4 tsp salt
- 1 package strawberry-flavored gelatin mix (3 oz)
For Dusting and Topping
- 1/4 cup powdered sugar, for dusting
- 24-30 pieces chocolate kiss candies, unwrapped Use the classic chocolate ones or mix it up with seasonal flavors.
Instructions
Prepare the Dough
- In a large mixing bowl, beat the softened butter and granulated sugar until light and fluffy, about 2-3 minutes.
- Incorporate the egg, vanilla extract, and almond extract (if using), beating until well combined.
- Gradually add the strawberry-flavored gelatin powder, mixing until fully incorporated.
- In a separate bowl, whisk together the flour, baking powder, and salt, then gradually add the dry mixture to the wet mixture.
- Mix on low speed until a soft, pink dough forms. If the dough feels too soft or sticky, add 1-2 extra tablespoons of flour.
Shape & Chill the Cookies
- Scoop about 1 tablespoon of dough and roll it between your palms to form a smooth ball.
- Place the dough balls on a lined baking sheet and chill in the refrigerator for at least 1 hour.
Bake
- Preheat your oven to 350°F (175°C).
- Arrange the chilled dough balls on a parchment-lined baking sheet, spaced about 2 inches apart.
- Bake for 11-13 minutes, or until the edges look set and slightly firm.
- Remove from oven, let cookies sit for 2 minutes, then gently press a chocolate kiss into each cookie.
- Transfer the cookies to a wire rack to cool completely.
- Dust the cookies with powdered sugar before pressing in the kisses.