

Every Thanksgiving, without fail, my family gathers around the dinner table, a cornucopia of scents wrapping us in a warm hug. But as much as I cherish the turkey and cranberry sauce, it’s my Stuffing Muffins that always steal the show. Growing up, my grandmother would whip these delightful creations, her kitchen filled with the savory aroma of herbs and fresh garlic. The moment they came out of the oven, her home felt like a cozy haven, a place where memories were made and laughter echoed.
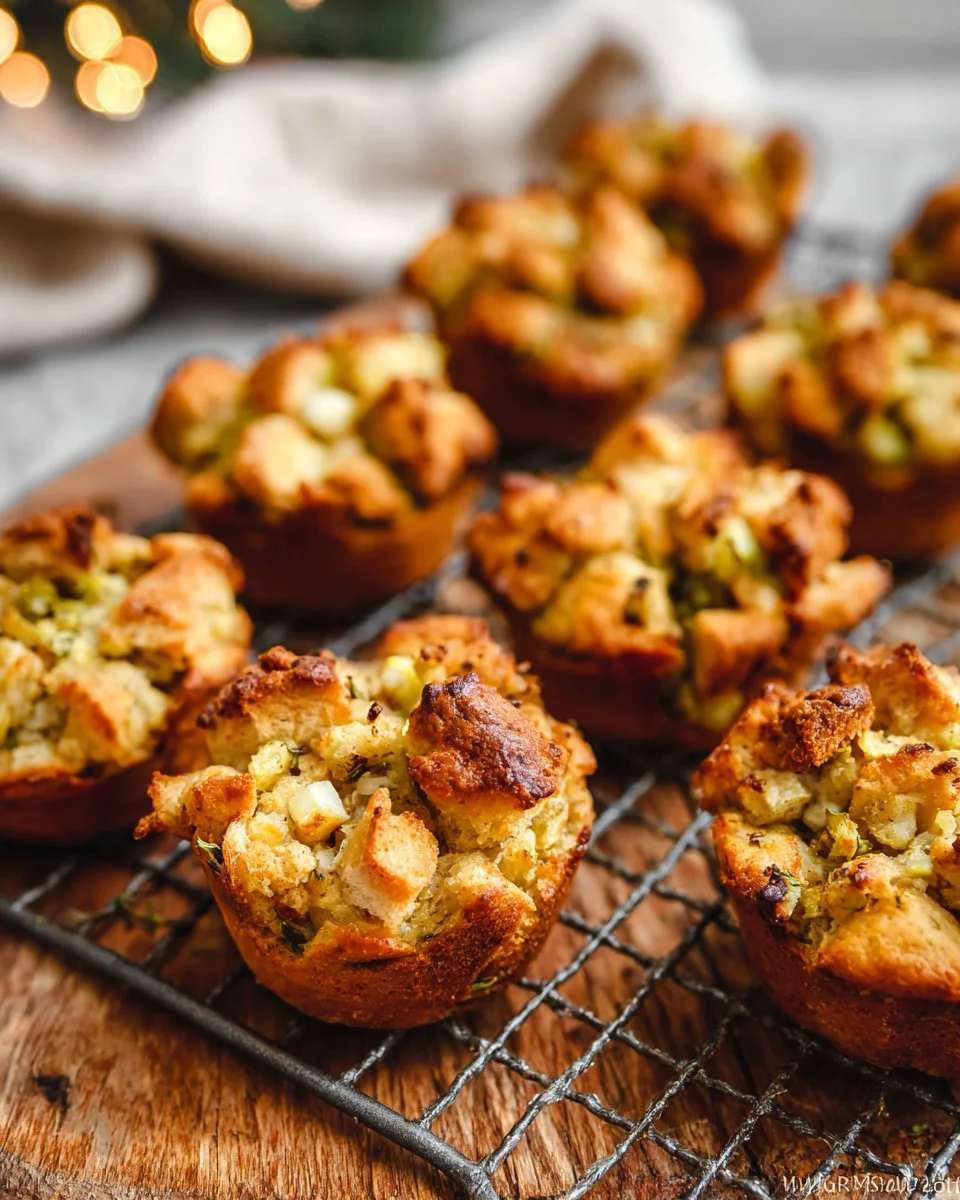
These Stuffing Muffins are not just your standard stuffing re-imagined; they’re an elevated, portable version that combines the soul of comfort food with the joy of finger food. Unlike traditional stuffing that can sometimes turn soggy, the muffin form provides a perfectly crispy exterior and a pillowy interior that’s infused with all those familiar flavors. Plus, they’re incredibly flexible! You can spice them up or keep them classic, depending on your preferences.
In this recipe, you’ll learn not just how to make these delicious Stuffing Muffins but also how to infuse them with your own personal touch. Whether for a holiday feast or a cozy weeknight dinner, I promise you, these muffins will become a beloved staple in your house, just like they are in mine.
What Are Stuffing Muffins?
The origin of Stuffing Muffins dates back to the traditional Thanksgiving stuffing that has graced holiday tables for centuries. The idea of transforming stuffing into a muffin shape arose from a need for convenience and presentation. Imagine a stuffing that’s not just a side dish but a statement on your plate!
These muffins marry soft, seasoned bread with delectable sautéed vegetables and fragrant herbs. The result? A bite-sized delight that’s bursting with flavor in every morsel! They carry the cozy essence of home-cooked stuffing while being perfectly portioned for sharing (or not sharing—no judgment here!).
You can whip up a batch for holiday celebrations, cozy dinners, or even breakfast. They’re adaptable to various occasions, ensuring that no matter when you make them, they’ll be a win.
Why You’ll Love This Recipe
- Amazing Flavor: The combination of savory onion, garlic, and herbs creates an explosion of flavor that tantalizes your taste buds. You’ll find that every muffin is a perfect balance between crispy and tender.
- Versatile: Love mushrooms? Toss them in! Want a kick? Add some jalapeños. These Stuffing Muffins are like a blank canvas, allowing you to get creative with ingredients you have on hand.
- Cost-effective: A recipe that doesn’t break the bank is always a welcome relief, especially around the holidays. With simple ingredients like bread, broth, and veggies, you can make a hearty side that serves a crowd.
- Easy Preparation: You don’t need to be a professional chef to nail this recipe. Even novice cooks will find joy in creating these muffins, as they require minimal prep and ingredients.
- Make Ahead: Prep these muffins in advance and simply bake them fresh when you’re ready to serve. This makes them a great option for busy holiday feasts.
So, toss those pre-packaged stuffing mixes aside, and let’s dive into a homemade adventure that will elevate your side dish game!
Ingredients Section
Here’s everything you’ll need to create scrumptious Stuffing Muffins:
- 10 slices of bread, cut into cubes (use sturdy bread like sourdough or whole wheat for more texture)
- 1/4 cup unsalted butter (room temperature for easy mixing; I recommend Kerrygold)
- 3 garlic cloves, minced (fresh is best for depth of flavor)
- 1 1/2 cups chopped celery
- 1 cup chopped yellow onion
- 1 tsp dried parsley
- 1 tsp garlic powder
- 1 tsp ground sage
- 1/2 tsp dried minced onion
- 1/2 tsp salt
- 1/4 tsp ground black pepper
- 2 large eggs (at room temperature for better incorporation)
- 2 cups chicken broth or vegetable broth or water (homemade broth makes all the difference!)
Notes on Ingredients
- Bread: Stale bread works wonderfully; if your bread is fresh, toast it lightly before cubing.
- Butter: You can substitute olive oil for a dairy-free option.
- Vegetables: Feel free to experiment with add-ins like bell peppers or carrots!
- Broth: Homemade broth is richer and adds more depth—store-bought is fine, but check for lower sodium options to control flavor.
Step-by-Step Instructions
- Preheat the oven to 325°F (163°C). Spray a muffin pan with nonstick cooking spray to ensure easy release.
- Toast the Bread: Spread the cubed bread onto a baking sheet in a single layer. Bake for 12-15 minutes, tossing halfway through, until lightly toasted. You’re looking for a golden color that will add texture to your muffins.
- Sauté Vegetables: Increase your oven temperature to 350°F (175°C). In a skillet over medium-high heat, melt the butter. Add garlic, chopped onion, and celery, cooking until softened, about 4-5 minutes. Add dried parsley, garlic powder, sage, minced onion, salt, and pepper; stir to combine and sauté for an additional minute.
- Prepare Egg Mixture: In a separate bowl, whisk together the eggs and chicken broth until well combined.
- Combine Everything: In a large bowl, add your toasted bread and pour in the cooked vegetable mixture, followed by the egg mixture. Toss everything gently until all the bread is well-coated.
- Fill Muffin Pan: Divide the mixture into the prepared muffin pan, pressing it down lightly to ensure they hold together. Don’t be shy about adding extra on top—more is definitely more!
- Bake: Place the muffin tin in the preheated oven and bake for 28-32 minutes, or until golden brown on top and firm to the touch. You want those golden edges!
- Cool Down: Let the muffins cool in the pan for about 10 minutes before carefully transferring them to a wire rack to cool completely. This step helps them firm up.
Chef’s Tips
- Want a crispy top? Broil for an additional 2 minutes after baking, watching carefully to avoid burning.
- Common Mistake: Overmixing can lead to dense muffins. Stir gently just until combined.
- For extra depth, add a splash of white wine to the sautéed vegetables!

Expert Tips & Tricks
- Serving Temperature: These muffins are best served warm, straight from the oven. If you’re making them ahead, reheat gently in the oven.
- Storage: Store in an airtight container in the fridge for up to 4 days or freeze for up to 3 months. Just reheat in the oven to bring back their crispy edges!
- Make-Ahead: Assemble the mixture a day before and keep it in the fridge, then bake fresh before serving.
- Troubleshooting: If your muffins are crumbling, you might need more moisture. Consider adding a splash more broth next time!
- Flavor Boosters: Add grated cheese on top before baking for a cheesy crunch.
Serving Suggestions
Whoever said you can’t serve side dishes on their own clearly hasn’t tried these Stuffing Muffins! They are perfect alongside roasted meats, like chicken or turkey, or even paired with a rich vegetable soup. For a beautiful presentation, sprinkle fresh herbs on top before serving.
These muffins are a show-stopper at holiday gatherings, potlucks, or even casual family dinners; their charming muffin shape takes the stress out of serving!
Variations & Substitutions
- Herb Variations: For a twist, try switching the sage with thyme for a more earthy flavor, or adding rosemary for an aromatic experience.
- Meat Lover’s Delight: Add cooked sausage or bacon to the vegetable sauté for a meaty version!
- Vegetarian Options: Swap the chicken broth for vegetable broth and add more vegetables for a hearty, meat-free dish.
Nutrition & Storage Info
- Prep Time: 20 minutes
- Cook Time: 45 minutes
- Total Time: 1 hour 5 minutes
- Yield: 12 muffins
- Estimated Calories: 150 calories per muffin (approximate)
Storage: Muffins can be kept at room temperature for 1 day, in the fridge for 4 days, or frozen for up to 3 months. Thaw in the fridge overnight before reheating.
FAQ Section
- Can I use gluten-free bread?
- Absolutely! Just ensure that the gluten-free bread can withstand toasting and won’t fall apart.
- What can I do if I don’t have chicken broth?
- Vegetable broth or even water can work; you may want to increase the seasoning if using plain water.
- Can I replace the eggs with flaxseed meal?
- Yes! For a flax egg, mix 1 tbsp of flaxseed meal with 3 tbsp of water and let it sit for a few minutes until it thickens.
- How can I make these muffins ahead of time?
- Assemble the muffin mixture, store it in the fridge overnight, and bake right before serving.
- Can I add other vegetables?
- Definitely! Cooked carrots, bell peppers, or spinach would all be delightful additions.
- What’s the best way to reheat leftovers?
- Reheat in the oven at 350°F for about 10 minutes for that fresh-out-of-the-oven taste.
- How can I customize the flavor?
- Add your favorite herbs or spices, or try different types of cheese or meats.
- Do they freeze well?
- Yes! They freeze beautifully—just make sure to store them in an airtight container.
- What should I serve these muffins with?
- They pair wonderfully with roasted meats, soups, or salads, making them a versatile side dish.
- Can I scale this recipe?
- Of course! Simply multiply the ingredients accordingly and adjust baking time as needed.
Conclusion
These Stuffing Muffins are more than just a recipe; they are a vessel for family memories, a spark of creativity, and a reason to gather together. With their deliciously crispy edges and fluffy interiors, they will undoubtedly bring warmth and satisfaction to your table, just as they have to mine.
So why not give them a try? You won’t regret it! I’d love to hear your thoughts and any tweaks you try out. Don’t forget to check out my other recipes on the blog, where you’ll find plenty more to keep your kitchen bustling! Happy baking!

Stuffing Muffins
Ingredients
Main Ingredients
- 10 slices slices of bread, cut into cubes (use sturdy bread like sourdough or whole wheat for more texture) Stale bread works wonderfully; if fresh, toast lightly before cubing.
- 1/4 cup unsalted butter (room temperature for easy mixing; I recommend Kerrygold) Olive oil can be substituted for a dairy-free option.
- 3 cloves garlic, minced (fresh is best for depth of flavor)
- 1 1/2 cups chopped celery Feel free to experiment with vegetables.
- 1 cup chopped yellow onion
- 1 tsp dried parsley
- 1 tsp garlic powder
- 1 tsp ground sage For a twist, try swapping with thyme or adding rosemary.
- 1/2 tsp dried minced onion
- 1/2 tsp salt Use lower sodium options if necessary.
- 1/4 tsp ground black pepper
- 2 large eggs (at room temperature for better incorporation) Flax eggs can be used as a substitute.
- 2 cups chicken broth or vegetable broth or water Homemade broth makes a significant difference!
Instructions
Preparation
- Preheat the oven to 325°F (163°C). Spray a muffin pan with nonstick cooking spray.
- Spread the cubed bread onto a baking sheet in a single layer. Bake for 12-15 minutes, tossing halfway through, until lightly toasted.
- Increase the oven temperature to 350°F (175°C). In a skillet over medium-high heat, melt the butter. Add garlic, onion, and celery; cook until softened, about 4-5 minutes.
- Add dried parsley, garlic powder, sage, minced onion, salt, and pepper to the skillet; stir to combine and sauté for an additional minute.
- In a separate bowl, whisk together the eggs and chicken broth until well combined.
- In a large bowl, add your toasted bread and pour in the cooked vegetable mixture, followed by the egg mixture. Toss everything gently.
- Divide the mixture into the prepared muffin pan, pressing down lightly to ensure they hold together.
- Bake for 28-32 minutes, or until golden brown on top and firm to the touch.
- Let the muffins cool in the pan for about 10 minutes before transferring them to a wire rack to cool completely.