
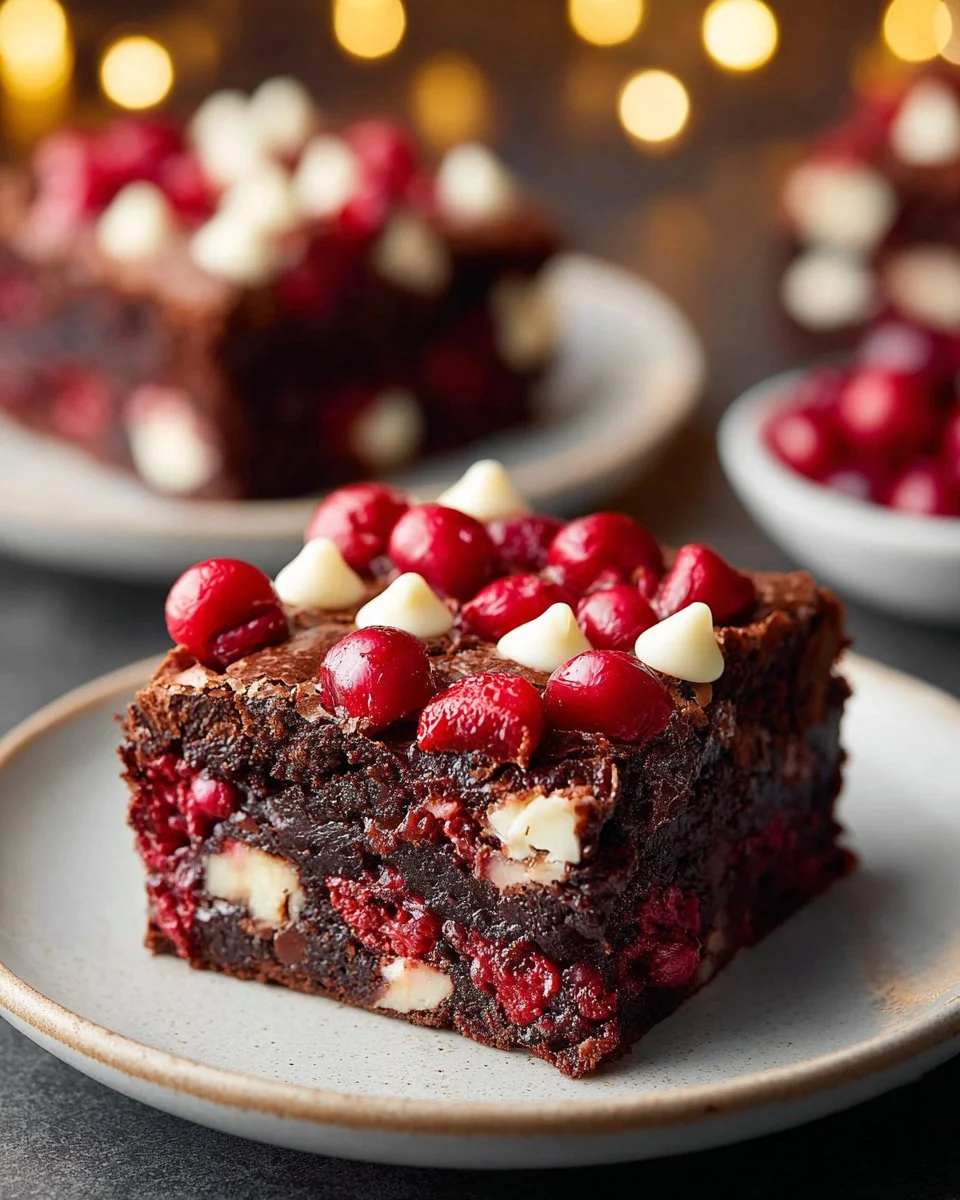
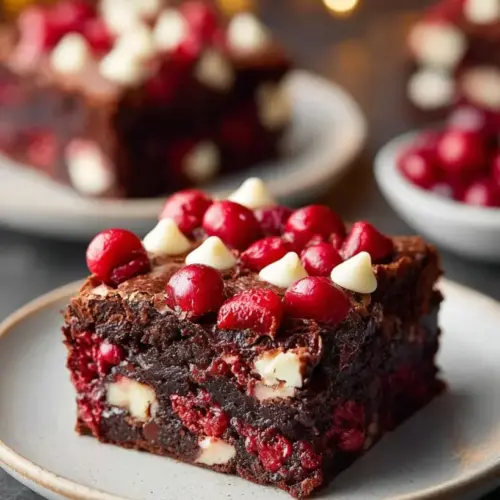
I can still remember the first time I tasted Heavenly Chocolate Cookie Cherry Bars. It was one of those cozy family gatherings, the kind where everyone gathers in the kitchen, laughter mingling with the smell of something heavenly baking in the oven. My aunt had just pulled a tray out and served the bars warm with a scoop of vanilla ice cream. The moment I took a bite, I was enveloped by the rich chocolatey goodness paired with bursts of sweet cherries—it was pure bliss! These bars have become a staple at family events ever since, filling our hearts and stomachs with joy.
What makes Heavenly Chocolate Cookie Cherry Bars special isn’t just their delightful combination of flavors but also the nostalgia they bring. Unlike a typical cookie or brownie, these bars have a multi-layered texture— the soft cookie base, the fruity cherry filling, and the decadent chocolate chips on top create a symphony of flavors and sensations that your taste buds will dance to.
In this recipe, I promise to guide you step-by-step to recreate these indulgent bars, ensuring every bite takes you down memory lane. So, whether you’re planning a family get-together or just want to treat yourself, let’s whip up a batch of these yummy delights together!
What Are Heavenly Chocolate Cookie Cherry Bars?
Heavenly Chocolate Cookie Cherry Bars are a beloved dessert that marries the classic flavors of chocolate cookie and cherry pie filling into one scrumptious treat. Though it’s hard to pinpoint an exact origin, these bars likely emerged from the genius of home bakers seeking to bring together two comfort food favorites: the chewy depths of chocolate cookies and the juicy, sweet-tart cherry filling.
The taste is a delightful experience—a balance of rich chocolate complemented by the light, refreshing pop of cherries. The texture is heavenly, with a perfectly chewy cookie base that contrasts beautifully against the smooth cherry layer and the robust chocolate chips scattered on top. It’s unique because of how it combines these different elements into a single, easy-to-make bar, making it a go-to dessert for any occasion, be it a holiday party, a potluck, or simply a cozy night in.
You’ll want to whip these up whenever you’re in need of a sweet treat to uplift your spirits or impress family and friends!
Why You’ll Love This Recipe
There are countless reasons to fall in love with this Heavenly Chocolate Cookie Cherry Bars recipe, but allow me to share a few of my favorites:
- Irresistible Flavor Combination: The rich, chocolatey base paired with sweet, luscious cherries creates a flavor explosion that’s hard to resist. It’s a perfect blend of decadent and refreshing.
- Cost-Effective: Why buy expensive dessert bars at the store when you can make these at home for a fraction of the price? The ingredients are affordable and commonplace—perfect for a budget-friendly treat!
- Customization OPTIONS: Want to switch things up? You can easily adapt the recipe to use other fruits, nut butters, or even flavored chocolate chips to suit your palate. Add in some almond extract or throw in some chopped nuts for an added crunch!
- Easy To Make: With just a few simple steps, this recipe is perfect for bakers of all levels. You don’t need to be a pastry chef to nail this one!
- Family-Friendly Fun: Involve the kids in the baking process! They’ll love mixing the ingredients and, of course, sampling the end product. Share stories while you bake, just like my family does!
So roll up your sleeves and get ready to make something truly special!
Ingredients Section
To create your own Heavenly Chocolate Cookie Cherry Bars, you will need the following ingredients, along with some notes to enhance your baking experience:
- 1 ¾ cups all-purpose flour: For best results, use a high-quality all-purpose flour. If you need a gluten-free option, try a 1:1 baking flour blend.
- 1 cup packed brown sugar: Light or dark brown sugar works; dark brown sugar will give a deeper flavor.
- 1 teaspoon baking powder: This will help your bars rise while keeping the texture soft.
- ½ cup unsweetened cocoa powder: Opt for high-quality cocoa for a richer chocolate flavor.
- 1 cup cold, unsalted butter: Make sure your butter is cold for the perfect crumb. I recommend brands like Kerrygold or Challenge for their creaminess and flavor.
- 1 large egg: Room temperature works best for even mixing.
- 2 teaspoons vanilla extract: Use pure vanilla extract for the best flavor—make life simpler by avoiding imitation vanilla.
- 19 oz cherry pie filling (1 can): Look for a brand without preservatives for the freshest flavor. You can also use homemade cherry filling if you’re feeling adventurous.
- 6-7 tablespoons milk: Start with 6 tablespoons and add more if needed. This helps with mixing the dough.
- 1 cup chocolate chips (dark or milk chocolate): Folks, give yourself the luxury of gourmet chocolate chips or choose semi-sweet for a classic touch.
- 1 cup white chocolate chips: These will add beautiful contrast and sweet creaminess to your bars—perfect for balancing the rich cocoa!
Prep Notes:
- Bring your butter and egg to room temperature for easier mixing.
With those ingredients and tips in hand, let’s get cooking!
Step-by-Step Instructions
Mapping out the process is essential for perfect bars every time. Here’s how to create your Heavenly Chocolate Cookie Cherry Bars:
- Preheat the Oven: Preheat your oven to 350°F (175°C) and prepare a 9×13-inch baking dish with parchment paper or cooking spray—this will make it easier to lift your bars out.
- Mix Dry Ingredients: In a large bowl, whisk together the all-purpose flour, brown sugar, baking powder, and cocoa powder until well combined.
- Add Butter: Cut in the cold, unsalted butter with a pastry cutter or your fingertips until the mixture resembles coarse crumbs. This will ensure a super tender texture!
- Combine Wet Ingredients: In a separate bowl, beat the egg and vanilla extract together, then pour this mixture into the dry ingredients. Stir until the dough starts to come together.
- Adjust Consistency: Add milk, one tablespoon at a time, until the dough holds together without being sticky.
- Set Aside Some Dough: Reserve 1 cup of the cookie dough for the topping, then press the remaining dough into the bottom of the prepared baking dish evenly.
- Spread Cherry Filling: Carefully pour the cherry pie filling over the pressed dough and spread it out evenly using a spatula.
- Add Topping: Mix the reserved dough with the chocolate chips, then sprinkle the topping over the cherry filling for an indulgent finish.
- Bake: Bake your bars in the preheated oven for 30-35 minutes. You’ll know they’re ready when the edges are firm, but the center still has a slight jiggle—it gives that gooey texture we admire!
- Cool and Chill: Let the bars cool in the pan for 30 minutes before refrigerating them for at least 2 hours. Trust me, this step enhances the flavor and makes slicing easier!
- Slice and Serve: Once chilled, lift the bars out using the parchment and slice them into squares. Your Heavenly Chocolate Cookie Cherry Bars are now ready to be enjoyed!
Chef’s Tips:
- Keep an eye on baking progress—oven temperatures can vary, so adjust accordingly based on your own.
- Slicing while still slightly warm helps keep those gooey layers together.

Expert Tips & Tricks
Here are my go-to tips for ensuring your Heavenly Chocolate Cookie Cherry Bars come out perfectly every time:
- Storage: Store them in an airtight container at room temperature for up to 4 days. For longer storage, keep them in the fridge for up to a week or freeze for a month.
- Make-Ahead Instructions: You can make the dough in advance and store it in the refrigerator for up to two days before assembling and baking.
- Troubleshooting: If the bars seem too crumbly, try adding a bit more milk to the dough—this can make all the difference!
- User Feedback: I’ve found that many find it helpful to taste test the cherry filling before baking, adjusting sweetness levels as needed. You could even mix in some almond extract for an extra layer of flavor!
- Presentation: For an elegant touch, dust with powdered sugar before serving or drizzle a bit of melted chocolate over the top for added sweetness.
Serving Suggestions
These Heavenly Chocolate Cookie Cherry Bars are delightful on their own but can be even more delightful when paired with a few accompaniments. Consider serving them warm with a scoop of creamy vanilla ice cream for a classic combo. Alternatively, try them with a dollop of fresh whipped cream or a sprinkle of chopped nuts on top for added texture.
Perfect for gatherings, these bars shine at birthday parties, potlucks, or as an after-dinner sweet treat!
Variations & Substitutions
Want to mix things up? Here are several exciting variations and substitutions you can try:
- Different Fruits: Swap cherry pie filling for blueberry or peach pie filling to feature seasonal fruits or personal favorites.
- Dietary Options: Consider using gluten-free flour blends to adapt for gluten-free diets. For dairy-free options, use coconut oil instead of butter and dairy-free chocolate chips.
- Seasonal Inspiration: During the holidays, feel free to stir in some cinnamon or nutmeg for a cozy twist, or even use pumpkin pie filling in the autumn!
Nutrition & Storage Information
- Prep Time: 20 minutes
- Cook Time: 30-35 minutes
- Total Time: 2 hours 55 minutes (includes cooling)
- Yield: 12-16 servings
- Estimated Calories: ~250 calories per serving
Storage Instructions: Keep bars in an airtight container at room temp for up to 4 days, in the fridge for up to a week, or freeze for a month.
FAQ Section
- Can I use fresh cherries instead of cherry pie filling?
- Yes! You can use fresh or frozen cherries, but make sure to sweeten them to taste and thicken with a bit of cornstarch for best results.
- Is it okay to use salted butter?
- Yes, just reduce the added salt in the recipe or skip it altogether, as salted butter will still yield delicious results!
- What’s the best way to cut these bars?
- For clean cuts, use a sharp knife and wipe it with a damp cloth between cuts to prevent sticking.
- Can I freeze leftovers?
- Absolutely! Wrap them tightly in plastic wrap and a layer of aluminum foil before placing them in the freezer.
- Do I need to chill the bars before cutting?
- Chilling is recommended, as it helps the bars firm up for cleaner slices.
- Are there dairy-free substitutes?
- Yes! Use dairy-free butter and chocolate chips for a delightful dairy-free version.
- How can I make these bars even more chocolatey?
- Add an extra half cup of chocolate chips to the dough or sprinkle more on top before baking!
- What can I serve with these bars?
- They pair beautifully with vanilla ice cream, fresh whipped cream, or even a drizzle of caramel sauce.
- What’s the best way to store leftovers?
- Keep them in an airtight container at room temperature, or refrigerate for longer freshness.
- Can I make these bars vegan?
- Yes! Substitute the egg with a flax egg (1 tablespoon ground flaxseed mixed with 2.5 tablespoons water) and use vegan butter and chocolate chips.

Conclusion
Heavenly Chocolate Cookie Cherry Bars are more than just a dessert; they’re a memory in the making. With their delectable blend of chocolate and cherry, each bite is a reminder of delightful family moments and sweet celebrations. You simply must try making them. I can almost guarantee they’ll become a cherished staple in your home, just as they have in mine.
I’d love to hear about your experience! Please share your thoughts in the comments, and don’t forget to check out other delightful recipes on my blog that’ll take your baking adventures to new heights! Happy baking!
Heavenly Chocolate Cookie Cherry Bars
Ingredients
For the Cookie Base
- 1.75 cups all-purpose flour Use high-quality flour. For gluten-free, try a 1:1 baking flour blend.
- 1 cup packed brown sugar Light or dark brown sugar works; dark adds depth.
- 1 teaspoon baking powder Helps bars rise and maintain a soft texture.
- 0.5 cups unsweetened cocoa powder Opt for high-quality cocoa for better flavor.
- 1 cup cold, unsalted butter Use quality butter for better flavor and crumb.
- 1 large egg Room temperature works best.
- 2 teaspoons vanilla extract Use pure vanilla for best taste.
- 6-7 tablespoons milk Start with 6 tablespoons and adjust as needed.
For the Topping
- 1 can (19 oz) cherry pie filling Use a brand without preservatives or homemade.
- 1 cup chocolate chips Use dark, milk, or semi-sweet chocolate chips.
- 1 cup white chocolate chips Adds contrast and sweetness.
Instructions
Preparation
- Preheat your oven to 350°F (175°C) and prepare a 9x13-inch baking dish with parchment paper or cooking spray.
- In a large bowl, whisk together the all-purpose flour, brown sugar, baking powder, and cocoa powder until well combined.
- Cut in the cold, unsalted butter until the mixture resembles coarse crumbs.
- In a separate bowl, beat the egg and vanilla extract together, then pour this mixture into the dry ingredients.
- Add milk, one tablespoon at a time, until the dough holds together without being sticky.
- Reserve 1 cup of the cookie dough for the topping, then press the remaining dough into the bottom of the prepared baking dish evenly.
- Carefully pour the cherry pie filling over the pressed dough and spread it out evenly using a spatula.
- Mix the reserved dough with the chocolate chips, then sprinkle the topping over the cherry filling.
- Bake for 30-35 minutes until edges are firm but the center has a slight jiggle.
- Let the bars cool in the pan for 30 minutes before refrigerating for at least 2 hours.
- Once chilled, lift the bars out using the parchment and slice into squares.