
Delicious Doughnuts: The Ultimate Comfort Food Recipe
There’s just something magical about the aroma of freshly fried doughnuts wafting through the kitchen. I still remember childhood mornings, when my grandma would whip up a batch of her famous doughnuts that hugged me with warmth and sweetness the moment I took a bite. Each flaky, sugary ring was not just a treat; it was an embodiment of family love and comfort. This recipe is not only a fantastic homage to those cherished memories, but it also packs a punch of flavor and texture that sets it apart from store-bought varieties.
What makes these doughnuts extra special, you ask? It’s the combination of precision in preparation and the quality of simple ingredients, creating a delightful crispy exterior and a soft, pillowy center. Unlike the hefty versions sold at shops, my crafted doughnuts are surprisingly easy to prepare at home, allowing you to adjust the flavorings, toppings, and, of course, the sweetness to your liking. So get ready, because you’re about to embark on a delicious journey where you’ll learn all my tips and tricks. By the end of this recipe, you’ll be frying or baking doughnuts like a pro, bringing smiles to your loved ones with every delectable bite!
What Are Doughnuts?
Doughnuts, also affectionately known as doughnuts, are a delightful pastry that has a rich history originating from various cultures around the world. Most commonly associated with the United States, these sweet, fried rings can be traced back to the Dutch settlers who brought their “olykoeks,” or oily cakes, to America in the 19th century. They’ve since evolved into countless forms and flavors, but at their core, they remain synonymous with indulgence and happiness.
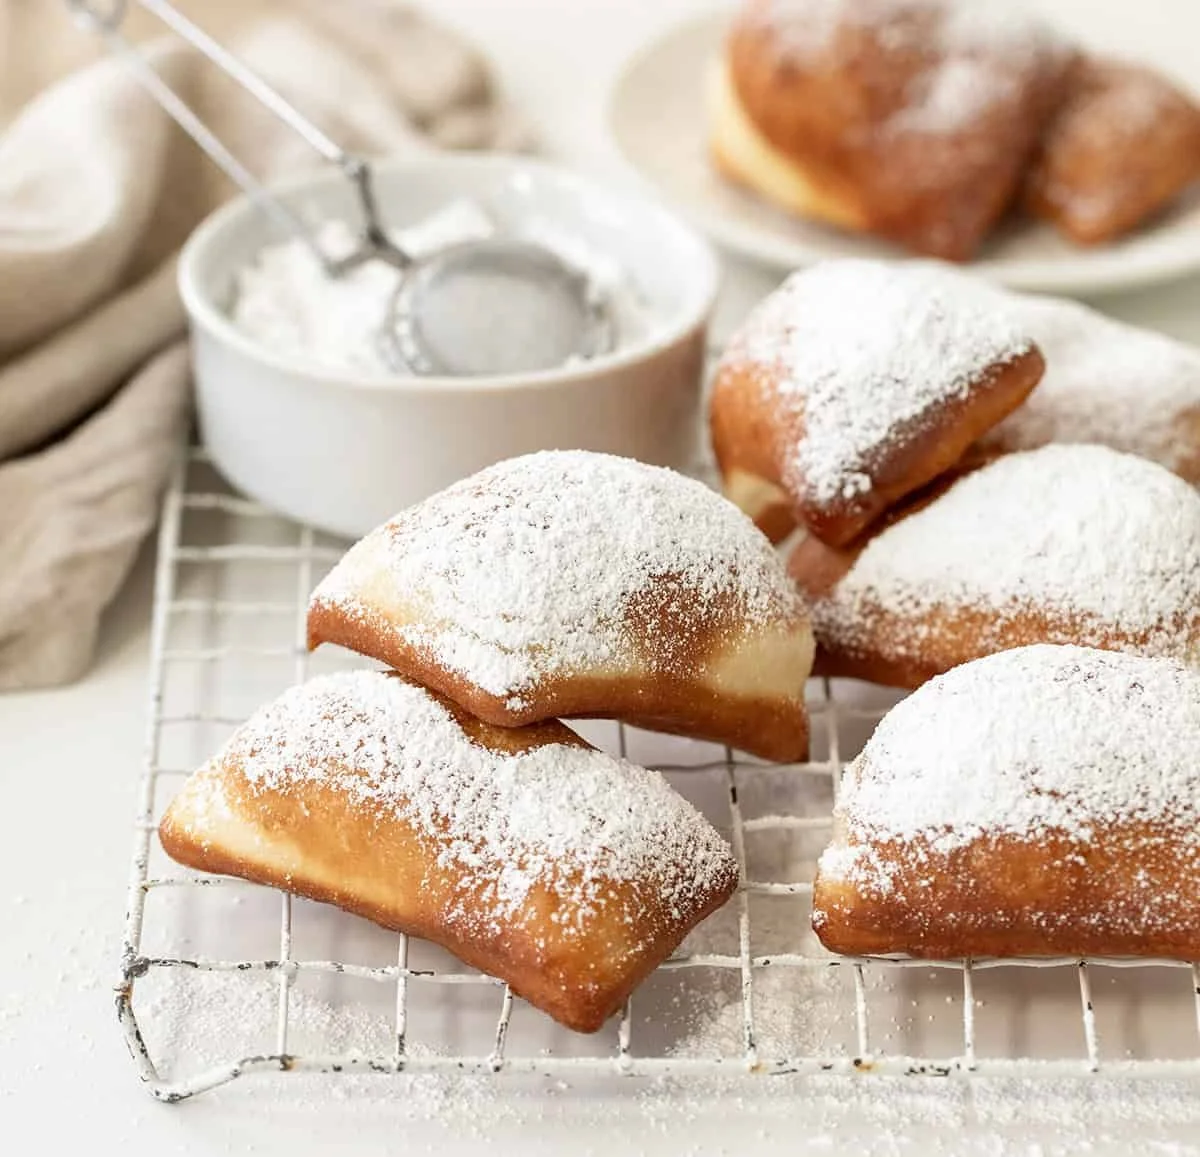
Imagine sinking your teeth into a doughnut—its crispy exterior giving way to a light and airy interior that melts in your mouth. Each variety offers a unique taste and texture; whether glazed, powdered, or filled with gooey jams or creams, there’s a doughnut for everyone. They are perfect for breakfast, dessert, or an afternoon pick-me-up, making them a fantastic choice for both festive occasions and everyday treats.
Why You’ll Love This Recipe
Flavor Explosion: Say goodbye to bland, store-bought doughnuts that leave you wanting more; these homemade versions are infused with flavor from the moment you mix the ingredients. They’re sweetened to perfection and customizable for whatever mood strikes you!
Affordability: Making your own doughnuts can be surprisingly cost-effective compared to those pricey gourmet options at cafes. By using basic pantry staples, you can whip up a whole batch for a fraction of the cost, ensuring that indulgence doesn’t break the bank.
Customizable Delights: The best part? You can tweak the ingredients to cater to every taste. Want a dash of cinnamon? Go for it! Craving a chocolate glaze instead of powdered sugar? The sky’s the limit. You can create something truly personal and delightful.
Satisfaction Level: The warm, gooey feeling of biting into a fresh doughnut with your family is unmatched. The joy and nostalgia connected to something homemade are so much greater than a purchased treat, making the effort truly worthwhile!
Easy Baking Options: Not just for frying, this recipe easily translates into baked or air-fried doughnuts, too! Each method yields a delightful treat that’s healthier, yet still delicious.
Ingredients
- 3/4 cup lukewarm water: Ensure your water is just warm to the touch (about 110°F) to activate the yeast effectively.
- 1/4 cup granulated sugar: Helps to sweeten the dough and balance flavors.
- 1 packet active dry yeast: This is the magic! If you can find instant yeast, it works just as well.
- 1/2 cup whole milk (room temperature): Adds moisture and richness. You can substitute with almond milk for a dairy-free version.
- 1 large egg (room temperature): Binds the dough together for a nice texture.
- 3 1/2 cups all-purpose flour: You’ll want a good quality flour. King Arthur is always my go-to for baking.
- 1/2 teaspoon kosher salt: Balances the sweetness and enhances flavors.
- 2 tablespoons unsalted butter (softened): This adds a wonderful richness. Let it sit out to reach room temperature for easy mixing.
- Vegetable oil for frying: Canola oil also works well! Enough to submerge the doughnuts (around 3 inches in a pot).
- Confectioners sugar for dusting: A sweet finishing touch that makes everything look and taste irresistible.
Step-by-Step Instructions
Activate the Yeast: In a medium bowl, whisk together the lukewarm water, granulated sugar, and yeast. Let it sit for 5 to 10 minutes until foamy—a sign that your yeast is alive and kicking!
Mix It Up: In a stand mixer fitted with a dough hook, add 3 1/2 cups flour and kosher salt. With the mixer on low, slowly pour in the activated yeast mixture along with the softened butter. Mix until just combined.
Knead Away: Increase the speed to medium and knead for 2 to 3 minutes. You want the dough to be smooth and to pull away from the sides of the bowl.
Let It Rise: Transfer the dough to a large, greased bowl, cover it with a kitchen towel, and let it rise in a warm place until it doubles in size, about 1 to 2 hours.
Shaping Time: Once doubled, roll out the dough into a rectangle about 1/4 to 1/2 inch thick on a floured surface. Cut into 32 squares (or desired shapes).
Fry It Up: Heat about 3 inches of vegetable oil in a pot to 360°F. Carefully place 4 to 6 pieces of dough into the hot oil, cooking for 30 seconds to 1 minute on each side until golden brown. Use a slotted spoon to transfer the fried doughnuts to a paper towel-lined baking sheet and dust generously with confectioners’ sugar.
Continue Frying: Repeat with the remaining dough, making sure to check that the oil temperature returns to 360°F before each batch.
Baking Option: If you prefer to bake, preheat oven to 350°F and place the square doughnuts on lined baking sheets. Let them rise for another 45 minutes, brush with milk, and bake for 12-15 minutes until golden.
Air Fryer Alternative: Preheat your air fryer to 350°F. Place a single layer of doughnuts in the basket and cook for 2 to 3 minutes until crispy outside. Dust with confectioners’ sugar and enjoy them warm!
Expert Tips & Tricks
- Don’t Rush the Rise: Patience is key—the dough should truly double in size. This ensures fluffy doughnuts!
- Temperature Matters: Use a thermometer to check the frying oil’s temperature; if it’s too hot, the outside will brown while the inside remains gooey.
- Storage: Unsure how to store your leftovers? Keep them at room temperature in an airtight container for about 1-2 days, or refrigerate them for up to a week. Reheat gently in the oven or microwave.
- Make Ahead: You can prepare the dough the night before and let it rise slowly in the refrigerator. Just bring it to room temperature before frying or baking.
- Troubleshoot: If doughnuts absorb too much oil, check your frying temperature; if too low, they’ll soak it up!
Serving Suggestions
Serve these delightful doughnuts with a steaming cup of coffee or a chilled glass of milk for a perfect pairing. You could even whip up some luscious dipping sauces, like chocolate or caramel, to take it up a notch! For a brunch gathering, arrange them on a beautiful platter, dusted with sugar, and add some fresh berries on the side for a pop of color.
Variations & Substitutions
- Flavors Galore: Try adding spices like cinnamon or nutmeg for a warm kick! Vanilla extract can brighten the classic doughnut flavor.
- Dietary Restrictions: Gluten-free flour blends can be used in place of regular flour if needed—just ensure your yeast is also gluten-free!
- Seasonal Twist: For fall, consider incorporating pumpkin puree and spice or for the holidays, a touch of peppermint extract in your glaze can be festive!
Nutrition & Storage Info
- Prep Time: 20 minutes
- Cook Time: 30 minutes
- Total Time: 1 hour
- Yield: 32 doughnuts
- Estimated Calories: Approximately 150 calories per doughnut
- Storage Info: Best enjoyed fresh! Leftovers can be left at room temperature for 1-2 days or refrigerated for a week.
FAQ Section

Can I freeze these doughnuts?
- Absolutely! Just make sure they’re completely cooled before freezing. Seal them in an airtight container, and they can last up to 3 months. To enjoy, thaw at room temperature or reheat in the oven!
Can I use bread flour instead of all-purpose flour?
- Yes! Bread flour has a higher protein content, which may give your doughnuts a chewier texture.
What if I don’t have a stand mixer?
- No worries! You can easily mix and knead by hand; just use a large mixing bowl and your strength to knead for about 10 minutes until smooth.
How do I know when the oil is ready for frying?
- You can test the oil by dropping a small piece of dough into it. If it sizzles and rises to the surface, it’s ready!
What’s the difference between frying and baking?
- Frying gives that characteristic crispness and airy texture with a rich flavor, while baking offers a lighter, less oily option, making them slightly healthier.
How can I tell if my dough is too sticky?
- If it sticks to your fingers when kneading and doesn’t hold its shape, add a tablespoon of flour at a time until it reaches a soft but slightly tacky consistency.
Can I make the doughnut holes with this recipe?
- Certainly! Just use the scraps from your dough and fry them up – they’ll be delicious little bites!
What’s the best way to glaze these doughnuts?
- For a simple glaze, combine powdered sugar with milk to your desired consistency. Dunk the warm doughnuts right after frying for a gooey finish!
What beverages pair well with doughnuts?
- Coffee, tea, or even chocolate milk make great companions!
What’s the key to an even fry?
- Fry in batches and ensure each piece has ample space in the pot for even cooking.
Conclusion
This doughnut recipe is a delicious way to create sweet memories in your kitchen. It brings together family, friends, and comfort in every crispy bite. I hope you give it a try and experience just how satisfying homemade doughnuts can be! Don’t forget to share your thoughts or any variations you try—I’d love to hear how they turn out! For more delightful recipes, check out my other posts in the baking section of my blog. Happy baking!

Doughnuts
Ingredients
Doughnut Ingredients
- 3/4 cup lukewarm water Ensure your water is just warm to the touch (about 110°F) to activate the yeast effectively.
- 1/4 cup granulated sugar Helps to sweeten the dough and balance flavors.
- 1 packet active dry yeast This is the magic! If you can find instant yeast, it works just as well.
- 1/2 cup whole milk (room temperature) Adds moisture and richness. You can substitute with almond milk for a dairy-free version.
- 1 large egg (room temperature) Binds the dough together for a nice texture.
- 3 1/2 cups all-purpose flour You’ll want a good quality flour. King Arthur is always my go-to for baking.
- 1/2 teaspoon kosher salt Balances the sweetness and enhances flavors.
- 2 tablespoons unsalted butter (softened) This adds a wonderful richness. Let it sit out to reach room temperature for easy mixing.
- vegetable oil for frying vegetable oil Canola oil also works well! Enough to submerge the doughnuts (around 3 inches in a pot).
- confectioners sugar for dusting confectioners sugar A sweet finishing touch that makes everything look and taste irresistible.
Instructions
Preparation
- In a medium bowl, whisk together the lukewarm water, granulated sugar, and yeast. Let it sit for 5 to 10 minutes until foamy—a sign that your yeast is alive and kicking!
- In a stand mixer fitted with a dough hook, add 3 1/2 cups flour and kosher salt. With the mixer on low, slowly pour in the activated yeast mixture along with the softened butter. Mix until just combined.
- Increase the speed to medium and knead for 2 to 3 minutes. You want the dough to be smooth and to pull away from the sides of the bowl.
- Transfer the dough to a large, greased bowl, cover it with a kitchen towel, and let it rise in a warm place until it doubles in size, about 1 to 2 hours.
- Once doubled, roll out the dough into a rectangle about 1/4 to 1/2 inch thick on a floured surface. Cut into 32 squares (or desired shapes).
Cooking
- Heat about 3 inches of vegetable oil in a pot to 360°F. Carefully place 4 to 6 pieces of dough into the hot oil, cooking for 30 seconds to 1 minute on each side until golden brown.
- Use a slotted spoon to transfer the fried doughnuts to a paper towel-lined baking sheet and dust generously with confectioners’ sugar.
- Repeat with the remaining dough, making sure to check that the oil temperature returns to 360°F before each batch.
- If you prefer to bake, preheat oven to 350°F and place the square doughnuts on lined baking sheets. Let them rise for another 45 minutes, brush with milk, and bake for 12-15 minutes until golden.
- For an air fryer alternative, preheat your air fryer to 350°F. Place a single layer of doughnuts in the basket and cook for 2 to 3 minutes until crispy outside. Dust with confectioners' sugar and enjoy them warm!