
Irresistibly Delicious Cotton Candy Cookies: Fun & Colorful Treats You’ll Adore!
When I first laid eyes on the Cotton Candy Cookies Recipe – Fun & Colorful Treats, I couldn’t help but smile. It transports me back to those carefree summer fairs where the sweet smell of candy floss danced in the air, beckoning me toward vibrant stalls. These cookies are not just any cookies; they encapsulate childhood memories, evoking laughter and joy with each colorful bite.
Baking in the kitchen has always been my happy place, a comforting ritual that often involves my family gathered around, eagerly waiting to sample my latest creation. The first time I made these enchanting Cotton Candy Cookies, my kids’ eyes widened in delight at the vibrant hues and whimsical flavors. They were a hit! What sets this recipe apart from others is not just their visual appeal – it’s the delightful combination of fluffy, buttery goodness with a hint of nostalgia from the cotton candy flavor that makes them irresistible.
In this recipe, I’ll take you step-by-step through the process of creating these delightful treats that are sure to become a family favorite. Not only will you learn how to bake them, but you’ll also discover tips to customize your cookies into magical works of edible art. So roll up your sleeves, and let’s dive into the fun world of cotton candy cookies!
What Are Cotton Candy Cookies?
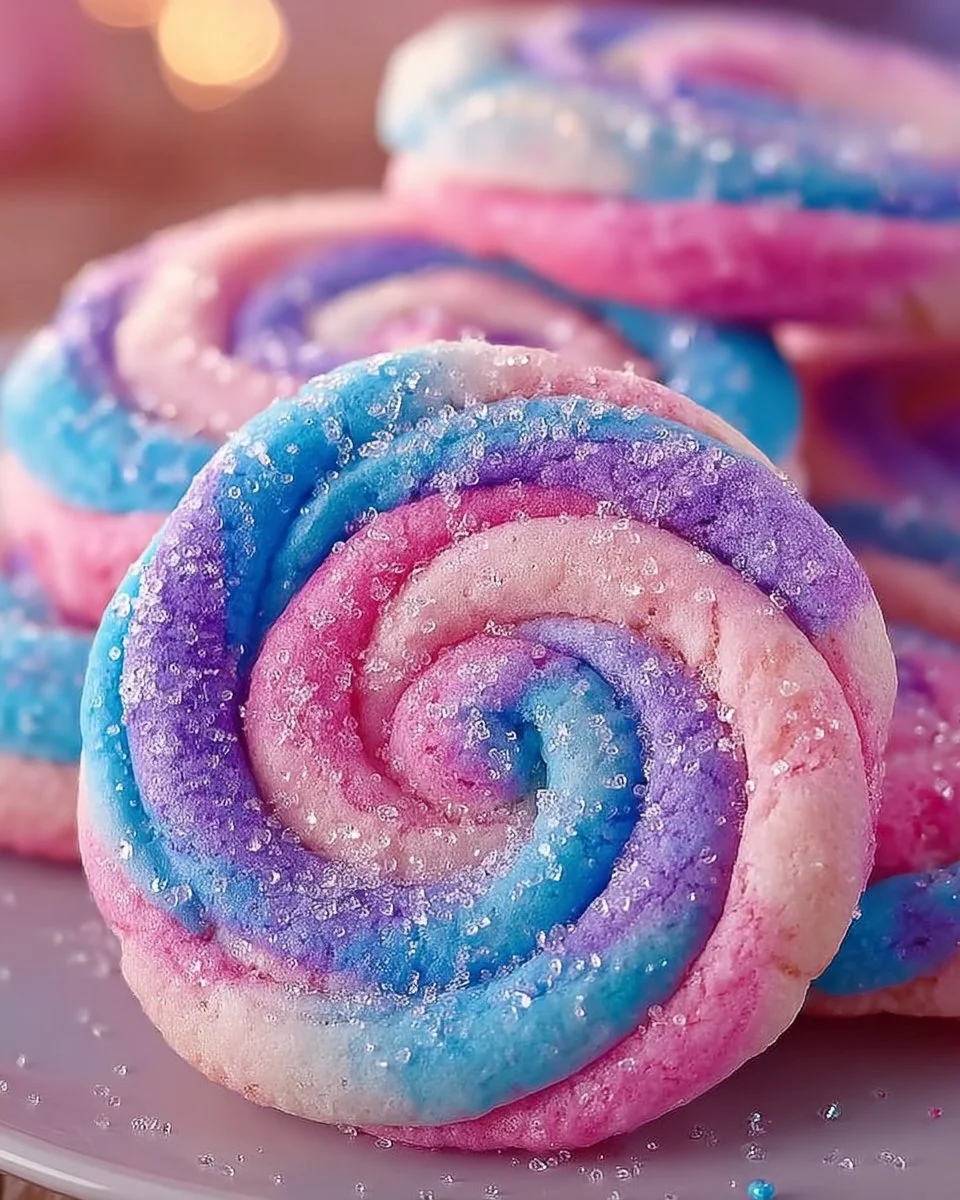
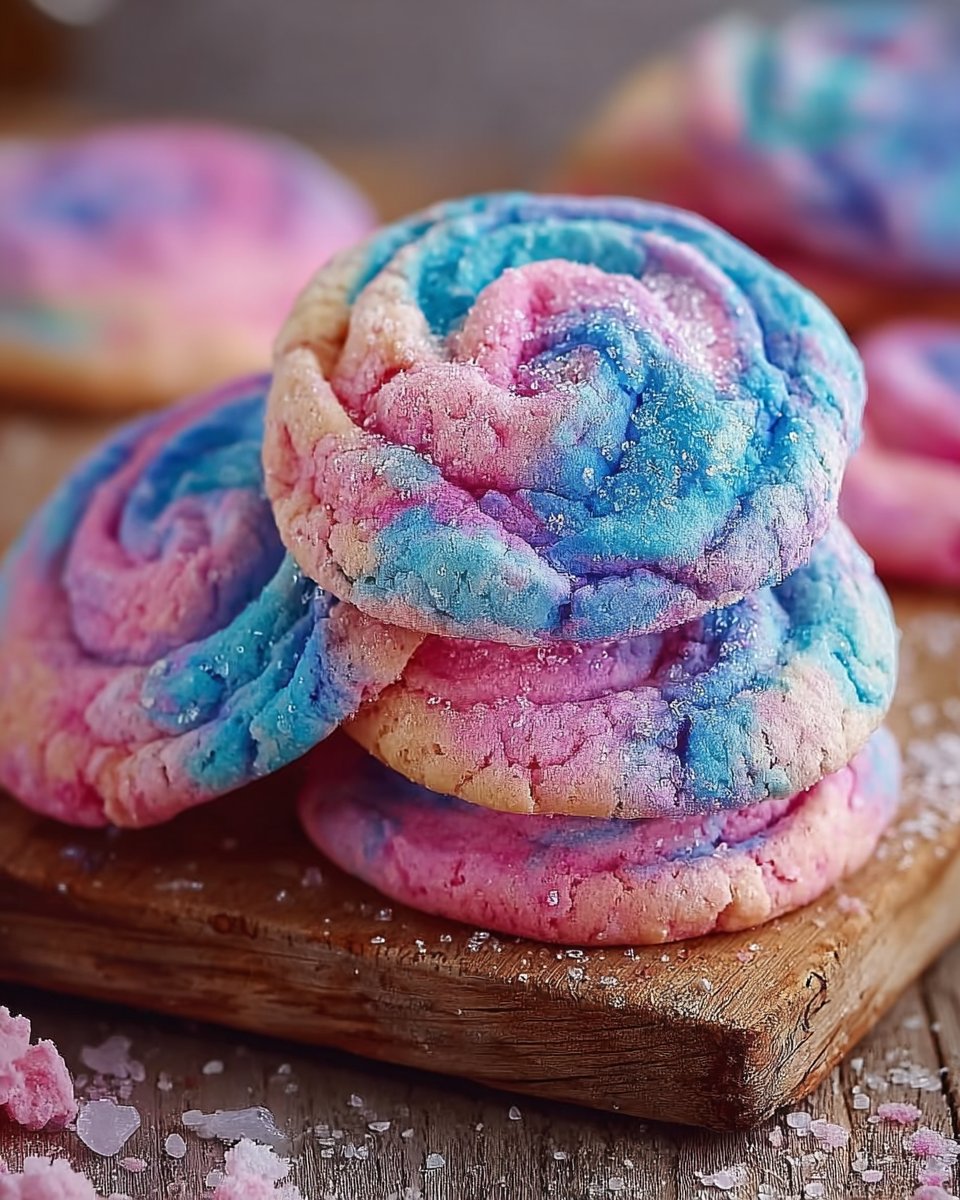
Cotton Candy Cookies are a whimsical blend of soft, chewy cookies reminiscent of the classic fair treat. The origins of the recipe draw inspiration from the vibrant color and sugary flavor of cotton candy, turned into a delightful cookie form. Imagine biting into a cloud-like treat that melts in your mouth, interspersed with bursts of sweetness, all while being cloaked in pretty pastel shades.
What makes these cookies truly unique is the way they blend flavors and visually dazzle. Whether you’re celebrating a birthday, throwing a colorful party, or simply brightening up a mundane day, these cookies are your go-to treat. You’ll want to make them because who wouldn’t want to experience the wonder of classic fair treats in their home?
Why You’ll Love This Recipe
Nostalgic Flavor: Cotton candy is a childhood memory for many, and these cookies capture that delightful flavor, adding a whimsical twist to your dessert table.
Customizable Colors: Feel free to unleash your creativity by using different gel food coloring for various occasions. From pastel pinks and blues for baby showers to vibrant rainbow hues for pride celebrations, the options are endless!
Cost-Effective and Easy to Make: With common pantry staples and a bit of magic, you can whip these up for a fraction of the cost of store-bought cookies, and you won’t need more than simple skills to impress your friends and family.
Quick Preparation and Baking Time: These cookies come together in about 30 minutes, making them a perfect last-minute treat.
Perfect for Any Occasion: These treats can brighten up birthdays, holidays, or even just an ordinary day. You’ll be the hero of any gathering with these colorful delights!
Now, let’s gather our ingredients and get started!
Ingredients
Here’s what you’ll need for your Cotton Candy Cookies Recipe – Fun & Colorful Treats:
- 2 1/2 cups all-purpose flour (for the perfect cookie structure; I recommend King Arthur for reliable results)
- 1 cup granulated sugar (sweetness is key—C&H is a great brand)
- 1/2 teaspoon baking powder (helps with rising)
- 1/4 teaspoon baking soda (aiding in the perfect texture)
- 1/4 teaspoon salt (balancing out the sweetness)
- 1/2 cup unsalted butter, softened (make sure it’s at room temperature for easy creaming; I usually use Land O’Lakes)
- 1/4 cup buttermilk (or substitute with 1/4 cup milk mixed with 1 teaspoon lemon juice or vinegar if needed)
- 1 large egg (always at room temperature for best results)
- 1 teaspoon vanilla extract (get the pure stuff for a rich flavor)
- Gel food coloring (pink and blue) (these colors make the cookies pop!)
- Cotton candy flavoring (optional) (for that extra nostalgic kick; I usually use LorAnn’s cotton candy flavoring)
Prep Notes
- Ensure your butter is soft to the touch; it should be easy to blend with sugar.
- For best flavor, use high-quality ingredients—your taste buds will thank you!
Step-by-Step Instructions
Step 1: Preheat the Oven
Preheat your oven to 350°F (175°C). Your cookies will love you for providing the perfect warm environment to bake perfectly!
Step 2: Mix the Dry Ingredients
In a medium bowl, whisk together the flour, baking powder, baking soda, and salt. This step is crucial to ensure everything is evenly combined.
Step 3: Cream Butter and Sugar
In a large bowl, beat the softened butter and sugar until fluffy (about 2-3 minutes). This will create air bubbles that will give your cookies a lovely texture.
Step 4: Add the Wet Ingredients
Add the egg, buttermilk, and vanilla extract to the creamed mixture. Mix until blended. If you’re using cotton candy flavoring, now’s the time to add that dreamy essence!
Step 5: Combine Dry and Wet Ingredients
Gradually add your dry ingredients to the wet mixture. Don’t overmix—just until you see no more flour streaks.
Step 6: Divide and Color the Dough
Divide the dough into two equal parts. In one half, add a few drops of blue gel food coloring, and in the other half, add pink. Knead each until the color is evenly spread.
Step 7: Form the Cotton Candy Cookies
Using your hands (or a cookie scoop), take small pieces of each colored dough and create swirls. Place on a baking sheet lined with parchment paper, spaced about two inches apart.
Step 8: Bake
Bake for 10-12 minutes or until the edges are lightly golden. The centers might look a little underbaked—that’s okay! They’ll firm up as they cool.
Step 9: Cool and Serve
Let your cookies cool on the baking sheet for 5 minutes, then transfer them to a wire rack to cool completely. This cooling step is where the magic happens—the flavors marry wonderfully!

Expert Tips & Tricks
Storage Recommendations: These cookies can be stored in an airtight container for up to 5 days at room temperature. If you want them to last longer, freeze them—thaw at room temperature when you’re ready to enjoy!
Make-Ahead Instructions: You can prepare the dough a day in advance—just wrap it tightly and store it in the fridge.
Troubleshooting: If your cookies spread too much, try chilling the dough for 30 minutes before baking.
Flavor Variations: Not a cotton candy fan? Experiment with different flavorings like bubblegum or vanilla!
Presentation Ideas: Serve on a vibrant plate, maybe dust with a little powdered sugar for an extra touch.
Texture Check: The cookies should be soft to the touch but firm around the edges when you take them out of the oven.
Serving Suggestions
These Cotton Candy Cookies pair wonderfully with a glass of milk or a scoop of vanilla ice cream. You might also consider presenting them alongside colorful sprinkles or whipped cream to enhance their whimsical nature. Perfect for birthday parties or as a fun summertime treat!
Variations & Substitutions
- Flavor Combinations: Try infusing the dough with different extracts such as strawberry, bubblegum, or even coconut to create a new flavor profile.
- Dietary Restrictions: You can substitute the all-purpose flour for gluten-free flour or use a flax egg in place of the egg for a vegan option.
- Seasonal Variations: For a holiday twist, consider adding festive colored candy sprinkles or swap the food colors to match the seasons—greens and reds for Christmas, pastel yellows and greens for Easter.
Nutrition & Storage Info
- Prep Time: 15 minutes
- Cook Time: 12 minutes
- Total Time: 27 minutes
- Yield: About 24 cookies
- Estimated Calories per Serving: 120 calories
- Storage Instructions: Store in an airtight container at room temp for 5 days; you can freeze for up to 3 months.
FAQ Section
Can I use different flavors instead of cotton candy?
Absolutely! You can easily substitute with other extracts like bubblegum, vanilla, or lemon for an exciting twist.How should I store leftover cookies?
Keep them stored in an airtight container at room temperature or you can freeze them for longer storage.What if I don’t have gel food coloring?
Liquid food coloring works, but it may alter the cookie’s texture slightly. Also, be mindful to not over-add it!Can I make these cookies vegan?
Yes! Substitute the egg with a flax egg (1 tablespoon ground flaxseed + 2.5 tablespoons water), and use a non-dairy butter alternative.Can I make the dough ahead of time?
Certainly! Just wrap the dough tightly in plastic wrap and refrigerate it. You can bake it as needed!What can I serve with these cookies?
They pair wonderfully with milk, vanilla ice cream, or even a fruit sorbet on the side.Can I add mix-ins like chocolate chips?
Yes! You can fold in mini chocolate chips or colorful sprinkles before forming the cookies.What do I do if my cookies come out flat?
If cookies spread too much, you might want to chill the dough before baking, or you may need to double-check your measurement ratios.How long can these cookies sit out?
If properly stored in an airtight container, they can last about 5 days at room temperature.What toppings does this cookie recipe work with?
You can top the cookies with icing or drizzle melted chocolate if you’re feeling adventurous!
Conclusion
These Cotton Candy Cookies Recipe – Fun & Colorful Treats are not just a delightful treat; they hold a hint of nostalgia and a promise of joy wrapped in vibrant colors. I’m so excited for you to try this recipe and make it your own. I encourage you to experiment with flavors, colors, and memories as you bake these whimsical cookies. Don’t forget to drop a comment below to let me know how your cookies turned out, or share your thoughts about any variations you tried! And if you’re looking for more fun recipes, check out my blog for similar delightful desserts. Happy Baking!
Cotton Candy Cookies
Ingredients
Dry Ingredients
- 2 1/2 cups all-purpose flour King Arthur recommended for reliable results
- 1 cup granulated sugar C&H is a great brand for sweetness
- 1/2 teaspoon baking powder Helps with rising
- 1/4 teaspoon baking soda Aiding in the perfect texture
- 1/4 teaspoon salt Balances out the sweetness
Wet Ingredients
- 1/2 cup unsalted butter, softened Ensure it's at room temperature for easy creaming; usually use Land O'Lakes
- 1/4 cup buttermilk Can substitute with 1/4 cup milk mixed with 1 teaspoon lemon juice or vinegar
- 1 large egg Always at room temperature for best results
- 1 teaspoon vanilla extract Use pure for rich flavor
Coloring and Flavoring
- as needed Gel food coloring (pink and blue) These colors make the cookies pop!
- as needed Cotton candy flavoring (optional) For that extra nostalgic kick; usually use LorAnn’s flavoring
Instructions
Preparation
- Preheat your oven to 350°F (175°C).
- In a medium bowl, whisk together the flour, baking powder, baking soda, and salt.
- In a large bowl, beat the softened butter and sugar until fluffy, about 2-3 minutes.
- Add the egg, buttermilk, and vanilla extract to the creamed mixture and mix until blended.
- Gradually add your dry ingredients to the wet mixture until just combined.
- Divide the dough into two equal parts, adding blue gel food coloring to one half and pink to the other, kneading until evenly colored.
Baking
- Using your hands or a cookie scoop, create swirls from both colored doughs and place on a lined baking sheet, spaced about two inches apart.
- Bake for 10-12 minutes or until the edges are lightly golden. Centers may look underbaked.
- Let cookies cool on the baking sheet for 5 minutes, then transfer to a wire rack to cool completely.