

Irresistibly Delicious Christmas Red Velvet Cheesecake: The Ultimate Holiday Dessert
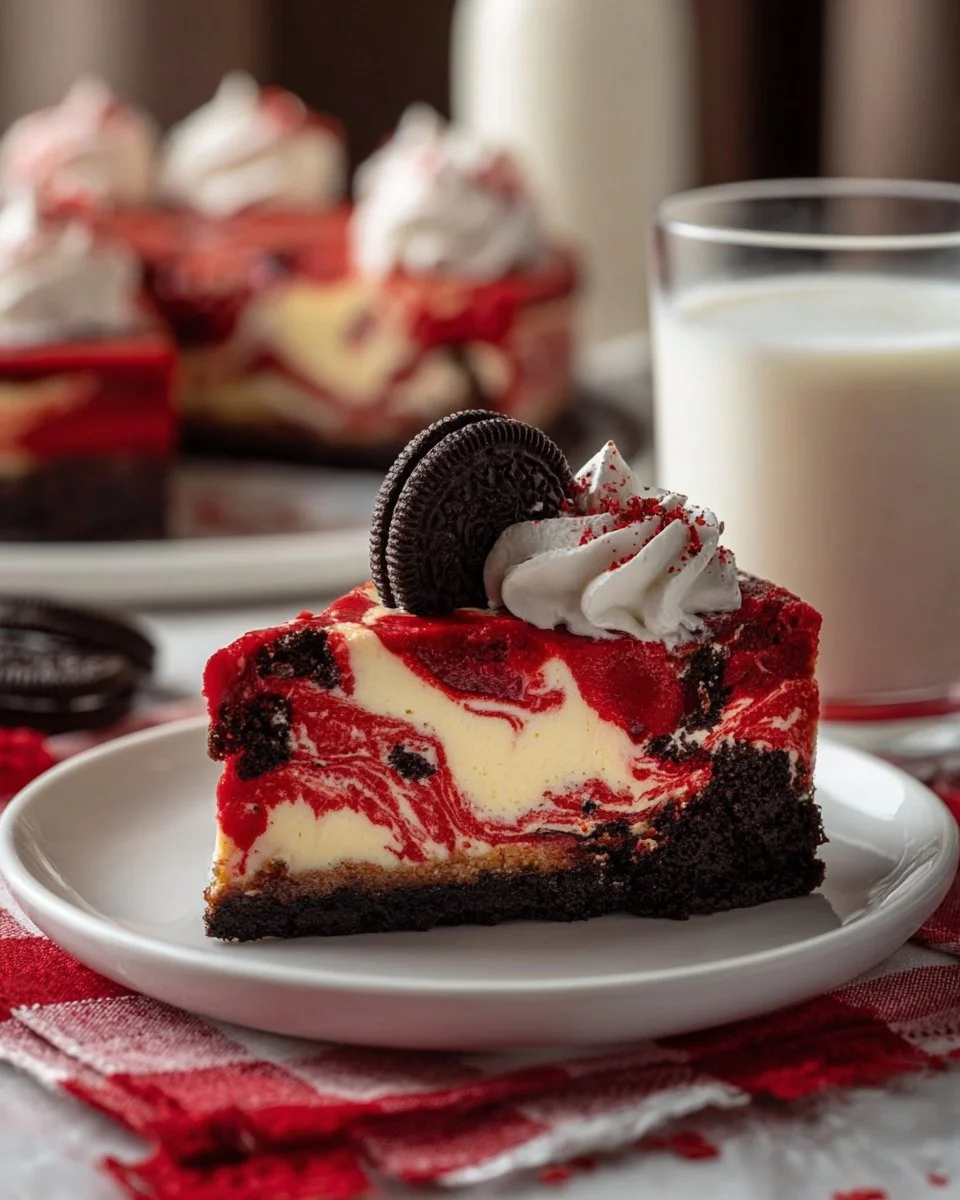
Ah, Christmas! That magical time of the year when the air is scented with fresh pine, twinkling lights adorn every corner, and kitchens become hubs of delicious creations. Every holiday season, my family would gather around as I baked my now-famous Christmas Red Velvet Cheesecake. The vibrant ruby hue and creamy texture never fail to coax smiles, fond memories, and heartwarming conversations. It’s not just a dessert; it’s a slice of our family tradition.
What makes this cheesecake special is the balance of rich flavors, the nostalgia attached to it, and the festive spirit it embodies. This isn’t just another red velvet cake masquerading as cheesecake; this delightful treat features a decadent Oreo crust, a fluffy cream cheese filling, and just the right amount of cocoa to complement the red velvet essence. Unlike store-bought desserts, my version is made from scratch with love, ensuring it brings warmth and joy right to your holiday table.
By the end of this post, not only will you learn how to master this show-stopping Christmas Red Velvet Cheesecake, but you’ll also discover tips and tricks that will make baking it a breeze. Let’s make this holiday season uniquely delicious!
What Are Christmas Red Velvet Cheesecakes?
The Christmas Red Velvet Cheesecake is a delightful fusion of two beloved desserts: classic red velvet cake and creamy cheesecake. Its roots trace back to the Southern United States, where red velvet cake became a popular delicacy, renowned for its stunning color and rich flavor. The cake’s unique taste is complemented perfectly by a velvety cream cheese filling, creating an indulgent layer of creamy happiness that’s hard to resist.
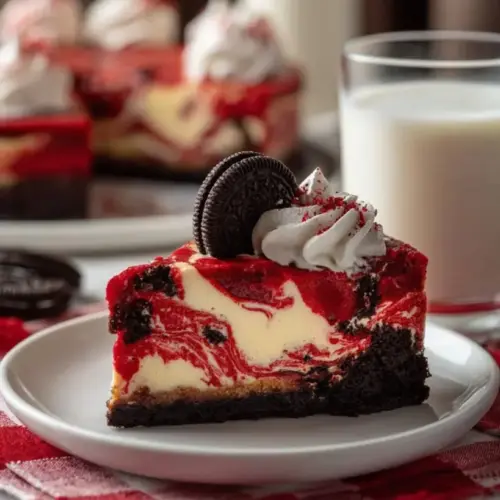
The decadent red velvet cheesecake is uniquely characterized by its smooth, rich texture that melts in your mouth, and the subtle hint of cocoa flavor that’s both comforting and festive. When served with festive garnishes like mini Oreos and bright Christmas sprinkles, it also becomes a stunning centerpiece for any holiday dessert table. This cheesecake is perfect for holiday gatherings, Christmas parties, or simply to enjoy with loved ones during cozy winter nights.
Why You’ll Love This Recipe
Irresistible Flavor and Texture: The rich cream cheese base meets the moist, tender red velvet for a combination that is ultimately satisfying. Each slice feels like a warm hug on a cold winter evening.
Cost-Effective: Making your Christmas Red Velvet Cheesecake at home is not only more affordable than its store-bought counterparts, but you also have full control over the quality of ingredients. Using top-notch cream cheese and real cocoa makes a world of difference!
Customizable: You can swap in your favorite seasonal flavors or even experiment with the decorations! Want to incorporate peppermint or use holiday-themed sprinkles? Go for it! This cheesecake is a perfect canvas for creativity.
Fairly Easy to Make: While it sounds fancy, I assure you this cheesecake isn’t as intimidating as it seems. With straightforward steps and some patience, you’ll impress your family, friends, and maybe even yourself!
Memories in the Making: Beyond just flavor and aesthetics, this cheesecake recipe is a chance to create unforgettable memories with your loved ones. Picture this: laughter ringing in the air, the smell of baked goodness wafting through the house, and everyone’s eager anticipation as you bring out this festive delight.
Ingredients Section
To create your Christmas Red Velvet Cheesecake, you’ll need the following ingredients, all arranged by order of use:
For the Oreo Crust:
- 24 Oreo cookies (about 2 cups crumbs)
- ⅓ cup butter, melted (I usually stick with Land O’Lakes for its rich flavor)
For the Cheesecake Filling:
- 4 (8-ounce) blocks of cream cheese, softened to room temperature (Philadelphia is my go-to!)
- ½ cup white sugar
- 2 cups heavy whipping cream
- 1 teaspoon vanilla extract
- 2 tablespoons cocoa powder
- Red food coloring (as needed for desired shade)
- ¼ cup Christmas sprinkles (for the filling)
For Decoration:
- Whipped cream (store-bought or homemade)
- Mini Oreos (for garnish)
- Extra Christmas sprinkles (for garnish)
Prep Notes: Make sure your cream cheese is at room temperature to achieve that smooth filling. I find letting it sit out for about an hour works best. If you’re in a pinch, you can microwave the cream cheese in 10-second increments, but keep an eye on it to avoid melting.
Step-by-Step Instructions
{‘@type’: ‘HowToStep’, ‘name’: ‘Prepare Pan & Oven’, ‘text’: ‘Preheat oven to 350°F (175°C). Wrap a 9-inch springform pan tightly with heavy-duty aluminum foil to prevent water seepage.’}
- Start by preheating your oven to 350°F (175°C).
- Wrap your 9-inch springform pan tightly with heavy-duty aluminum foil. This step is crucial for preventing pesky water from ruining your cheesecake during the bake.
{‘@type’: ‘HowToStep’, ‘name’: ‘Make the Red Velvet Crust’, ‘text’: ‘Crush Oreo cookies finely. In a bowl, combine crumbs with melted butter and 2 tablespoons of white sugar. Press mixture firmly into the bottom of the prepared springform pan. Bake for 8-10 minutes. Cool completely on a wire rack.’}
- Crush the Oreo cookies in a food processor or place them in a sealed bag and crush using a rolling pin until they form fine crumbs.
- In a mixing bowl, combine the crumbs with ⅓ cup melted butter and 2 tablespoons of white sugar. Mix well until it resembles wet sand.
- Press the mixture firmly into the bottom of your prepared pan.
- Bake the crust for 8-10 minutes. The aroma of freshly baked Oreos will fill your kitchen—trust me, it’s heaven. Let it cool completely on a wire rack.
{‘@type’: ‘HowToStep’, ‘name’: ‘Prepare Cheesecake Filling’, ‘text’: ‘In a mixer, beat softened cream cheese until smooth. Gradually add ½ cup white sugar, mixing until just combined. Stir in vanilla extract, cocoa powder, and red food coloring until evenly vibrant. In a separate bowl, whip 1 cup of the heavy whipping cream until soft peaks form. Gently fold the whipped cream into the cream cheese mixture until just combined. Fold in ¼ cup Christmas sprinkles. Pour filling over the cooled crust.’}
- In a large mixer, beat the 4 blocks of softened cream cheese until smooth and creamy.
- Gradually add ½ cup of white sugar, mixing until just combined. It’s tempting to overmix here, but we want a smooth texture without incorporating too much air.
- Stir in 1 teaspoon of vanilla extract, 2 tablespoons of cocoa powder, and add red food coloring until you achieve that brilliant red hue you desire.
- In a separate bowl, whip 1 cup of heavy whipping cream until soft peaks form. Gently fold this whipped cream into your cream cheese mixture until just combined.
- Finally, fold in the ¼ cup Christmas sprinkles—a festive touch that’s hard to resist.
- Pour this filling over your cooled Oreo crust.
{‘@type’: ‘HowToStep’, ‘name’: ‘Bake the Cheesecake’, ‘text’: "Reduce oven temperature to 325°F (160°C). Place the foil-wrapped springform pan into a larger roasting pan. Carefully pour hot water into the roasting pan, reaching halfway up the springform pan’s sides. Bake for 1 hour to 1 hour and 15 minutes, or until edges are set but the center still jiggles slightly."}
- Reduce the oven temperature to 325°F (160°C).
- Place your foil-wrapped springform pan inside a larger roasting pan.
- Carefully pour hot water into the roasting pan, making sure it reaches halfway up the sides of the springform pan. This water bath method is key to achieving that perfectly moist cheesecake.
- Now, it’s time to bake! Expect it to take between 1 hour and 1 hour 15 minutes. You want the edges to be set, but that center should still jiggle slightly—don’t worry, it will set as it cools.
{‘@type’: ‘HowToStep’, ‘name’: ‘Cool & Chill’, ‘text’: ‘Turn off the oven, leave the cheesecake inside with the door ajar for 1 hour. Remove from oven and water bath; cool completely on a wire rack for 2-3 hours. Run a knife around the edge to loosen, then cover loosely and refrigerate for at least 6-8 hours, preferably overnight, until firm.’}
- Once baked, turn off the oven and leave the cheesecake inside with the door slightly ajar for 1 hour. This helps prevent cracks.
- After an hour, remove the cheesecake from the oven and the water bath, allowing it to cool completely on a wire rack for 2-3 hours.
- Run a knife around the edge to loosen any potential sticking. Cover it loosely with plastic wrap and refrigerate for at least 6-8 hours, but I recommend letting it chill overnight—this gives the flavors a chance to meld beautifully!
{‘@type’: ‘HowToStep’, ‘name’: ‘Decorate & Serve’, ‘text’: ‘Remove springform pan sides. Top cheesecake with whipped cream. Garnish with mini Oreos and extra Christmas sprinkles. For clean slices, use a sharp, hot knife wiped clean between cuts. Store leftovers in the refrigerator.’}
- Once fully chilled, carefully remove the sides of the springform pan.
- Top the cheesecake with a generous swirl of whipped cream, then garnish with mini Oreos and sprinkle any leftover Christmas sprinkles on top for an extra festive touch.
- For clean slices, use a sharp knife dipped in hot water and wiped clean between cuts—this little trick prevents any messy edges.
Expert Tips & Tricks
Room Temperature Ingredients: For the best results, ensure your cream cheese and heavy cream are at room temperature. This promotes an even, smooth texture without lumps.
Avoid Overmixing: While mixing your cheesecake filling, be gentle—overmixing can incorporate too much air into the batter, leading to cracks post-baking.
Water Bath Technique: If you’re hesitant about using a water bath, an alternative is to bake the cheesecake at a lower temperature for a longer period, but I highly recommend the water bath for its consistent results.
Storage Tips: After the cheesecake has set, it can be stored in the refrigerator for up to 4-5 days. If you plan to freeze it, wrap it tightly in plastic wrap, followed by aluminum foil; it can be frozen for up to 2 months.
Make Ahead: This cheesecake is ideal for making ahead of time, allowing the flavors to deepen as it chills overnight before serving. It’s a true time-saver during the holiday rush!
Troubleshooting Cracks: If your cheesecake cracks, don’t fret! Cover it with whipped cream or a luscious ganache—no one will notice after that!
Serving Suggestions
To create an unforgettable dessert experience, serve your Christmas Red Velvet Cheesecake with a side of homemade peppermint hot chocolate or spiced apple cider. For presentation, consider placing the cheesecake on a festive cake stand adorned with twinkling lights, or serve individual slices on cute holiday-themed plates for a personal touch.
This cheesecake is fabulous for holiday gatherings, Christmas dinner, or even as a sweet surprise for a cozy night in with loved ones.
Variations & Substitutions
Different Flavor Combinations: Want to jazz it up? Try adding a layer of peppermint extract or even a hint of espresso powder to the cream cheese mixture for a mocha twist!
Dietary Restrictions: For a gluten-free version, simply opt for gluten-free Oreos. You can also use dairy-free cream cheese substitutions and coconut cream to make it vegan.
Seasonal Variations: As the seasons change, why not switch it up? Substitute festive decorations like crushed candy canes for a minty flair in December, or top it with fresh berries in the summer for a gorgeous touch.
Nutrition & Storage Info
- Prep Time: 30 minutes
- Cook Time: 1 hour 15 minutes
- Total Time: 8 hours (including chilling)
- Yield: 12 servings
- Estimated calories per serving: Approximately 400 calories (varies based on specific ingredients used).
Storage Instructions: Store leftovers in the refrigerator, covered tightly, for up to 5 days or freeze for up to 2 months. For the best taste, consume cold or at room temperature.
FAQ Section
Can I use a different crust?
Absolutely! While Oreo cookies create the perfect chocolatey foundation, feel free to swap them for graham crackers or even a nut crust for a gluten-free option.How do I know when my cheesecake is done?
It’s done when the edges are set, and the center still jiggles slightly. It will continue to firm up while cooling.What if my cheesecake cracked during baking?
Don’t worry! Aesthetic imperfections can be covered up by whipped cream or decorations, making it look even more festive.Can I make this cheesecake ahead of time?
Yes! This cheesecake is best made the day before serving, allowing the flavors to meld and the texture to set beautifully.What can I use instead of heavy whipping cream?
If you’re looking for a lighter option, you might try using whipped topping or whipped coconut cream, though the texture may vary slightly.Can I add more cocoa powder for a richer chocolate flavor?
You sure can! Just remember that a little goes a long way; start with an extra tablespoon and adjust to your preference.What’s the best way to slice a cheesecake?
For clean cuts, use a hot knife. Dip it in hot water, wipe it dry to remove moisture, and slice through your cheesecake.How do I store leftovers?
Wrap any leftover cheesecake in plastic wrap and store it in the refrigerator for up to 5 days, or freeze for up to 2 months.Does this cheesecake need to be covered while refrigerating?
Yes! Cover it with plastic wrap or foil to ensure it doesn’t absorb other odors in your fridge.Can I freeze this cheesecake?
Definitely! Just be sure to wrap it tightly in plastic wrap and aluminum foil. Thaw it overnight in the refrigerator before serving.
Conclusion
Your journey to creating the ultimate Christmas Red Velvet Cheesecake is not just about baking; it’s about creating lasting memories and delicious moments with those you cherish. This recipe embodies the spirit of the holiday season and is bound to win hearts (and taste buds) at your gathered festivities.
I can’t wait to hear how your version turns out! Feel free to drop a comment below or share your experience. And if you’re on the hunt for more delightful holiday recipes, be sure to check out my blog for a treasure trove of festive goodies that will make this season even sweeter.

Christmas Red Velvet Cheesecake
Ingredients
For the Oreo Crust
- 24 cookies Oreo cookies About 2 cups crumbs
- ⅓ cup butter, melted Recommended: Land O'Lakes for its rich flavor.
For the Cheesecake Filling
- 4 blocks cream cheese, softened to room temperature Recommended: Philadelphia.
- ½ cup white sugar
- 2 cups heavy whipping cream
- 1 teaspoon vanilla extract
- 2 tablespoons cocoa powder
- to taste red food coloring As needed for desired shade.
- ¼ cup Christmas sprinkles For the filling.
For Decoration
- to taste whipped cream Store-bought or homemade.
- to taste mini Oreos For garnish.
- to taste extra Christmas sprinkles For garnish.
Instructions
Preparation
- Preheat oven to 350°F (175°C). Wrap a 9-inch springform pan tightly with heavy-duty aluminum foil to prevent water seepage.
Make the Red Velvet Crust
- Crush Oreo cookies finely. In a bowl, combine crumbs with melted butter and 2 tablespoons of white sugar. Press mixture firmly into the bottom of the prepared springform pan. Bake for 8-10 minutes. Cool completely on a wire rack.
Prepare Cheesecake Filling
- In a mixer, beat softened cream cheese until smooth. Gradually add ½ cup white sugar, mixing until just combined. Stir in vanilla extract, cocoa powder, and red food coloring until evenly vibrant. In a separate bowl, whip 1 cup of the heavy whipping cream until soft peaks form. Gently fold the whipped cream into the cream cheese mixture until just combined. Fold in ¼ cup Christmas sprinkles. Pour filling over the cooled crust.
Bake the Cheesecake
- Reduce oven temperature to 325°F (160°C). Place the foil-wrapped springform pan into a larger roasting pan. Carefully pour hot water into the roasting pan, reaching halfway up the springform pan's sides. Bake for 1 hour to 1 hour and 15 minutes, or until edges are set but the center still jiggles slightly.
Cool & Chill
- Turn off the oven, leave the cheesecake inside with the door ajar for 1 hour. Remove from oven and water bath; cool completely on a wire rack for 2-3 hours. Run a knife around the edge to loosen, then cover loosely and refrigerate for at least 6-8 hours, preferably overnight, until firm.
Decorate & Serve
- Remove springform pan sides. Top cheesecake with whipped cream. Garnish with mini Oreos and extra Christmas sprinkles. For clean slices, use a sharp, hot knife wiped clean between cuts. Store leftovers in the refrigerator.