
Irresistibly Creamy Banana Pudding Cheesecake: A Nostalgic Delight
I still remember those sweltering southern summers spent at my grandmother’s house, where the air was heavy with the sweet aroma of ripe bananas. Among everyone’s favorite desserts was her legendary Banana Pudding—a charming dish that always had us coming back for more. But one day, she decided to take it up a notch and introduce us to an unexpected twist: Banana Pudding Cheesecake. My heart skipped a beat as I watched her skillfully layer thick, creamy cheesecake with the beloved flavors of banana pudding.
What makes this Banana Pudding Cheesecake so special? It’s that perfect balance of rich creaminess from the cheesecake, the soft texture of ripe bananas, and the crunch of Nilla wafers—every bite feels like an embrace from a warm memory. Unlike store-bought renditions, this homemade version allows you to control the sweetness and make it even more delicious, tailored just for your palate.
In today’s recipe, I’ll guide you step-by-step on how to recreate this soul-soothing dessert that’s sure to spark nostalgia and create new cherished memories around the family table. So roll up your sleeves, and let’s dive into baking magic!
What Are Banana Pudding Cheesecakes?
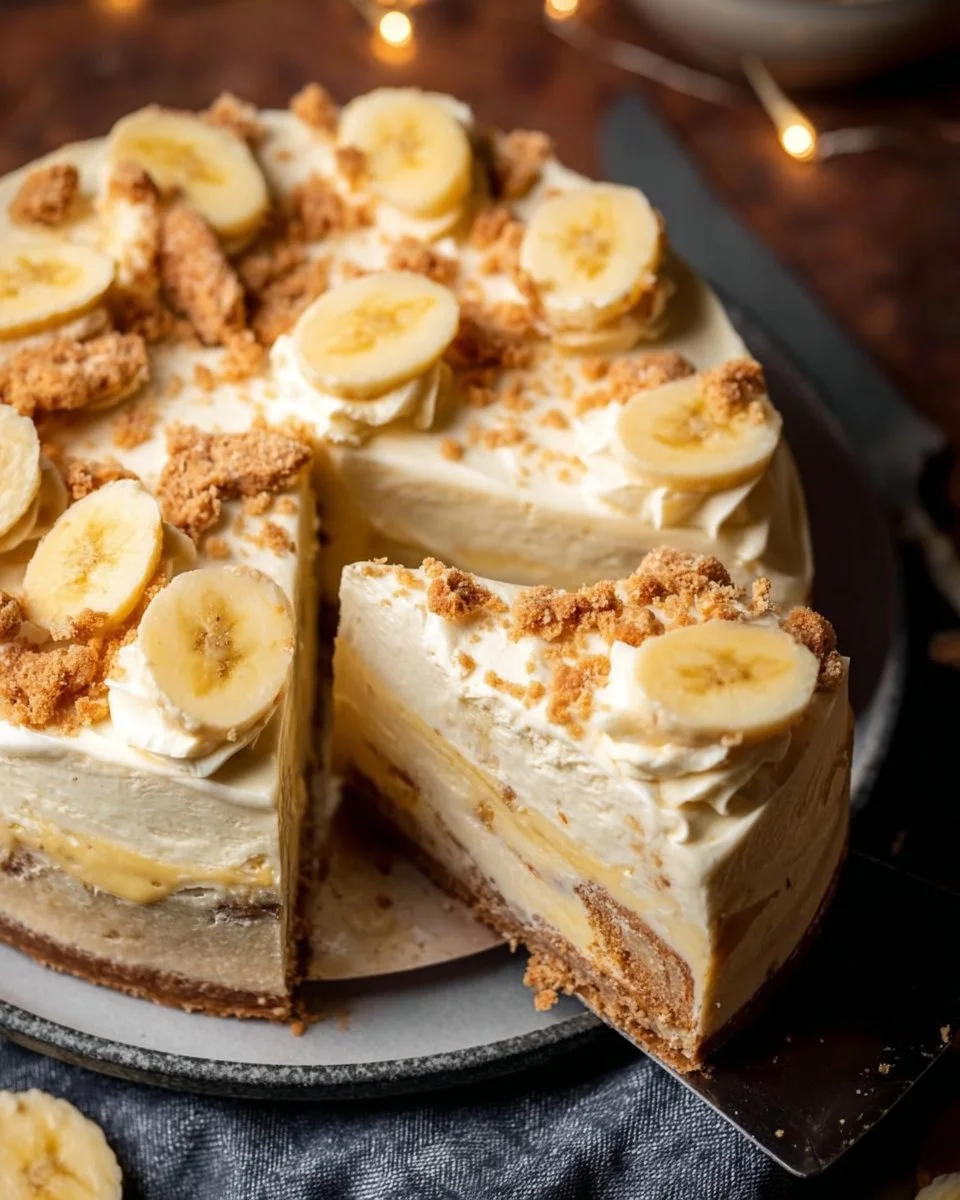
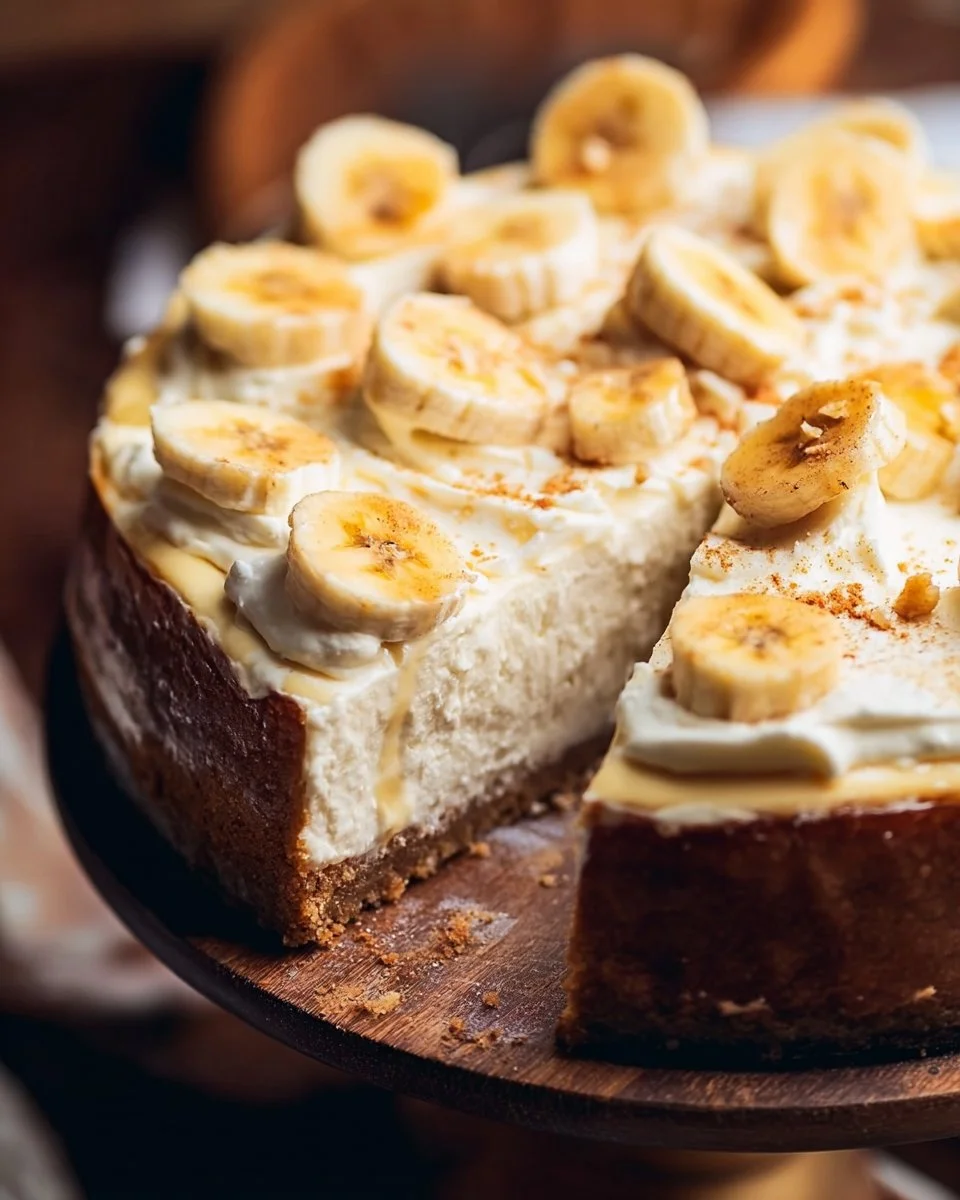
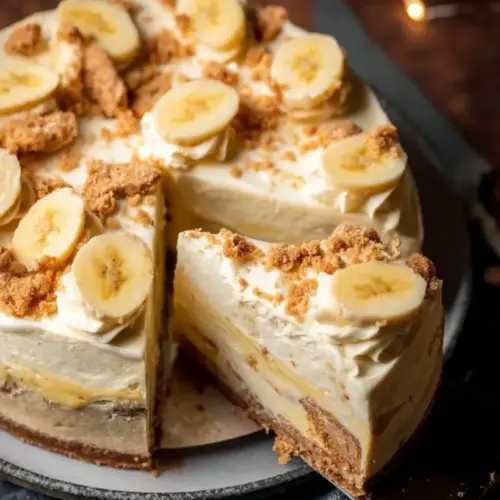
The union of banana pudding and cheesecake is a celebration of comfort food, and it’s a delightful twist rooted in Southern tradition. At its core, Banana Pudding Cheesecake offers a creamy, velvety filling infused with fresh banana slices, layered lovingly atop a buttery Nilla wafer crust. The delightful contrast of textures—the smoothness of the cream cheese, the soft bananas, and the crisp crust—creates a flavor experience that consistently wins hearts.
You might find Banana Pudding Cheesecakes gracing dessert tables during family gatherings, summer picnics, or holiday celebrations. They stand out from regular cheesecakes thanks to their nostalgic flavor profile, evoking a sense of home and happiness. Whether you’re new to baking or a seasoned pro, this dish is not just a recipe; it’s a way of connecting with your loved ones.
Why You’ll Love This Recipe
Decadent Flavor: This isn’t just any dessert; it’s a luscious fusion of two classics. The banana-infused cheesecake layer adds a surprising twist to a familiar favorite.
Cost-Effective: Ditching the expensive store-bought versions, you can create this masterpiece for a fraction of the price, leaving your wallet happy and your taste buds satisfied!
Customizable: Want a touch of chocolate? You can easily fold in some chocolate chips or sprinkle cocoa powder for a tasty variation.
Beginner-Friendly: If you’re nervous about baking cheesecakes, fear not! This recipe is straightforward and rewarding, making it accessible for bakers of all skill levels.
Make-Ahead Magic: This cheesecake is the perfect make-ahead dessert. It actually tastes better after a night in the refrigerator, allowing flavors to meld beautifully.
By making this Banana Pudding Cheesecake, you’ll create a dessert that not only impresses guests but also fills your heart with the warmth of family traditions.
Ingredients Section
Essentials:
- 2 cups Nilla wafers (I recommend Nabisco for the classic flavor)
- 4 tablespoons unsalted butter, melted
- 16 oz cream cheese, softened (use full-fat for a creamier texture)
- 1 cup granulated sugar
- 1 cup sour cream (add a touch of tang)
- 1 teaspoon vanilla extract (pure vanilla for the best flavor)
- 3 ripe bananas, sliced (make sure they’re spotty for maximum sweetness)
- 2 cups whipped cream (I prefer homemade for fresh flavors, but you can use store-bought)
- 1 package vanilla pudding mix (instant works best for texture)
- 2 cups milk (whole milk will give a richer taste)
Prep Notes:
- Make sure your cream cheese and butter are at room temperature; this ensures a smooth mixture.
- Crush Nilla wafers in a zip-top bag with a rolling pin for a stress-relief activity!
Step-by-Step Instructions
Preheat the oven to 350°F (175°C). Preheating is crucial for even baking, so don’t skip this step!
Prepare the crust: Crush the Nilla wafers in a food processor or a zip-top bag. Pour in the melted butter and mix until the crumbs are well-coated. Press this mixture firmly into the bottom of a springform pan to create a solid crust. You’ll want it compact for a sturdy base.
Cream cheese layer: In a mixing bowl, beat the softened cream cheese and granulated sugar together until smooth and creamy, about 3-5 minutes. You should see no lumps!
Add the sour cream and vanilla: Mix in the sour cream and vanilla extract until everything is superbly combined. The mixture should be velvety.
Incorporate the bananas: Gently fold in the sliced ripe bananas. The goal is to keep those lovely banana pieces intact for enjoyable bites.
Spread: Carefully pour and spread the cream cheese mixture over the prepared crust, smoothing out the top.
Pudding layer: In a separate bowl, whisk the vanilla pudding mix and milk together until thickened (about 2 minutes of mixing). Pour this creamy goodness over the cheesecake layer.
Topping it off: Generously spread the whipped cream over the vanilla pudding layer. Feel free to get artistic here!
Garnish: Top with additional sliced bananas for an extra pop of color and flavor.
Chill: Refrigerate for at least 4 hours, or ideally overnight, to let the flavors meld into pure deliciousness.
Chef’s Tips:
- Avoid overmixing the cream cheese to prevent cracks.
- For a perfectly set cheesecake, don’t skip the chilling time!
Expert Tips & Tricks
Storage recommendations: Cover your cheesecake tightly with plastic wrap in the fridge. It can last up to 5 days! For longer storage, freeze it for up to 2 months, but omit the whipped cream topping before freezing.
Make-ahead instructions: This cheesecake is even better the next day! Make it the night before, and you’ll thank yourself when it’s time to serve.
Troubleshooting: If your cheesecake cracks during baking, you’ve either overmixed or baked it too long. Bake just until the edges are set—the center will be slightly jiggly.
Creamy texture shaping: If you want an extra creamy cheesecake, incorporate a tablespoon of cornstarch to help stabilize the mixture.
Flavor boost: A sprinkle of cinnamon or nutmeg in the banana layer can elevate the flavors.
Serving Suggestions
Serve your Banana Pudding Cheesecake with additional whipped cream on the side, a drizzle of caramel sauce, or a sprinkle of crushed Nilla wafers for that perfect crunch. This dessert is perfect for summer BBQs, family reunions, or cozy winter gatherings where warmth and sweetness are needed.
Variations & Substitutions
- Different flavor combinations: Swap bananas for strawberries or mixed berries for a summer twist! A delightful strawberry pudding layer would be heavenly!
- Dietary restrictions: For a lactose-free version, use dairy-free cream cheese and sour cream alternatives.
- Seasonal variations: Pumpkin spice can be incorporated into the filling during fall for a holiday twist!
Nutrition & Storage Info
- Prep time: 30 minutes
- Cook time: 0 minutes (assuming no baking!)
- Chilling time: 4 hours
- Total time: Approximately 4 hours and 30 minutes
- Yield: 12 servings
- Estimated calories: Approximately 350 calories per serving
- Storage: Refrigerate the cheesecake for up to 5 days. It can be frozen for up to 2 months, but remember to omit any toppings before freezing.
FAQ Section
Can I use other kinds of cookies for the crust?
- Certainly! While Nilla wafers are traditional, graham crackers or digestive biscuits can add a different flavor.
How do I know when the cheesecake is done?
- Look for set edges and a slightly jiggly center. It will firm up as it chills.
Can I use fresh whipped cream instead of cool whip?
- Absolutely! Homemade whipped cream adds a fresher taste and better texture.
Is it necessary to use sour cream?
- While it enhances creaminess and flavor, you can substitute with Greek yogurt if you prefer.
Why did my cheesecake crack?
- Overmixing or baking at too high a temperature can cause cracks. A water bath can help create a gentle baking environment.
How should I cut the cheesecake?
- For clean slices, dip your knife in hot water, then dry it before cutting. This helps prevent sticking!
Can I make this gluten-free?
- Yes! Use gluten-free cookies for your crust and ensure other ingredients are gluten-free.
How long does banana pudding cheesecake last?
- In the refrigerator, it should last about 5 days; in the freezer, it can be kept for 2 months.
What can I substitute for the vanilla pudding mix?
- You can create a homemade pudding mix using cornstarch, sugar, and vanilla essence.
Can I make these as individual servings?
- Yes! You can use muffin tins to create individual cheesecakes, adjusting the baking time accordingly.
Conclusion
This Banana Pudding Cheesecake is more than just a dessert; it’s a sweet slice of nostalgia that brings comfort and joy to any table. Whether it’s a sun-soaked gathering with friends or a cozy family dinner, this recipe is bound to bring smiles and satisfied taste buds. I encourage you to give it a try; I’d love to hear your thoughts and any variations you come up with! Feel free to explore related recipes on the blog for more delightful desserts. Happy baking!
Banana Pudding Cheesecake
Ingredients
For the Crust
- 2 cups Nilla wafers Use Nabisco for classic flavor.
- 4 tablespoons unsalted butter, melted Ensure it's melted for mixing.
For the Cheesecake Filling
- 16 oz cream cheese, softened Use full-fat for a creamier texture.
- 1 cup granulated sugar To sweeten the filling.
- 1 cup sour cream Adds tang to the cheesecake.
- 1 teaspoon vanilla extract Use pure for best flavor.
- 3 ripe bananas, sliced Ensure they are spotty for maximum sweetness.
- 1 package vanilla pudding mix Instant works best for texture.
- 2 cups milk Whole milk for richer taste.
- 2 cups whipped cream Homemade is preferred for fresh flavors.
Instructions
Preparation
- Preheat the oven to 350°F (175°C).
- Crush the Nilla wafers and mix with melted butter until well-coated. Press into the bottom of a springform pan.
- In a mixing bowl, beat cream cheese and sugar until smooth and creamy.
- Add sour cream and vanilla extract, mixing until combined.
- Fold in sliced bananas gently to keep the pieces intact.
Assembly
- Spread the cream cheese mixture over the prepared crust.
- In another bowl, whisk the pudding mix with milk until thickened and pour over the cheesecake layer.
- Spread whipped cream over the pudding layer and garnish with more banana slices.
- Chill in the refrigerator for at least 4 hours or preferably overnight.