

Irresistibly Soft Homemade Bread: Your Guide to the Perfect Loaf
I still remember the first time I pulled a loaf of homemade bread from the oven. The warm, yeasty aroma filled my kitchen, wrapping me in a comforting embrace unlike anything from the store. It was a rainy Sunday afternoon, and I had decided to try my hand at baking homemade bread, something my grandmother used to do every weekend. The way she would knead the dough with love while sharing stories of her childhood is a memory that fuels my passion for baking today.
This isn’t just any homemade bread recipe; it’s an invitation to create something truly special. Unlike store-bought options, this bread has a fluffy interior and a crisp crust that beckons you to slice into it. Best of all, the magic lies in its simplicity—no special equipment required! Whether it’s slathered with butter or turned into a sandwich for a family picnic, every bite has the power to ignite memories and create new ones.
In this post, I’ll walk you through every step of making this delightful homemade bread, so you can recreate that cozy, nostalgic feeling in your own home. Get ready to knead, rise, and create a loaf that will impress family and friends!
What Are Homemade Bread?
Homemade bread has a rich history that dates back thousands of years, marking it as one of humanity’s oldest culinary practices. Made from just a handful of simple ingredients—water, yeast, flour, and salt—this wholesome staple is a canvas for flavors and textures that can transform any meal.
The taste of a good homemade loaf is simply incomparable; it’s soft, airy, and slightly chewy with a crust that crackles beautifully when you slice into it. The magic comes from the fermentation process, where yeast works to develop flavors and textures that store-bought bread simply can’t replicate.
So, when should you make homemade bread? The answer is simple: whenever you need a little comfort! Be it a rainy day, a festive gathering, or just a cozy night in, homemade bread can elevate the occasion and provide a warm hug in loaf form.
Why You’ll Love This Recipe
Simplicity is Key: Making homemade bread is easier than you think! With just one bowl required and straightforward steps, even novice bakers will shine. I remember the excitement of watching my dough rise for the first time—it felt like magic!
Cost Effective: Why spend a fortune on artisan bread when you can create something better at home? This recipe yields multiple loaves and costs pennies per serving compared to shop prices. Plus, it’s a great way to impress friends without breaking the bank.
Customization Options: This is your bread! Feel free to add herbs, garlic, or even cheeses—there are endless ways to personalize your loaf. I often throw in rosemary and garlic for a savory twist that never fails to wow guests.
Healthier Choice: You control the ingredients! No preservatives, no surprises. Just wholesome, natural goodness that you can feel good about enjoying.
Therapeutic Experience: Kneading the dough is surprisingly therapeutic! It’s a fantastic way to destress, letting your hands work as you breathe in the delightful aroma of fresh, yeasty goodness.
Ingredients
- 3 cups lukewarm water: Make sure it’s warm enough to activate the yeast but not hot enough to kill it—think of a cozy bath!
- 1 and 1/2 tablespoons instant or active dry yeast: I prefer instant yeast for its reliable rise, but either works well.
- 1 and 1/2 tablespoons coarse salt: This enhances the flavor of the bread beautifully. I love using sea salt.
- 6 and 1/2 cups all-purpose flour: A staple in my pantry! You can substitute up to half with whole wheat flour for a nutty flavor and added fiber.
- Optional: herbs for flavoring: Fresh or dried herbs like rosemary, thyme, or even sun-dried tomatoes can take your homemade bread to the next level.
Notes on Ingredient Quality
Using high-quality ingredients will elevate your bread. For flour, I love King Arthur or Bob’s Red Mill brands. When selecting yeast, make sure to check the expiration date to guarantee freshness.
Prep Notes
- Ensure your butter is at room temperature if you choose to add it for richness. It makes for an extra delectable crust.
Step-by-Step Instructions
Mixing the Ingredients:
In a very large mixing bowl, combine 3 cups lukewarm water, 1 and 1/2 tablespoons yeast, and 1 and 1/2 tablespoons coarse salt. If you’re adding herbs, stir them in now.Add Flour:
Add 6 and 1/2 cups all-purpose flour all at once. Stir with a wooden spoon or use your hands to mix until there are no visible streaks of flour left.First Rise:
Cover the bowl with plastic wrap or a kitchen towel and let the dough rise in a warm area for 2 to 4 hours. The dough should double in size—keep an eye on it!Portioning:
If making the master recipe, pull away 1 quarter of the dough and refrigerate the remainder for later use. For the halved recipe, simply remove half of the dough.Shape the Dough:
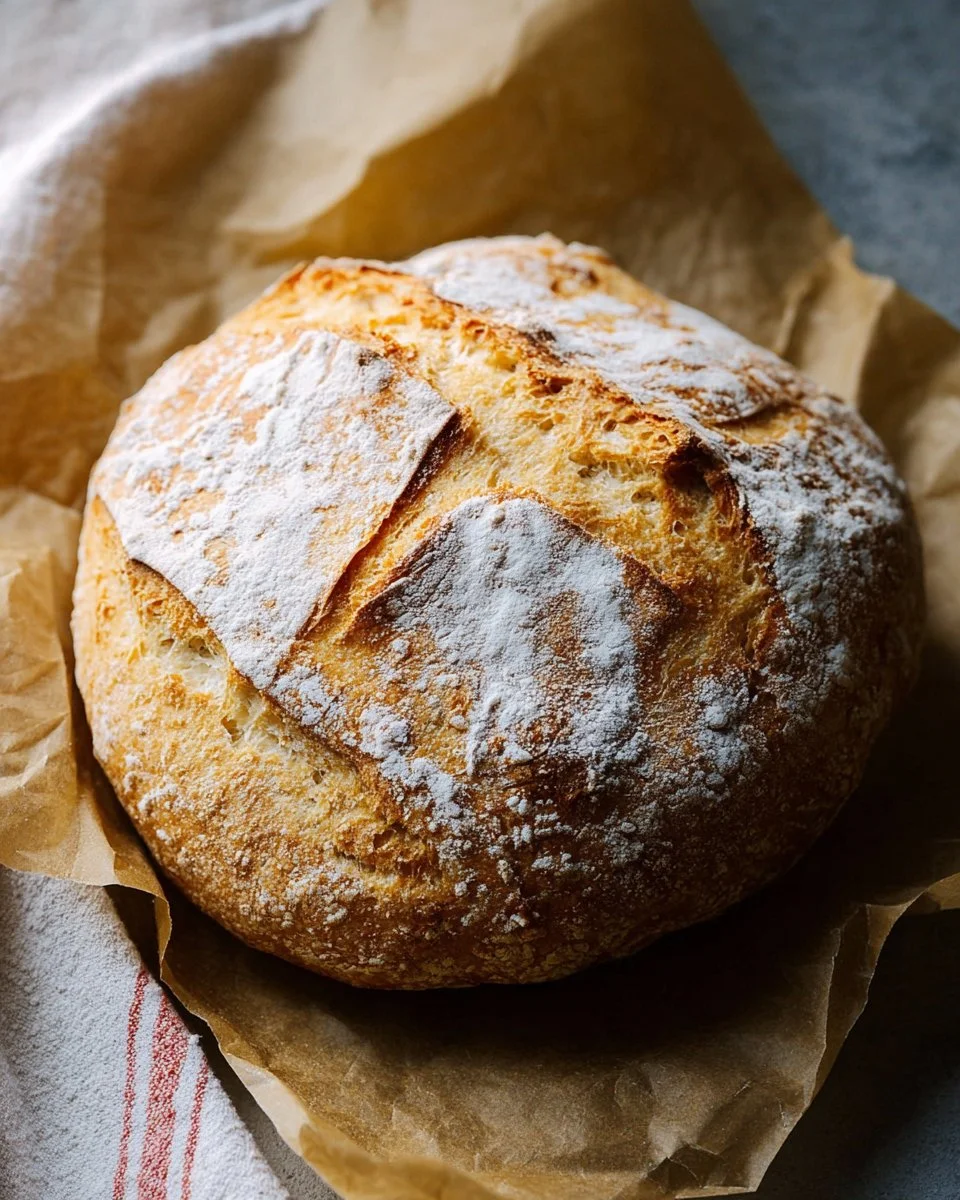
Dust your hands and work surface with flour or cornmeal. Shape the reserved dough into a boule (a round loaf) and let it rest for 30 minutes.Preheat Oven:
Preheat your oven to 450 degrees F. Place a baking vessel (like a Dutch oven) inside to heat, and place a pan with water on the bottom rack to create steam—a secret for a perfect crust!Scoring and Baking:
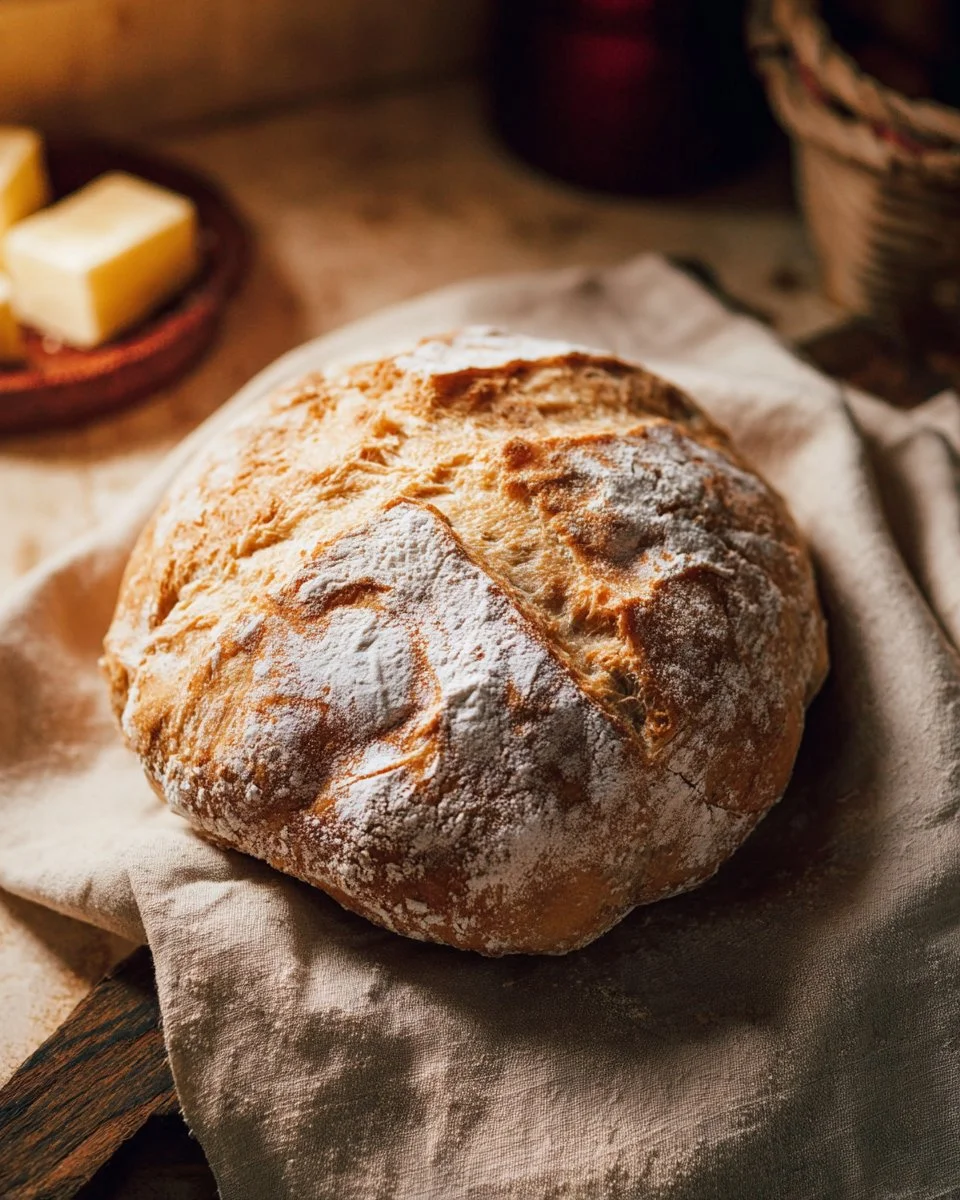
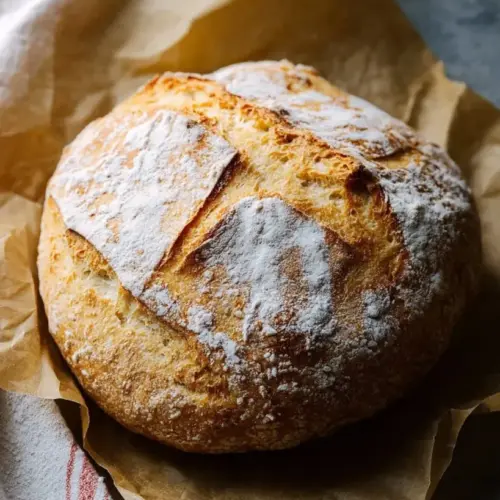
Dust the top of your loaf with flour, then use a sharp knife to slash the top (which helps steam escape). Bake for 30 to 40 minutes or until golden brown. The internal temperature should reach around 200 degrees F.Cooling:
Let the loaf cool on a wire rack for at least 15 minutes before slicing. This is the hardest part, but trust me, it’s worth it!
Chef’s Tips
- Visual Cues: The dough should be tacky but not too sticky—add flour a little at a time if needed.
- Common Mistake: Don’t skip the resting time! It helps develop gluten, resulting in a chewy texture.
Expert Tips & Tricks
Storage Recommendations: The bread can be stored at room temperature in a bread bag for up to 3 days. You can also freeze slices individually for up to 3 months—perfect for toasting!
Make-Ahead Instructions: You can prepare the dough ahead of time and keep it in the fridge for up to 7 days. Each day brings a deeper flavor!
Troubleshooting: If your bread fails to rise, it’s likely due to old yeast or water temperature that’s too hot or cold. Always check the expiration date on your yeast packet.
Test for Doneness: Tap the bottom of the loaf; if it sounds hollow, it’s ready!
Experiment with Shapes: Feel free to get creative! Shape it into baguettes, rolls, or even a braided loaf for special occasions.
Serving Suggestions
Hot homemade bread is a versatile companion! Serve it warm with a spread of butter, or alongside a hearty soup or salad. For special family gatherings, garnishing with fresh herbs and serving on a rustic wooden board elevates the presentation.
Occasion Ideas
- Weekend brunch with friends.
- Cozy dinners on chilly nights.
- Afternoon tea with butter and jam.
Variations & Substitutions
- Herb and Garlic: Add minced garlic and fresh rosemary for an aromatic twist.
- Cheesy Garlic Bread: Mix in shredded cheese like parmesan or cheddar into the dough before baking.
- Pumpkin Spice: In the fall, swap out some flour for pumpkin puree and add pumpkin spice for a delightful seasonal treat.
Dietary Adaptations
- Gluten-Free Version: Substitute all-purpose flour with a high-quality gluten-free blend—make sure to add a binding agent like xanthan gum.
Nutrition & Storage Info
- Prep Time: 20 minutes
- Cook Time: 40 minutes
- Total Time: 1 hour
- Yield: Approximately 2 loaves (12-16 slices)
- Estimated Calories: 120 calories per slice
- Storage: Room temperature for 3 days, or freeze for 3 months.
FAQ SECTION
Can I use regular dry yeast instead of instant yeast?
Yes, just remember to activate it in warm water for about 5-10 minutes before mixing!Why did my bread turn out dense?
This could be because the dough was not kneaded enough, or it sank during rising due to under-proofing. Be sure to let it rise until doubled!How can I enhance the flavor of my bread?
Try adding flavors like garlic powder, parmesan cheese, or various spices.What if my dough is too sticky?
Dust with flour gradually while mixing until manageable.Can I bake it in a bread machine?
Absolutely! Just follow your machine’s instructions for the dough setting.What temperature should I store my bread?
Room temperature is best for up to 3 days, but freezing is ideal for longer storage.How can I tell when my bread is done?
A hollow sound when you tap the bottom and a golden-brown crust are your cues!Is it possible to make this bread vegan?
Yes! Omit any dairy and use a plant-based substitute if you wish to enrich your dough.Can I substitute other types of flour?
Yes, experimenting with whole wheat or spelt flour will yield unique flavors!How long does it take to thaw frozen bread?
Just a couple of hours at room temperature, or you can toast it straight from the freezer!
Conclusion
This homemade bread recipe is more than just a cooking guide; it’s an invitation to create cherished memories in your kitchen. Loaves baked with love connect us to our past while providing comfort in our present. If you’re ready to embark on this delicious journey, I can’t wait to hear how your bread turns out! Share your thoughts in the comments or check out my other recipes that celebrate the magic of homemade delights. Let’s keep turning those simple ingredients into something extraordinary, one loaf at a time!
Homemade Bread
Ingredients
For the dough
- 3 cups lukewarm water Warm enough to activate yeast, not hot.
- 1.5 tablespoons instant or active dry yeast Instant yeast preferred for reliable rise.
- 1.5 tablespoons coarse salt Enhances the flavor of bread.
- 6.5 cups all-purpose flour Can substitute half with whole wheat flour.
- Optional: herbs for flavoring Fresh or dried herbs like rosemary, thyme, or sun-dried tomatoes.
Instructions
Mixing the Ingredients
- In a very large mixing bowl, combine lukewarm water, yeast, and salt.
- If adding herbs, stir them in now.
Add Flour
- Add all-purpose flour all at once.
- Stir with a wooden spoon or use your hands until there are no visible streaks of flour.
First Rise
- Cover the bowl with plastic wrap or a kitchen towel and let the dough rise in a warm area for 2 to 4 hours.
- The dough should double in size.
Portioning
- If making the master recipe, pull away 1 quarter of the dough and refrigerate the remainder for later use.
- For the halved recipe, simply remove half of the dough.
Shape the Dough
- Dust your hands and work surface with flour or cornmeal.
- Shape the reserved dough into a boule and let it rest for 30 minutes.
Preheat Oven
- Preheat your oven to 450 degrees F and place a baking vessel inside to heat.
- Place a pan with water on the bottom rack to create steam.
Scoring and Baking
- Dust the top of your loaf with flour, then use a sharp knife to slash the top.
- Bake for 30 to 40 minutes or until golden brown and the internal temperature reaches around 200 degrees F.
Cooling
- Let the loaf cool on a wire rack for at least 15 minutes before slicing.