
Irresistible Banana Pudding Crunch Cheesecake: A Heavenly Dessert Delight
Do you remember the comfort of indulging in grandma’s banana pudding on a hot summer day? The way the creamy layers melted in your mouth as you savored the buttery vanilla wafers? That’s exactly the inspiration behind my homemade Banana Pudding Crunch Cheesecake. This recipe isn’t just a culinary creation; it’s a tribute to family gatherings, warm laughter, and the pure joy that comes from sharing food with loved ones.
Unlike the traditional banana pudding or typical cheesecakes, this dish combines the best of both worlds. Picture rich, velvety cream cheese infused with the sweetness of ripe bananas and a crunchy layer of vanilla wafers that brings a delightful textural contrast. What makes this cheesecake even better than others is its ability to evoke nostalgia while providing an unforgettable dessert experience.
I promise you’ll learn how to capture that essence, balancing warmth and sweetness to create a dessert that will steal the show at your next gathering. Let’s dive into the deliciousness together and make some memories!
What Are Banana Pudding Crunch Cheesecakes?
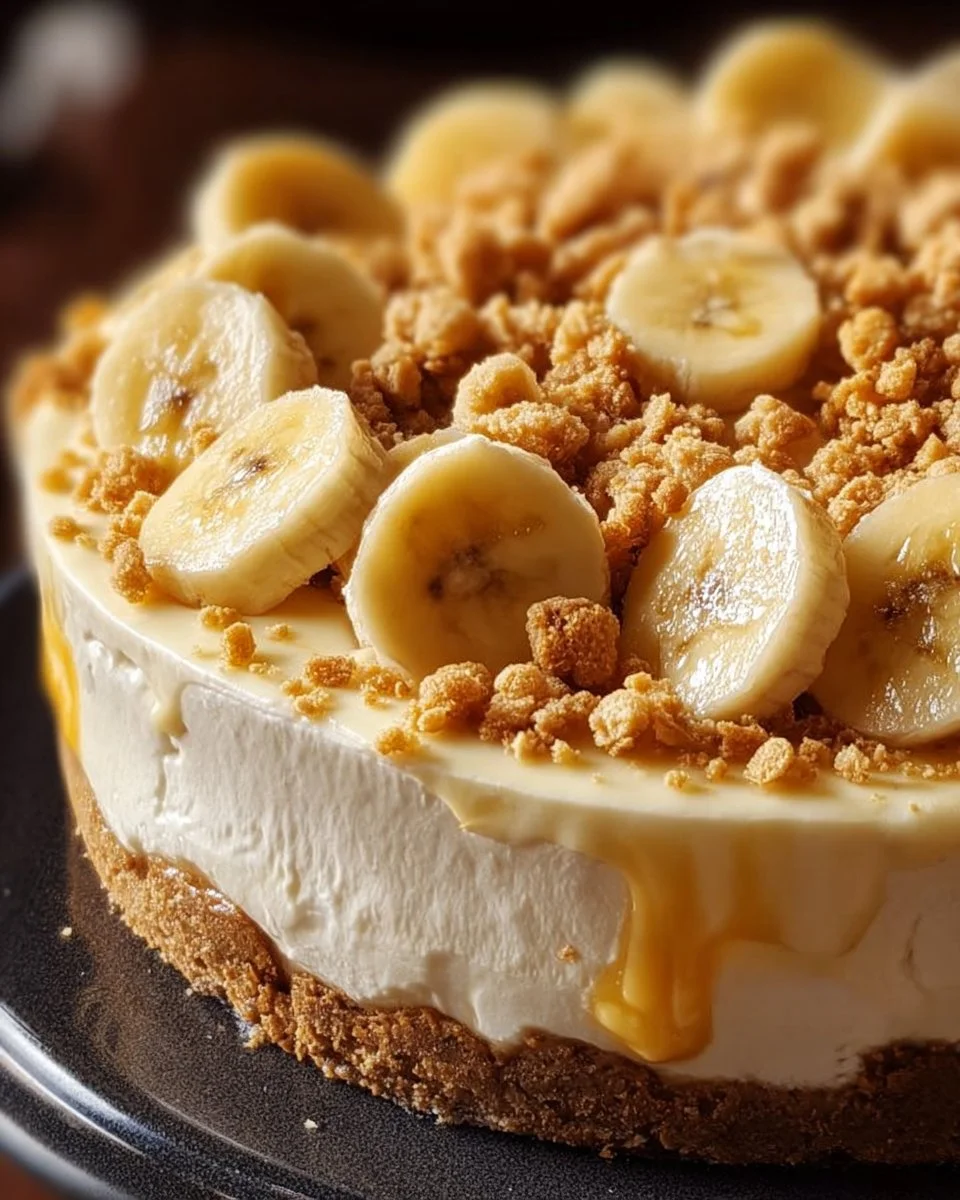
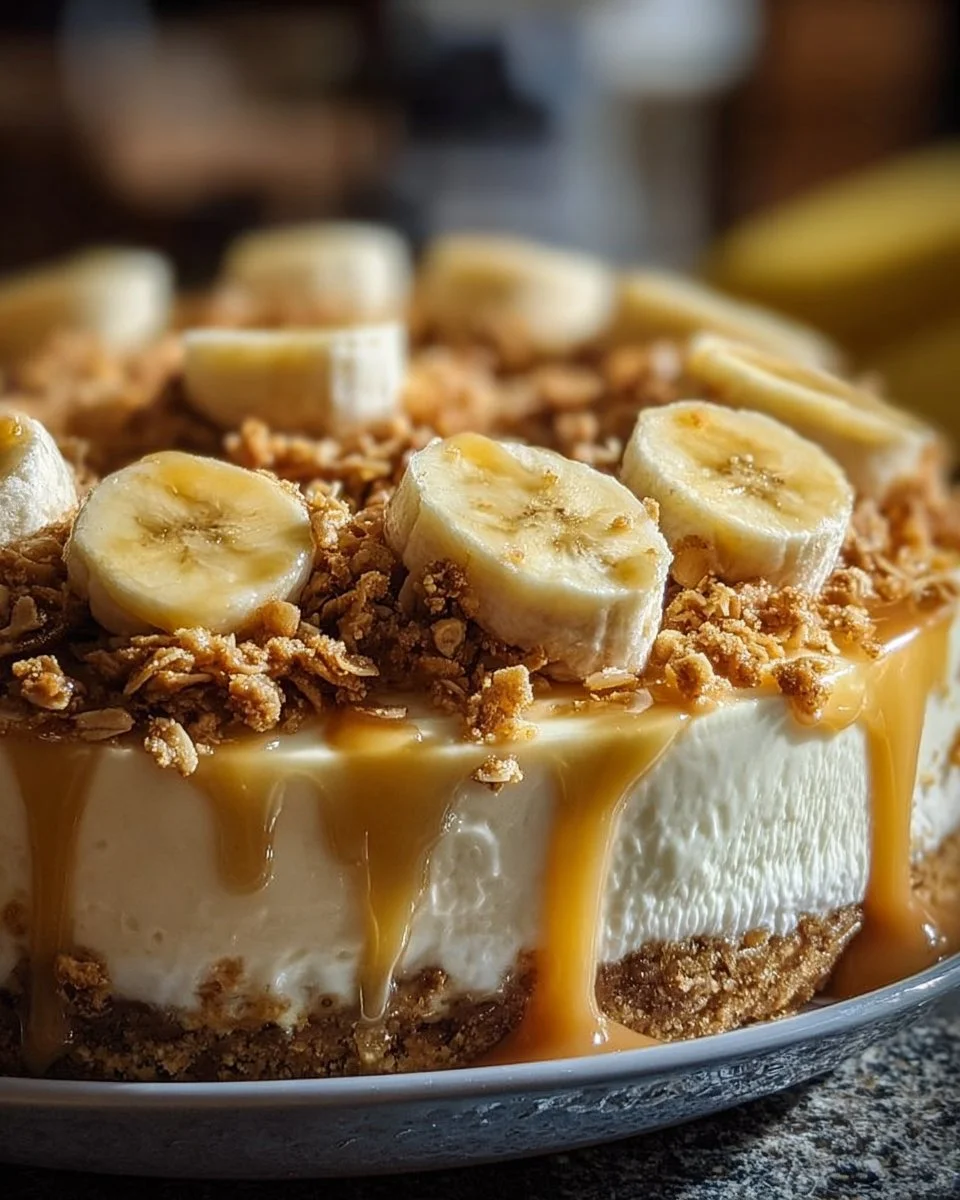
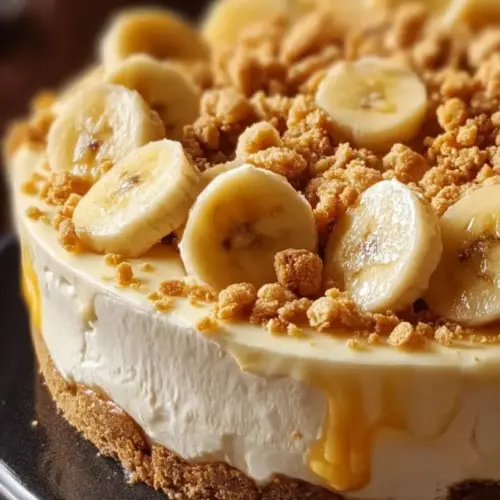
The Banana Pudding Crunch Cheesecake brings together the rich history of banana pudding and the sophistication of cheesecake into one decadent dessert. Originating in the southern United States, banana pudding has been a beloved classic for generations. The addition of cream cheese creates a smooth, rich filling layered with that unmistakable banana flavor and a signature crunch.
Imagine sinking your fork into a creamy slice where the texture dances between velvety and crumbly. Each bite unveils a luscious blend of sweet bananas, a hint of tang from the cream cheese, and the irresistible crunch of vanilla wafers and pecans on top. This dessert is not just perfect for the holidays or special occasions; it can elevate any gathering or even a solo evening on the couch.
Why You’ll Love This Recipe
- Nostalgic Flavor: This cheesecake transforms beloved vanilla pudding into an elegant dessert, connecting generations with familiar flavors.
- Cost-Effective: With simple ingredients found at any grocery store, you can whip up a stunning dessert without breaking the bank.
- Customizable: Whether you prefer a different nut, want to add a chocolate twist, or skip the nuts altogether, this recipe allows delicious flexibility.
- Easy to Make: With a moderate skill level, this recipe guides you step-by-step, ensuring you don’t need to be a professional baker to impress.
- Store-Bought Comparison: Forget about those dry, overpriced cheesecake slices at the bakery! This homemade version is fresher, richer, and undeniably more satisfying.
Can you imagine a slice of this cheesecake served at your next potluck? Its mouthwatering taste and beautiful presentation will surely have everyone asking for the recipe!
Ingredients Section
For the Crust
- 1 1/2 cups crushed vanilla wafers: For that classic flavor, you can use brands like Nabisco Nilla Wafers.
- 1/4 cup granulated sugar: Adjust if you prefer a sweeter crust.
- 1/4 cup unsalted butter, melted: Make sure it’s at room temperature for easy mixing.
For the Cheesecake Filling
- 24 oz cream cheese, softened: Philadelphia is a trusted choice for creamy texture.
- 1 cup granulated sugar: For the perfect balance of sweetness.
- 3 ripe bananas, mashed: The riper, the better!
- 3 large eggs: Bring to room temperature for a smoother batter.
- 1 tsp vanilla extract: Use pure vanilla for the best flavor.
- 1/4 cup sour cream: This adds creaminess and tang.
- 1/4 cup all-purpose flour: Helps to set the cheesecake.
For the Topping
- 1 cup crushed vanilla wafers: To create that lovely crunchy texture.
- 1/4 cup chopped pecans: Optional for an additional nutty flavor.
- 2 tbsp unsalted butter, melted.
Prep Notes: Ensure ingredients are at room temperature (particularly the cream cheese and eggs) for a smoother mixture.
Step-by-Step Instructions
Preheat the Oven: Preheat your oven to 325°F (160°C) and grease a 9-inch springform pan with butter or non-stick spray.
Prepare the Crust: In a mixing bowl, combine the 1 1/2 cups crushed vanilla wafers, 1/4 cup granulated sugar, and 1/4 cup melted butter. Mix until well combined and moist. Press this mixture evenly into the bottom of the prepared pan to form the crust.
Make the Filling: In a separate bowl, beat the 24 oz softened cream cheese and 1 cup granulated sugar until smooth and creamy, about 2-3 minutes.
Add the Bananas: Stir in the 3 mashed bananas, followed by the 3 large eggs, 1 tsp vanilla extract, 1/4 cup sour cream, and 1/4 cup flour. Mix until fully combined, ensuring there are no lumps.
Pour the Filling: Pour the cheesecake mixture over the crust in the springform pan, spreading it evenly with a spatula.
Prepare the Topping: In a small bowl, mix 1 cup crushed vanilla wafers, 1/4 cup chopped pecans, and 2 tbsp melted butter. Sprinkle this mixture over the cheesecake filling.
Bake the Cheesecake: Place the springform pan on a baking sheet (to catch drips) and bake in the preheated oven for 55-60 minutes. The edges should be set, while the center should still be slightly jiggly.
Cool in the Oven: Turn off the oven, crack the door slightly, and leave the cheesecake in there for 1 hour to cool gently—a tip I learned can prevent cracking!
Refrigerate: After the hour of cooling, remove from the oven and let cool completely on the counter. Then refrigerate for at least 4 hours, or preferably overnight, to allow the flavors to meld.
Serve: Once chilled, carefully remove the cheesecake from the springform pan, slice, and serve!
Expert Tips & Tricks
- Quality Ingredients Matter: Use the best quality cream cheese you can find for a richer flavor.
- Don’t Overmix: When adding eggs, mix just until combined. Overmixing can lead to cracks in your cheesecake.
- Make-Ahead Option: This cheesecake can be made up to two days in advance! Store it covered in the fridge.
- Troubleshooting: If your cheesecake cracks, don’t fret! A dollop of whipped cream on top will disguise any imperfections beautifully!
- Storage: Leftovers can be stored in the refrigerator for up to one week or freeze slices for up to three months for a sweet treat later!
Serving Suggestions
This Banana Pudding Crunch Cheesecake stands wonderfully on its own, but you can elevate its presentation by serving it with:
- Fresh whipped cream: Add a dollop on top for extra richness.
- Sliced bananas: Place them on the side for a pop of color and freshness.
- Chocolate syrup or caramel drizzle: A touch of sweetness that enhances the overall flavor.
- Perfect for family gatherings, holiday celebrations, or a cozy movie night!
Variations & Substitutions
- Nut-Free: Omit the pecans for a nut-free dessert or substitute with toasted coconut for added texture.
- Seasonal Fruits: Swap in fresh strawberries or blueberries for a seasonal twist.
- Healthier Option: Use Greek yogurt instead of sour cream, or low-fat cream cheese for a lighter version.
- Chocolate Lovers: Add cocoa powder to the cream cheese mixture for a chocolate banana cheesecake!
Nutrition & Storage Info
- Prep Time: 30 minutes
- Cook Time: 1 hour
- Total Time: 5 hours (including cooling and refrigeration)
- Yield: 10–12 servings
- Estimated Calories: Approximately 350 calories per slice
- Storage Instructions: Store covered in the fridge for up to a week. You can freeze slices for up to three months.
FAQ Section
Can I use ripe bananas?
Yes! Ripe, brown bananas are ideal as they provide more sweetness and flavor.What if my cheesecake cracks while baking?
Don’t worry! It can still taste delicious, and a little whipped cream can cover it up perfectly.Can I use a different crust?
Absolutely! A graham cracker or Oreos crust also works wonderfully if you want a different flavor.Is this cheesecake gluten-free?
To make it gluten-free, ensure to use gluten-free vanilla wafers.How do I know when it’s done baking?
The edges should be set while the center should have a slight jiggle when shaken gently.Can I make this cheesecake vegan?
You can use vegan cream cheese and silken tofu as a substitute for eggs.How should I slice my cheesecake?
Dip your knife in hot water, wipe it dry, and slice for clean edges!Can I top it with something else?
Try toasted coconut or crushed pretzels for a salty-sweet twist!What’s the best way to store leftovers?
Cover tightly with plastic wrap and refrigerate or place in an airtight container.How long will it last in the fridge?
Properly stored, the cheesecake can last up to one week in the fridge.
Conclusion
The Banana Pudding Crunch Cheesecake isn’t just a dessert; it’s a celebration of flavor and nostalgia wrapped in a creamy crust. I encourage you to try making this recipe and experience the joy it brings. Your loved ones will surely appreciate it, just like my family does! Don’t forget to share your thoughts and feedback in the comments; I love hearing your stories. And be sure to check out my blog for more sweet delights that’ll make your taste buds dance with joy!
Happy baking!
Banana Pudding Crunch Cheesecake
Ingredients
For the Crust
- 1.5 cups crushed vanilla wafers For that classic flavor, you can use brands like Nabisco Nilla Wafers.
- 0.25 cups granulated sugar Adjust if you prefer a sweeter crust.
- 0.25 cups unsalted butter, melted Make sure it’s at room temperature for easy mixing.
For the Cheesecake Filling
- 24 oz cream cheese, softened Philadelphia is a trusted choice for creamy texture.
- 1 cup granulated sugar For the perfect balance of sweetness.
- 3 pieces ripe bananas, mashed The riper, the better!
- 3 large eggs Bring to room temperature for a smoother batter.
- 1 tsp vanilla extract Use pure vanilla for the best flavor.
- 0.25 cups sour cream This adds creaminess and tang.
- 0.25 cups all-purpose flour Helps to set the cheesecake.
For the Topping
- 1 cup crushed vanilla wafers To create that lovely crunchy texture.
- 0.25 cups chopped pecans Optional for an additional nutty flavor.
- 2 tbsp unsalted butter, melted
Instructions
Preparation
- Preheat your oven to 325°F (160°C) and grease a 9-inch springform pan with butter or non-stick spray.
- In a mixing bowl, combine the crushed vanilla wafers, granulated sugar, and melted butter. Mix until well combined and moist. Press this mixture evenly into the bottom of the prepared pan to form the crust.
- In a separate bowl, beat the softened cream cheese and granulated sugar until smooth and creamy, about 2-3 minutes.
- Stir in the mashed bananas, followed by the eggs, vanilla extract, sour cream, and flour. Mix until fully combined, ensuring there are no lumps.
- Pour the cheesecake mixture over the crust in the springform pan, spreading it evenly with a spatula.
- In a small bowl, mix the crushed vanilla wafers, chopped pecans, and melted butter. Sprinkle this mixture over the cheesecake filling.
Baking
- Place the springform pan on a baking sheet (to catch drips) and bake in the preheated oven for 55-60 minutes. The edges should be set, while the center should still be slightly jiggly.
Cooling
- Turn off the oven, crack the door slightly, and leave the cheesecake in there for 1 hour to cool gently.
- After the hour of cooling, remove from the oven and let cool completely on the counter. Then refrigerate for at least 4 hours, or preferably overnight, to allow the flavors to meld.
Serving
- Once chilled, carefully remove the cheesecake from the springform pan, slice, and serve!