
Decadent Burnt Cream Cheesecake: The Ultimate Recipe You’ve Been Craving!
There’s something magical about dessert; it has this incredible ability to transport us back to cherished moments in our lives. For me, it’s the memory of family gatherings overflowing with laughter and the scent of sweet indulgence wafting through the air. The centerpiece? A show-stopping Burnt Cream Cheesecake that never failed to impress everyone around the table. With its perfectly creamy center and that intoxicating caramelized top layer, it captured our hearts and taste buds alike.
You might think all cheesecakes are created equal, but trust me, this recipe stands apart! This Burnt Cream Cheesecake is not just a treat; it’s an experience, filled with layers of flavor and history. Unlike the store-bought variety that can fall flat, this recipe delivers a rich texture and satisfying taste that clings to your memories. I promise you’ll learn how to create your own masterpiece that transforms any occasion into an extraordinary celebration.
So, grab your apron and join me on this exciting baking adventure – your taste buds are in for a delightful surprise!
What Are Burnt Cream Cheesecakes?
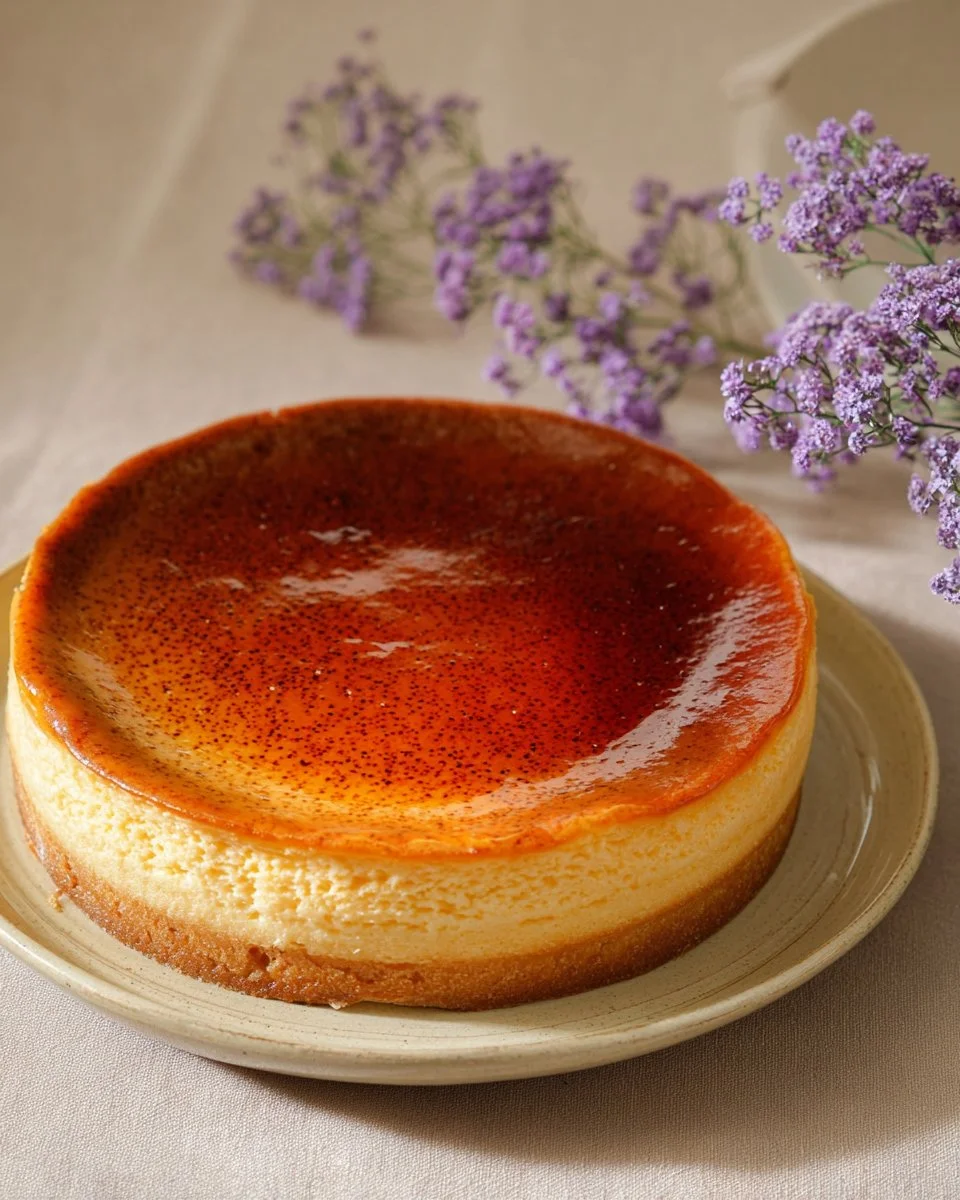
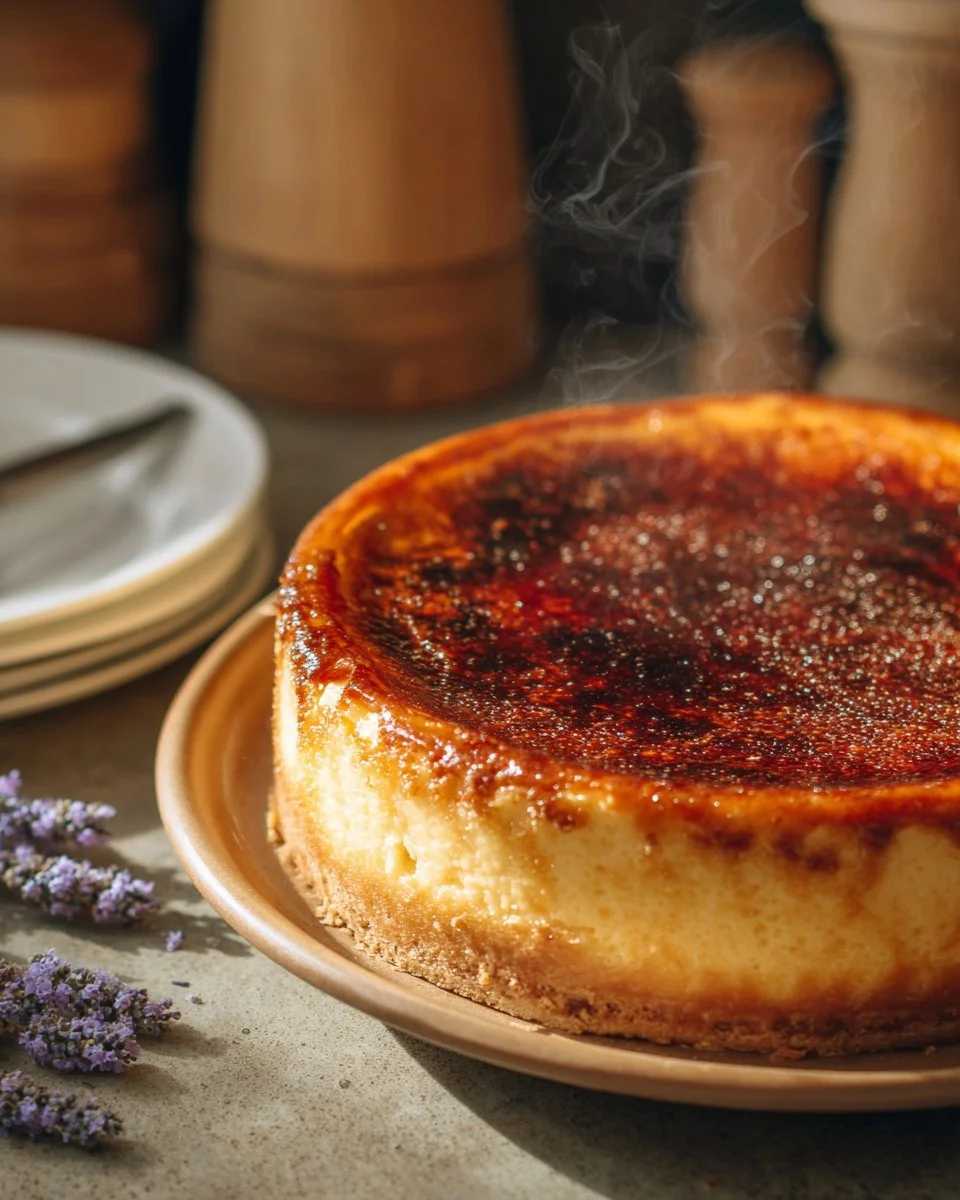
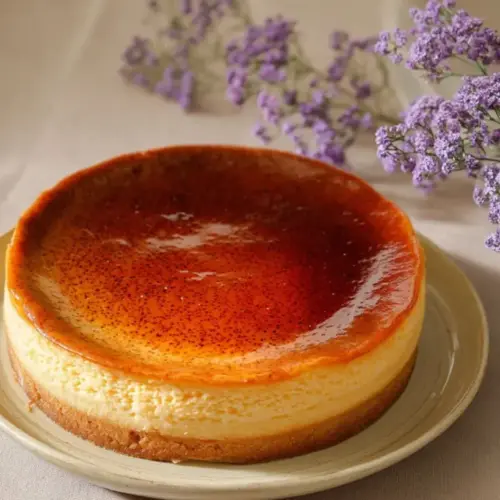
Burnt Cream Cheesecake, often known as Crème Brûlée Cheesecake, combines the rich, velvety texture of a classic cheesecake with a caramelized sugar crust that brings a delightful crunch. This delightful fusion hails from the French tradition of crème brûlée, where a creamy custard base is topped with a hardened layer of caramelized sugar. When you take a bite, you’ll experience a heavenly contrast between the smooth creaminess of the cheesecake and the satisfying crack of the burnt top.
What sets this dessert apart is its intricate yet straightforward balance of flavors: the cream cheese lends a rich tanginess, while the caramelized sugar adds just the right sweetness. It’s perfect for special occasions – think birthdays, dinner parties, or even a cozy Sunday night in! With this recipe, you’ll impress family and friends while creating lasting memories.
Why You’ll Love This Recipe
Irresistible Flavor Combination: The blend of rich cream cheese, sour cream, and caramelized sugar creates a flavor profile that dances on your palate. Say goodbye to the bland cheesecakes of the past!
Cost-Effective: Making your own Burnt Cream Cheesecake can cost a fraction of what you’d spend at a restaurant, allowing you to indulge without breaking the bank. This recipe is not only delicious but also budget-friendly!
Endless Customization: Whether you want to add a splash of lemon zest for a citrus twist or a layer of chocolate ganache, this cheesecake is incredibly versatile. You’ll have a canvas to get creative with flavor.
Simplicity Meets Elegance: While it may seem daunting, this cheesecake is a breeze to make, even for novice bakers. It’s a delightful mix of simple steps that just about anyone can nail.
Impressive Presentation: You’ll love the “wow” factor when you serve this dessert! It’s a showstopper that looks like you spent hours in the kitchen, but it’s really easier than you think!
Ingredients Section
To whip up your very own Burnt Cream Cheesecake, you’ll need the following ingredients:
For the Crust:
- 170 g digestive biscuits (or graham crackers)
- 100 g butter, melted
For the Cheesecake:
- 900 g cream cheese, softened to room temperature (look for high-quality brands like Philadelphia)
- 200 g caster sugar (superfine sugar)
- 160 g sour cream (use full-fat for the best flavor)
- 1 ½ teaspoons vanilla extract (real vanilla will elevate the taste)
- Pinch of salt
- 4 large eggs, room temperature (lightly beaten)
- 50 g granulated sugar (for the burnt topping)
Prep Notes:
- Ensure the butter is melted and cool before mixing it with the biscuits for the crust.
- Bring all your dairy ingredients to room temperature to avoid lumps in your cheesecake.
Step-by-Step Instructions
To Make the Crust:
Preheat Your Oven: Set your oven to 160°C (320°F). This gentle heat will help the cheesecake bake evenly.
Prepare the Baking Pan: Line a 9-inch springform pan with parchment paper and grease the sides for easy removal later.
Crush the Biscuits: Place the digestive biscuits in a food processor and pulse until finely crushed. Alternatively, you can use a sealable bag and a rolling pin for a more manual approach.
Combine Ingredients: In a mixing bowl, combine the crushed biscuits with the melted butter, mixing until the crumbs resemble wet sand.
Press the Mixture: Transfer the biscuit mixture into the prepared pan, pressing it firmly and evenly across the base.
Bake the Crust: Bake in the preheated oven for about 10 minutes until lightly golden. Remove and let it cool.
To Make the Cheesecake:
Mix Cream Cheese: In a large mixing bowl, beat the softened cream cheese until smooth and creamy, about 2-3 minutes.
Add Sugar and Sour Cream: Gradually add caster sugar and sour cream, mixing well until combined. Scrape down the sides of the bowl to ensure an even mix.
Incorporate Eggs and Vanilla: Add the lightly beaten eggs one at a time, mixing on low speed until just combined. Finally, add the vanilla extract and a pinch of salt, mixing gently.
Pour into the Crust: Carefully pour the cheesecake filling over the cooled crust and spread it evenly.
Bake: Bake in the oven for 50-60 minutes. The cheesecake is done when the edges are set but the center still has a slight jiggle.
Cool Down: Turn off the oven and crack the door open, allowing the cheesecake to cool gradually for about an hour, which helps prevent cracking.
Make the Crème Brûlée Topping:
Chill the Cheesecake: Once completely cool, refrigerate the cheesecake for at least 4 hours, or overnight for the best texture.
Caramelize the Sugar: Just before serving, sprinkle granulated sugar evenly over the top of the cheesecake. Using a kitchen torch, carefully heat the sugar until it turns golden and caramelized, creating that delightful burnt top.
Serve: Let the burnt topping cool for a minute before slicing and enjoying your masterpiece!
Chef’s Tips:
- Avoid overmixing the batter to prevent too much air, which can cause cracks.
- If you don’t have a torch, you can place it under a broiler for a minute or two, but keep a close eye to prevent burning.
Expert Tips & Tricks
Ingredient Quality Matters: High-quality cream cheese and fresh eggs make a significant difference in flavor and texture.
Storage Recommendations: If you have leftovers, cover the cheesecake tightly with plastic wrap and store it in the fridge for up to 5 days.
Make-Ahead Instructions: This cheesecake can be made a day in advance, allowing it to set beautifully overnight before you caramelize the sugar.
Troubleshooting Common Problems: If your cheesecake cracks, don’t fret! A crack can be easily disguised with the caramelized sugar layer.
Check for Doneness: use a toothpick inserted into the center — it should come out with a few moist crumbs but not wet batter.
Transporting Tips: When transporting, keep the cheesecake chilled and stable in a cooler with ice packs to preserve its texture.
Serving Suggestions
Pair your Burnt Cream Cheesecake with a light fruit compote or fresh berries to add a refreshing contrast. For an extra indulgent touch, a dollop of whipped cream can elevate the dining experience. Present it on a beautiful serving platter with a sprinkle of powdered sugar for visual appeal, and it’s perfect for spring parties or holiday gatherings!
Variations & Substitutions
Feeling adventurous? Try these variations:
- Flavor Infusion: Add citrus zest for a lemon or orange flavor, or mix in chocolate ganache for a decadent twist!
- Dietary Adaptations: Use dairy-free cream cheese and coconut cream to make a vegan version.
- Seasonal Options: Consider a pumpkin spice version during the fall by adding pumpkin puree and cinnamon to the cheesecake base.
Nutrition & Storage Info
Prep Time: 20 minutes
Cook Time: 1 hour
Total Time: 6 hours (including chilling)
Yield: Serves 12
Estimated Calories: Approximately 380 calories per slice
Storage Instructions:
- Room Temperature: The cheesecake should not be left out for more than 2 hours.
- Refrigerator: Keeps well for up to 5 days, covered.
- Freezer: You can freeze the cheesecake for up to 2 months. Thaw in the fridge overnight before serving.
FAQ Section
Can I use a different type of biscuit for the crust?
Absolutely! You can use any type of sweet biscuit or cookie, such as Oreos or gingersnaps, to change the flavor profile.How do I know when the cheesecake is done?
The edges should look set, and the center should slightly jiggle when you gently shake the pan. It will continue to firm up as it cools.Is it possible to make mini cheesecakes?
Yes! You can use a muffin tin lined with cupcake liners to create individual servings. Adjust the baking time to 20-25 minutes.Can I use Greek yogurt instead of sour cream?
Yes, Greek yogurt is a great substitute that will add creaminess and a slight tang.What can I do if the caramelized sugar didn’t harden?
If your sugar didn’t harden properly, make sure your torch is at the right distance, or consider returning it to the oven for a moment.Can I use a different sweetener instead of sugar?
You can experiment with alternatives like honey or maple syrup, but keep in mind that it might change the consistency slightly.Why is my cheesecake cracking?
Cracking can occur due to rapid temperature changes or overmixing. Gradual cooling and not overwhipping the batter will help prevent this.What’s the best way to slice a cheesecake?
Use a hot, dry knife for clean cuts. Dip the knife in hot water and wipe it clean between slices for the best presentation.How long should I chill the cheesecake before serving?
For the best results, chill the cheesecake for at least 4 hours, but overnight is even better.Can I serve it without the caramelized topping?
Certainly! The cheesecake is delicious on its own, but the caramelized topping adds that luxurious touch.
Conclusion
This Burnt Cream Cheesecake recipe is more than just a dessert; it’s a heartfelt way to create memories and share joy with loved ones. With its tantalizing blend of flavors and textures, I hope you’ll be inspired to try making it yourself. I’d love to hear your thoughts and experiences, so please share your feedback in the comments below.
Looking for more delicious recipes? Check out my blog for seasonal desserts and irresistible pastries that will feed your passion for baking! Happy baking!
Burnt Cream Cheesecake
Ingredients
For the Crust
- 170 g digestive biscuits (or graham crackers)
- 100 g butter, melted Ensure it is melted and cool before using.
For the Cheesecake
- 900 g cream cheese, softened to room temperature Use high-quality brands like Philadelphia.
- 200 g caster sugar (superfine sugar)
- 160 g sour cream Use full-fat for the best flavor.
- 1.5 teaspoons vanilla extract Real vanilla will elevate the taste.
- 1 pinch salt
- 4 large eggs, room temperature Lightly beaten.
- 50 g granulated sugar (for the burnt topping)
Instructions
To Make the Crust
- Preheat your oven to 160°C (320°F).
- Line a 9-inch springform pan with parchment paper and grease the sides.
- Crush the digestive biscuits until finely crushed.
- Combine crushed biscuits with melted butter until the crumbs resemble wet sand.
- Press the mixture into the prepared pan firmly and evenly.
- Bake for about 10 minutes until lightly golden, then let it cool.
To Make the Cheesecake
- In a large mixing bowl, beat the softened cream cheese until smooth (about 2-3 minutes).
- Gradually add caster sugar and sour cream, mixing until well combined.
- Incorporate eggs one at a time, mixing on low speed until just combined, then add vanilla extract and salt.
- Pour cheesecake filling over the cooled crust and spread evenly.
- Bake for 50-60 minutes until the edges are set and the center has a slight jiggle.
- Turn off the oven and crack the door open, allowing cheesecake to cool gradually for about an hour.
Make the Crème Brûlée Topping
- Chill the cheesecake in the refrigerator for at least 4 hours, preferably overnight.
- Just before serving, sprinkle granulated sugar evenly over the top of the cheesecake.
- Using a kitchen torch, heat the sugar until it turns golden and caramelized.
- Let the burnt topping cool for a minute before slicing.