
# Irresistibly Delicious Italian Grinder Salad Sandwich – An Easy Recipe You'll Love!
## Introduction
Picture this: a sunny afternoon, family gathered around the table, laughter echoing as my mother slices into a towering Italian Grinder Salad Sandwich, the layers of fresh vegetables and savory meats bursting with flavor. I can still taste that first bite—crunchy lettuce giving way to juicy tomatoes, spicy pepperoncini, and salty salami, all held together by a crusty roll that's just perfection. These sandwiches aren't just food; they are memories, moments of joy shared with loved ones, and a comfort that wraps around you like a warm hug.
I’ve tried countless versions of the Italian Grinder Salad Sandwich over the years, but this recipe is my all-time favorite. It stands out because of its perfect balance of flavors and textures—crunchy, creamy, tangy, and just a hint of spice that dances on your palate. With fresh ingredients and a quick assembly, it's an easy recipe that elevates your lunch or dinner game.
In this blog post, I'll take you through how to create your own Italian Grinder Salad Sandwich that will not only satisfy your craving but also impress your guests. You’ll learn tips for ingredient quality, optimal layering techniques, and how to customize it to your taste. Trust me, once you make it, you won't want to go back to store-bought versions!
## What Are Italian Grinder Salad Sandwiches?
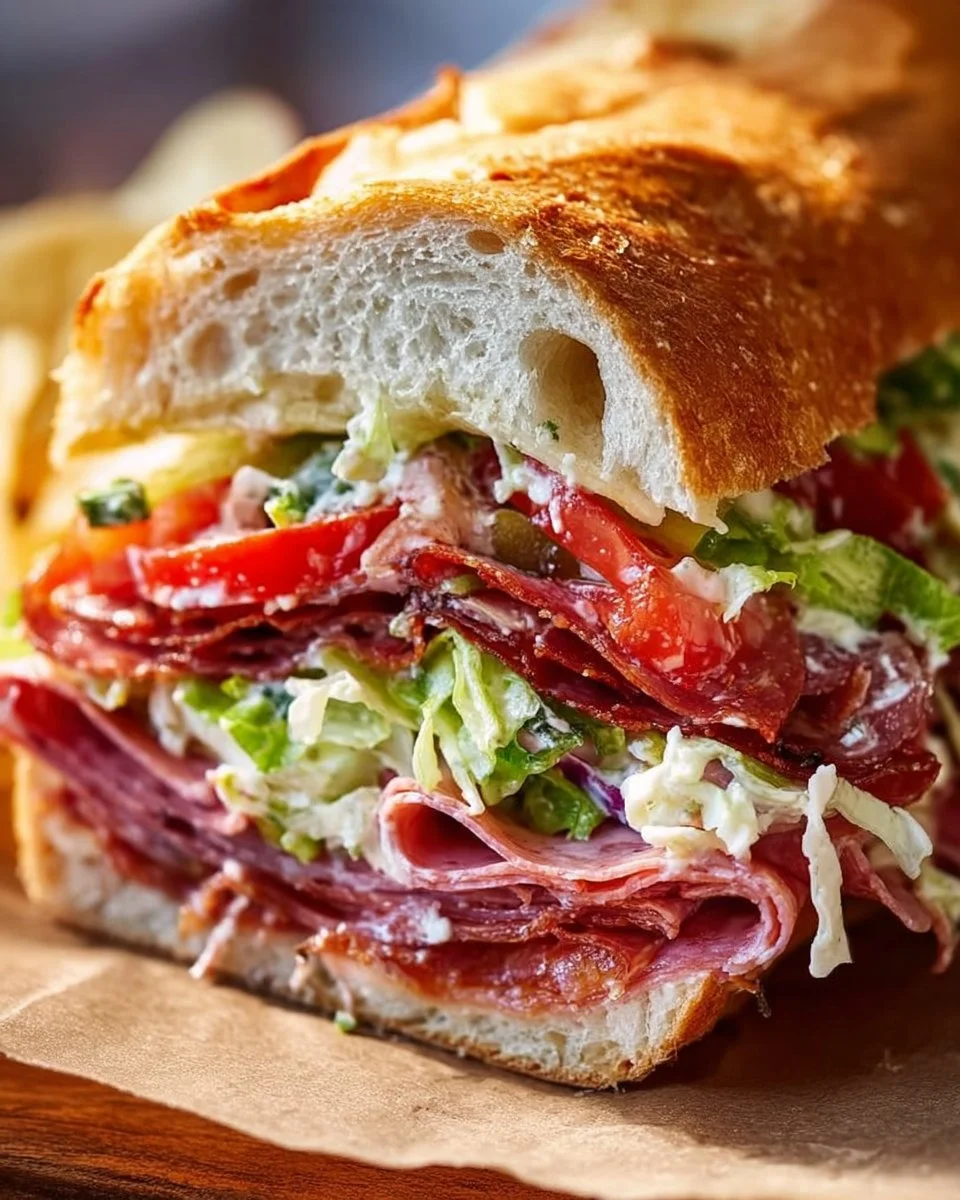
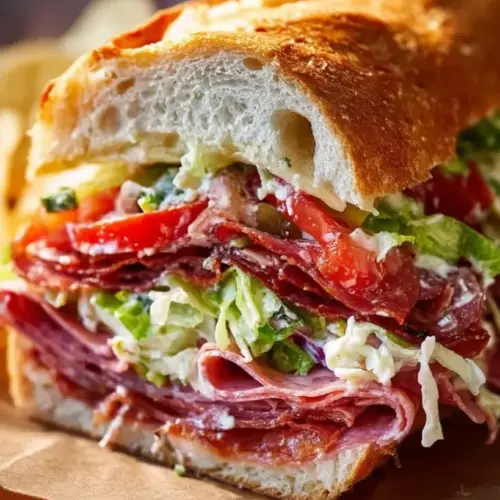
The history of the Italian Grinder Salad Sandwich is as rich as its flavor. This sandwich traces its origins to Italian-American communities, where hardworking families created meals that were hearty, satisfying, and perfect for sharing. The "grinder" aspect refers to the traditional Italian rolls that cradle all the delicious fillings within.
The taste? Imagine crisp vegetables playing center stage while the cured meats and provolone create a symphony of flavors. Each bite has layers: crunchy, zesty, and savory, with the olive oil and vinegar providing a refreshing finish.
Italian Grinder Salad Sandwiches are perfect for any occasion—packed for picnics, served as a quick lunch, or even as a simple dinner. They are a customizable dream, allowing you to play with ingredients according to what you have on hand or what you’re craving.
## Why You’ll Love This Recipe
1. **Simplicity is Key**: With just a handful of quality ingredients, you can whip up this dish in no time. Minimal prep means more time to enjoy!
2. **Cost-Effective**: Unlike overpriced deli sandwiches, making your own Italian Grinder Salad Sandwich at home is incredibly budget-friendly. Plus, you can control the portion sizes.
3. **Customizable**: Whether you prefer turkey, pepperoni, or even a meat-free option, you can mix and match to your heart's content. The base ingredients can be adjusted to suit dietary preferences effortlessly.
4. **Fresher & Tastier**: Homemade means you can choose the freshest ingredients. Refrigerator leftovers can't compete with this sandwich's vibrant flavors.
5. **Quick & Easy**: Perfect for those busy weeknights or lazy weekends—once you’ve mastered the base recipe, you’ll find it’s a go-to culinary staple in your home.
Not only do I promise you will never look at store-bought sandwiches the same way again, but I also guarantee this recipe will make your tastebuds dance with delight!
## Ingredients Section
To craft your very own Italian Grinder Salad Sandwich, you’ll need the following ingredients:
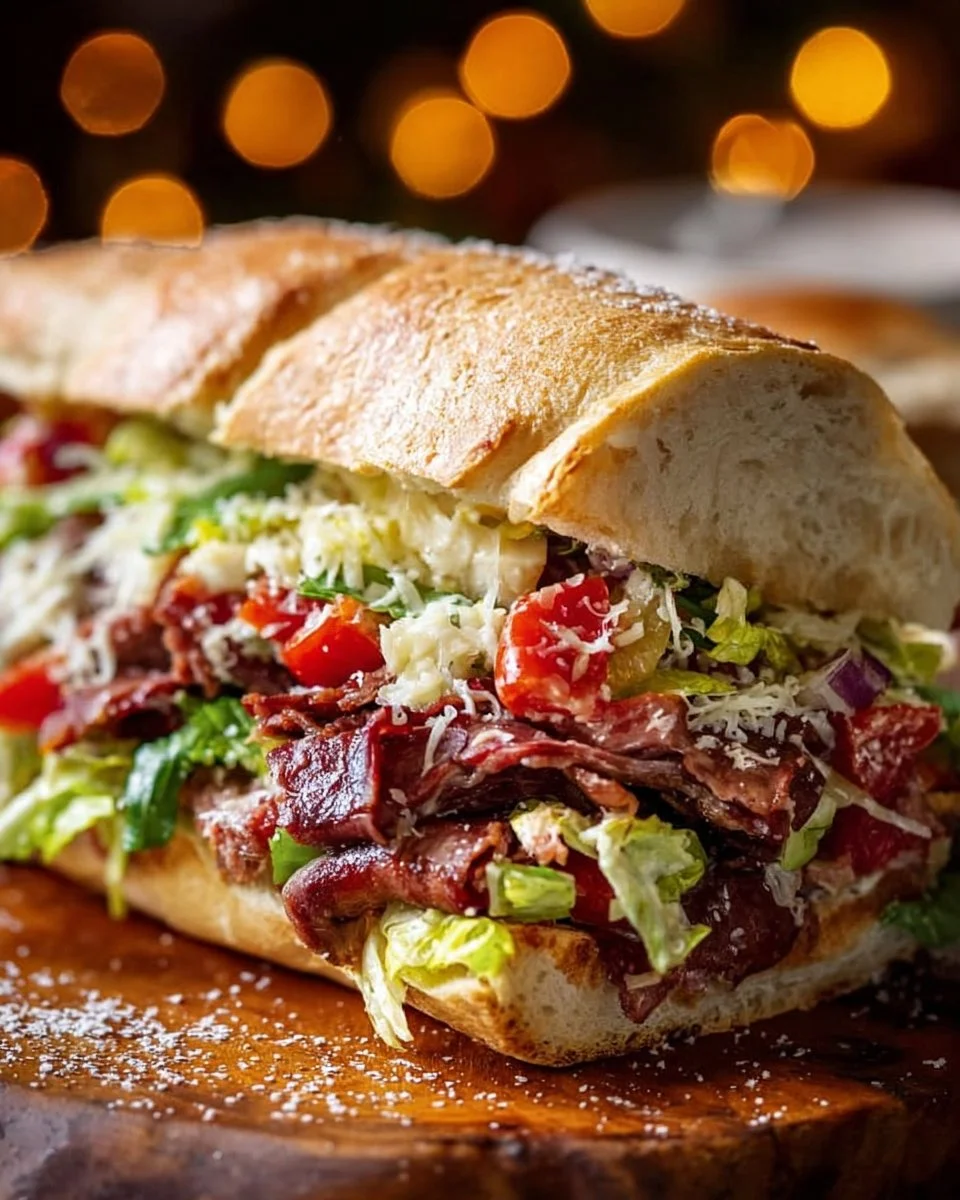
- **Italian bread or sub rolls**: Look for fresh, high-quality options at your local bakery. Day-old bread can work too, just lightly toast it!
- **Lettuce**: Romaine or iceberg for that satisfying crunch.
- **Tomatoes**: Choose ripe, flavorful varieties. Heirlooms are a real treat when in season.
- **Red onions**: Sweet or mild for a little bite, but feel free to soak them in cold water to mellow the flavor if desired.
- **Pepperoncini**: For that signature tang! Jarred works perfectly.
- **Salami & Capicola**: Opt for deli-quality meats for the best taste. I love using Boar's Head brand for its flavor and freshness.
- **Provolone cheese**: Sliced. Or, switch things up with a spicy pepper jack if you're feeling adventurous!
- **Olive oil**: Use extra virgin for a robust flavor.
- **Red wine vinegar**: Elevates the fresh flavors brilliantly.
- **Oregano, Salt, & Pepper**: For seasoning. Use fresh oregano if you have it; it’s worth it!
*Chef’s Note*: Allow your butter (if using for spreading) to come to room temperature for easy application, and set your ingredients out ahead so you can assemble quickly.
## Step-by-Step Instructions
1. **Slice the Italian bread or sub rolls in half**: Use a serrated knife for a clean cut. Aim to create sandwich halves that will hold all the fantastic fillings!
2. **Layer the lettuce, tomatoes, red onions, and pepperoncini**: Start with a generous base of lettuce for crunch, followed by thick slices of tomato, onion, and a few pepperoncini for heat. Don’t skimp on the veggies; they bring a freshness that’s delightful!
3. **Add slices of salami, capicola, and provolone cheese**: Stack them high for a satisfying bite. Feel free to alternate the meats and cheese to create a beautiful layered effect.
4. **Drizzle with olive oil and red wine vinegar, and sprinkle with oregano, salt, and pepper**: The oil and vinegar will seep into the bread, creating moisture. You’re building flavor here, so be generous with the spices!
5. **Close the sandwich and press it down slightly**: This will meld all those incredible flavors. Don’t be shy—apply a little pressure!
6. **Slice and serve immediately, or wrap it up for later**: The sandwiches are best enjoyed fresh but can hold up in the refrigerator for a day or two. If saving for later, wrap tightly to minimize sogginess.
*[Chef's Tip]*: If you have time, let your assembled sandwiches rest in the fridge for about 30 minutes before serving. This allows the flavors to meld beautifully!
## Expert Tips & Tricks
- **Storage Recommendations**: Keep your sandwiches refrigerated in an airtight container. They can last for up to 2 days, but fresh is always best.
- **Make-Ahead Instructions**: You can prep the individual components ahead of time. Chop veggies, slice meats, and cheeses, and store them separately. Assemble just before serving.
- **Troubleshooting Common Problems**: Avoid soggy bread by sealing your ingredients well and keeping moisture-heavy items (like tomatoes) toward the center.
- **Time Management**: If you’re making these for a crowd, assemble in batches to save time.
- **Serving Tips**: Serve with potato chips or a simple pasta salad for a complete meal!
## Serving Suggestions
Pair your Italian Grinder Salad Sandwich with crispy potato chips and a crunchy dill pickle for an authentic deli experience. A fresh side salad or some crunchy bruschetta makes for an even more delightful spread. For a rustic touch, serve it up on a wooden board with cute toothpicks and colored napkins!
These sandwiches make excellent finger food for casual gatherings, lunchboxes for kids, or even a simple, delicious dinner option after a long day. They are ultimate crowd-pleasers, no matter the event!
## Variations & Substitutions
Feel free to get creative! Swap out the meats for grilled chicken for a lighter, healthier version or try different cheeses like mozzarella or cheddar. For a vegetarian twist, load up on extra roasted veggies or marinated artichokes.
You can also adapt them seasonally: think roasted peppers in summer or peppery arugula instead of lettuce in the fall. The possibilities are limitless, so have fun experimenting!
## Nutrition & Storage Info
- **Prep Time**: 10 minutes
- **Cook Time**: 0 minutes
- **Total Time**: 10 minutes
- **Yield**: Serves 2-4, depending on portion size.
- **Estimated Calories**: About 450-500 calories per sandwich.
- **Storage Instructions**: Store in the fridge wrapped tightly in plastic wrap or in an airtight container. Best consumed within 2 days.
## FAQ Section
1. **Can I make these sandwiches in advance?**
Yes! Assemble them a few hours ahead and store them in the fridge. Just be mindful of sogginess by layering correctly.
2. **What if I don’t like spicy food?**
You can omit the pepperoncini and choose milder meats or just use more veggies.
3. **Can I use a different type of bread?**
Absolutely! Ciabatta or hoagie rolls also work beautifully.
4. **Are these sandwiches gluten-free?**
Use gluten-free bread for your version; everything else is naturally gluten-free!
5. **How do I prevent soggy bread?**
Build your sandwich layering wisely; keep wet ingredients away from the bread until serving.
6. **Can I add other toppings?**
Go wild! Avocado, fresh basil, or a sprinkle of cheese can only enhance the dinng experience.
7. **How can I make this more filling?**
Add more meats, extra cheese, or even some roasted veggies for heartiness.
8. **What’s the best way to store leftovers?**
Wrap tightly and keep in the fridge for no more than 2 days to retain freshness.
9. **Can I freeze these sandwiches?**
Freezing isn’t recommended as the bread will get soggy. Best enjoyed fresh!
10. **Are there vegetarian options?**
Absolutely! You can replace meats with marinated veggies or even chickpeas.

## Conclusion
This Italian Grinder Salad Sandwich is special because it brings together the best of bold flavors wrapped in a simple yet stunning package. It’s perfect for family gatherings, picnics, or just a delightful weeknight dinner at home. Trust me, once you give it a try, you'll want to make it again and again, just like my family does.
I would love to hear what you think! Try crafting your version and let me know how it turns out. And while you’re here, check out other delightful recipes on my blog that celebrate the joy of food and togetherness. Enjoy!
Italian Grinder Salad Sandwich
A delightful and customizable Italian sandwich loaded with fresh vegetables, cured meats, and provolone cheese, perfect for any occasion.
Ingredients
For the Sandwich
- 4 rolls Italian bread or sub rolls Fresh, high-quality options preferred.
- 4 cups Lettuce Romaine or iceberg for crunch.
- 2 cups Tomatoes Ripe, flavorful varieties.
- 1 Red onion Sweet or mild, soak in cold water if desired.
- 1 cup Pepperoncini Jarred works perfectly.
- 4 oz Salami Opt for deli-quality meats.
- 4 oz Capicola Opt for deli-quality meats.
- 4 oz Provolone cheese Sliced, or use pepper jack for a twist.
- 2 tbsp Olive oil Use extra virgin for robust flavor.
- 2 tbsp Red wine vinegar Elevates the flavors.
- 1 tbsp Oregano Use fresh if available.
- 1 tsp Salt
- 1 tsp Pepper
Instructions
Preparation
- Slice the Italian bread or sub rolls in half using a serrated knife.
- Layer the lettuce, tomatoes, red onions, and pepperoncini starting with lettuce for crunch.
- Add slices of salami, capicola, and provolone cheese, stacking them high.
- Drizzle with olive oil and red wine vinegar, and sprinkle with oregano, salt, and pepper.
- Close the sandwich and press it down slightly to meld the flavors.
- Slice and serve immediately, or wrap it up for later.
Notes
For the best flavor, let assembled sandwiches rest in the fridge for about 30 minutes before serving. Store leftovers in an airtight container and consume within 2 days.