

Crafting Irresistible Pumpernickel Bread: A Delight for All Seasons!
A Slice of My Heart: The Pumpernickel Bread Story
Every loaf of homemade bread tells a story, but my journey with Pumpernickel Bread is woven with cherished family memories and a dash of nostalgia. I vividly remember weekends spent at my grandmother’s kitchen, where the aroma of rye and cocoa mingled with laughter and warmth. She would expertly knead the dough, her strong hands transforming simple ingredients into an extraordinary loaf that carried not just flavor but love.
What truly sets my Pumpernickel recipe apart from store-bought or restaurant versions is the deep, rich flavor that comes from using high-quality ingredients, like medium rye flour and robust molasses. This bread is more than just a sidekick for your meals; it’s a part of family tradition, a vehicle for bringing loved ones together around the dinner table.
In this post, I promise to guide you through each step of making your very own Pumpernickel Bread, unlocking not just a recipe but an experience that will warm your heart and home. So, roll up your sleeves, because you’re about to embark on a deliciously rewarding baking adventure!
What Are Pumpernickel Bread?
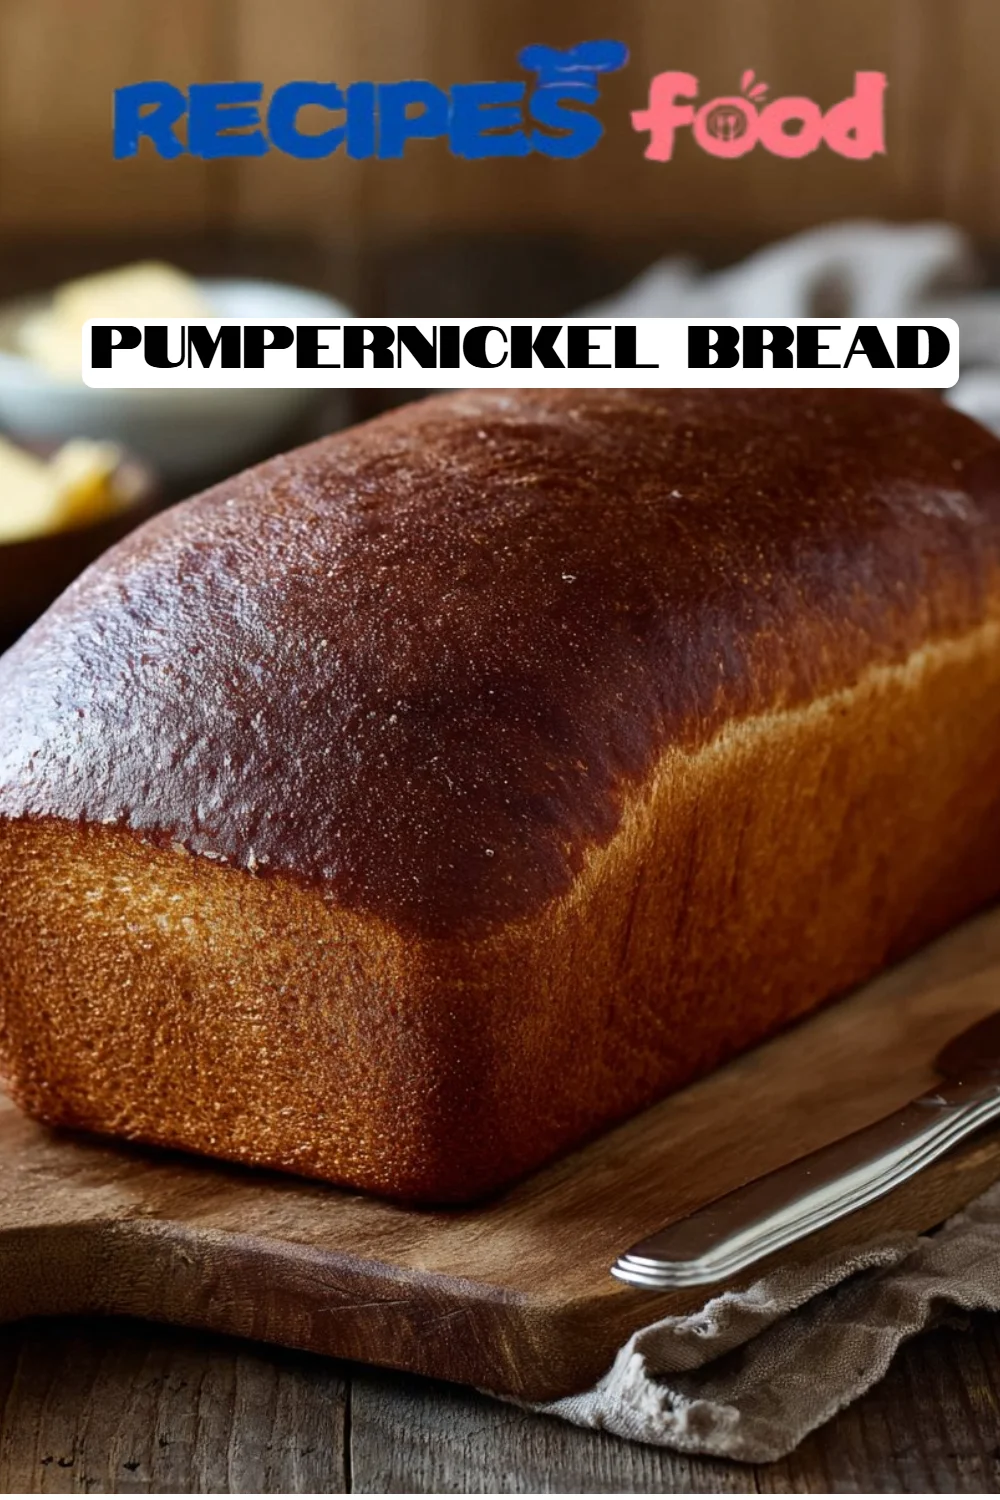
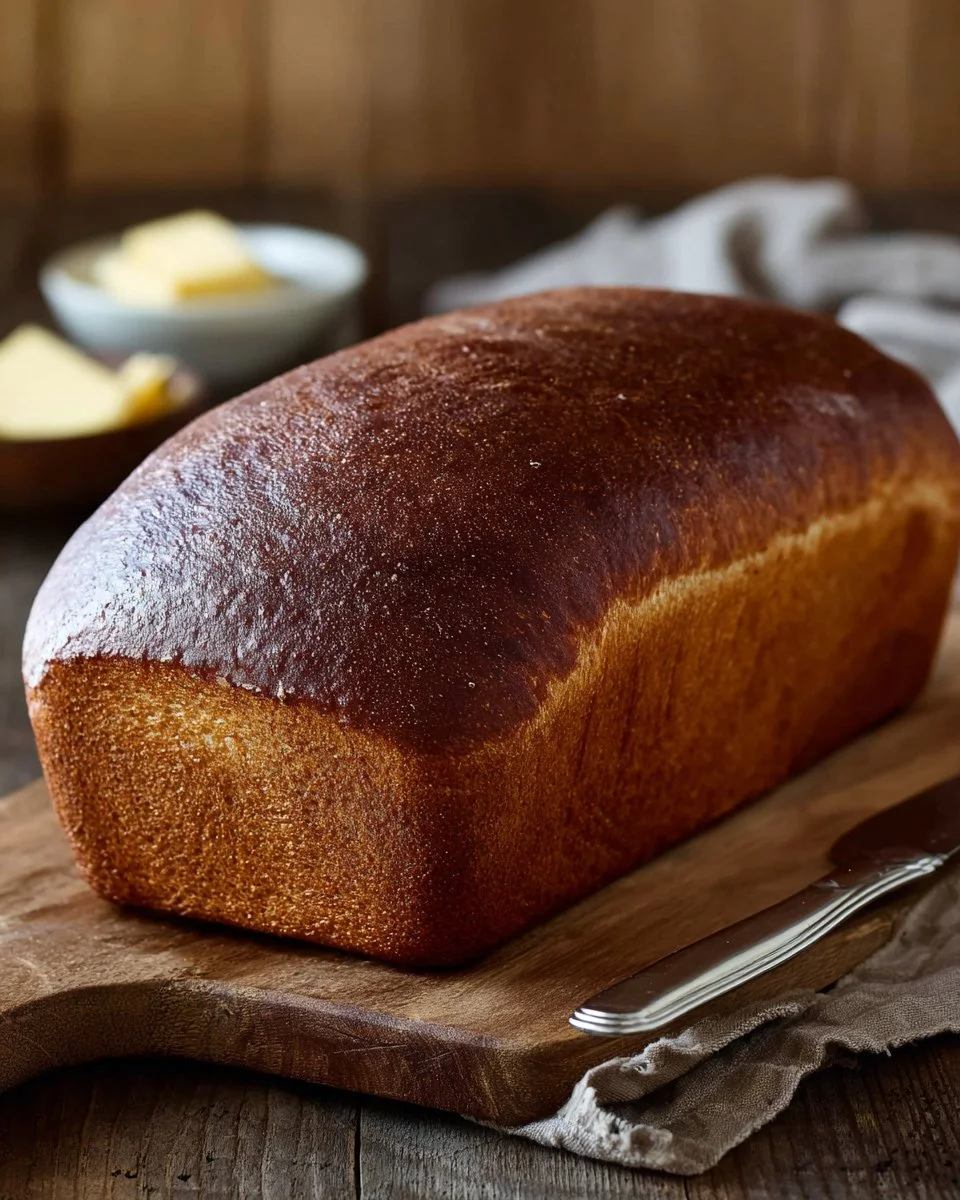
Pumpernickel bread has a beautiful origin story dating back to Germany, where it’s been a beloved staple for centuries. Traditionally made from coarsely ground rye, this bread is known for its dense texture and slightly sweet and nutty flavor, which is further enhanced by the addition of unsweetened cocoa powder.
What makes Pumpernickel truly unique is its fermentation process; unlike typical bread, it often includes a long, slow rise that develops a robust, complex flavor profile. When you slice into it, you’ll notice its dark, rich crust and soft, chewy interior—a satisfying contrast that’s perfect for everything from sandwiches to a snack on its own with butter or cream cheese.
Whether you’re preparing a hearty breakfast or hosting a dinner party, this bread complements both casual and refined meals, making it a versatile addition to any gathering.
Why You’ll Love This Recipe
Homemade Goodness: There’s nothing quite like the taste of freshly baked bread, especially when warmed by the cozy aroma that fills your kitchen. This Pumpernickel Bread will have your neighbors knocking on your door, hoping for a slice!
Cost-Effective: Making your own Pumpernickel at home not only saves you money but lets you control the quality of your ingredients. Store-bought versions often contain preservatives and additives that you simply don’t need.
Customization Options: This recipe is just the start! Feel free to toss in seeds, herbs, or even chopped nuts to personalize your loaf. Imagine slicing into a Pumpernickel filled with sunflower seeds, adding yet another layer of flavor and texture.
Simple Yet Rewarding: You’ll be pleased to find that this recipe isn’t overly complicated. With a bit of patience and a little elbow grease, you’ll be producing homemade bread worthy of any bakery display!
Nostalgic Comfort: There’s something immensely satisfying about crafting your own bread, evoking the warmth of home and family gatherings. It’s an experience that brings back memories and creates new ones.
Ingredients
- 2 1/2 cups all-purpose flour (White Lily is my preferred brand for bread, as it creates a lovely texture!)
- 1 cup bread flour (King Arthur Flour is excellent for that ideal chewiness)
- 1 cup medium rye flour (Bob’s Red Mill offers great-quality rye flour)
- 2 tablespoons unsweetened cocoa powder (This adds depth of flavor—Ghirardelli is my go-to!)
- 5 teaspoons instant yeast (Rapid-rise yeast works well for a quicker rise)
- 1 tablespoon granulated sugar (Any granulated sugar will do!)
- 1 tablespoon kosher salt (Maldon salt adds a touch of luxury)
- 1 1/2 cups warm water (105-115°F—warm enough to proof the yeast without killing it)
- 1/2 cup molasses (For extra flavor, choose a robust brand like Grandma’s)
- 2 tablespoons vegetable oil (I prefer canola oil for neutral flavor)
- Prep Notes: Make sure your ingredients are at room temperature, especially your molasses and vegetable oil. It helps them incorporate better into the dough.
Step-by-Step Instructions
Prepare your pan: Spray a 9×5-inch loaf pan with nonstick cooking spray and set aside.
Mix dry ingredients: In a large bowl, whisk together all-purpose flour, bread flour, rye flour, cocoa powder, instant yeast, granulated sugar, and kosher salt. This is the bedrock for your delicious bread!
Combine wet ingredients: In a stand mixer bowl, mix warm water, molasses, and vegetable oil together until well-blended.
Form the dough: Gradually add the dry ingredients to the wet mixture and mix on low speed until a dough forms, about 1-2 minutes.
Knead the dough: Turn the mixer to medium speed and knead the dough for 5-8 minutes until it’s smooth and elastic.
Let it rise: Place the dough in an oiled bowl, cover with plastic wrap, and let rise in a warm place until doubled in size, about 60-90 minutes. (If you’re short on time, a warm oven can help!)
Shape the dough: Roll out the risen dough into a rectangle, then roll it tightly into a log, pinching the seams to seal.
Second rise: Place seam-side down in the prepared loaf pan and let rise until doubled, approximately 45 minutes.
Preheat your oven: Preheat your oven to 375°F (190°C) so it’s nice and hot when your bread is ready to bake.
Bake to perfection: Beat the clock and bake for 50-55 minutes, until the bread sounds hollow when tapped. Trust your senses—this is where the magic happens!
Cool and slice: Cool completely on a wire rack before slicing. Patience is key here; a warm loaf could crumple when sliced!
Expert Tips & Tricks
Perfecting the Rise: If your dough isn’t rising well, check that your yeast is fresh. A bubble-filled proofing stage indicates your yeast is active!
Storage: Once baked, let the loaf cool completely. For optimal freshness, wrap it in foil and store it at room temperature for up to 3 days. You can also freeze it by wrapping it tightly in plastic wrap.
Make-Ahead: Prepare the dough the night before and let it rise in the fridge. In the morning, just shape and bake—fresh bread with minimal morning effort!
Troubleshooting: If your bread falls post-bake, it may have over-proofed. Keep an eye on the rise; you want it just doubled, not peak!
Serving Suggestions
This luscious Pumpernickel Bread pairs beautifully with rich spreads like cream cheese, fresh butter, or your favorite hummus. For a delightful brunch, serve it alongside smoked salmon and capers.
During the holidays, slice it up and serve it with a lavish charcuterie board overflowing with cheeses, meats, and pickles. Its hearty texture and deep flavors make it a standout at any occasion.
Variations & Substitutions
Flavor Combinations: Why not add caraway seeds for a classic touch? Or incorporate walnuts for a deliciously crunchy contrast?
Dietary Adaptations: For a gluten-free take, try using gluten-free bread flour instead, but bear in mind that texture may differ.
Seasonal Twists: During fall, swap out some flour for pumpkin puree for a seasonal spin that’s tasty and festive.
Nutrition & Storage Info
- Prep time: 2 hours (including rise time)
- Cook time: 50-55 minutes
- Total time: ~3 hours
- Yield: 1 loaf (about 12 servings)
- Estimated calories: 120 calories per slice
Storage Instructions: Keep at room temperature wrapped tightly, in the fridge for up to a week, or freeze for 3 months.
FAQ Section
What gives Pumpernickel its dark color?
The dark color comes from the use of whole rye flour and cocoa powder, which is unique to this type of bread.Can I use whole wheat flour instead?
Absolutely! Just be mindful that it will alter the flavor and texture – a lovely whole wheat perspective!Can I make this bread in advance?
Yes! The dough can be made the night before. Just let it rise overnight in the fridge.Does it pair well with other foods?
Yes! It’s terrific with sharp cheddar, smoked meats, or as a base for a hearty sandwich.Why did my bread not rise?
It could be your yeast isn’t fresh or your water was too hot, which can kill the yeast.Can I substitute honey for molasses?
Yes, honey can add a different flavor profile—consider using half the amount since it’s sweeter.What’s the best way to slice Pumpernickel?
Use a serrated knife for clean cuts without squishing the loaf.Can I bake this in a bread machine?
Most definitely, but adjust your method according to the machine’s instructions.Can I add seeds to the dough?
Yes! Sunflower seeds or pumpkin seeds would add great texture and flavor.What if my bread is too dense?
You might have added too much flour during kneading; ensure your measuring technique is accurate.
Conclusion
This Pumpernickel Bread recipe is a beautiful blend of tradition and comfort, something that transcends generations in my family. I wholeheartedly encourage you to give it a try—your kitchen will be filled with warmth and delightful scents, and your taste buds will thank you!
Share your baking experiences with me in the comments, and don’t miss out on exploring more recipes on my blog, like my savory Rye Bread or light, fluffy Whole Wheat Bread! Happy baking!

Pumpernickel Bread
Ingredients
Dry Ingredients
- 2.5 cups all-purpose flour White Lily is preferred for its texture
- 1 cup bread flour King Arthur Flour is excellent for chewiness
- 1 cup medium rye flour Bob's Red Mill offers great quality
- 2 tablespoons unsweetened cocoa powder Ghirardelli is recommended for depth of flavor
- 5 teaspoons instant yeast Rapid-rise yeast works well for quicker rise
- 1 tablespoon granulated sugar Any granulated sugar will do
- 1 tablespoon kosher salt Maldon salt adds a touch of luxury
Wet Ingredients
- 1.5 cups warm water 105-115°F for proofing yeast
- 0.5 cups molasses Choose a robust brand like Grandma's
- 2 tablespoons vegetable oil Canola oil preferred for neutral flavor
Instructions
Preparation
- Spray a 9×5-inch loaf pan with nonstick cooking spray and set aside.
- In a large bowl, whisk together all-purpose flour, bread flour, rye flour, cocoa powder, instant yeast, granulated sugar, and kosher salt.
- In a stand mixer bowl, mix warm water, molasses, and vegetable oil together until well-blended.
- Gradually add the dry ingredients to the wet mixture and mix on low speed until a dough forms, about 1-2 minutes.
- Turn the mixer to medium speed and knead the dough for 5-8 minutes until smooth and elastic.
Rising
- Place the dough in an oiled bowl, cover with plastic wrap, and let rise in a warm place until doubled in size, about 60-90 minutes.
- Roll out the risen dough into a rectangle, then roll tightly into a log, pinching seams to seal.
- Place seam-side down in the prepared loaf pan and let rise until doubled, approximately 45 minutes.
Baking
- Preheat your oven to 375°F (190°C).
- Bake for 50-55 minutes until the bread sounds hollow when tapped.
- Cool completely on a wire rack before slicing.