

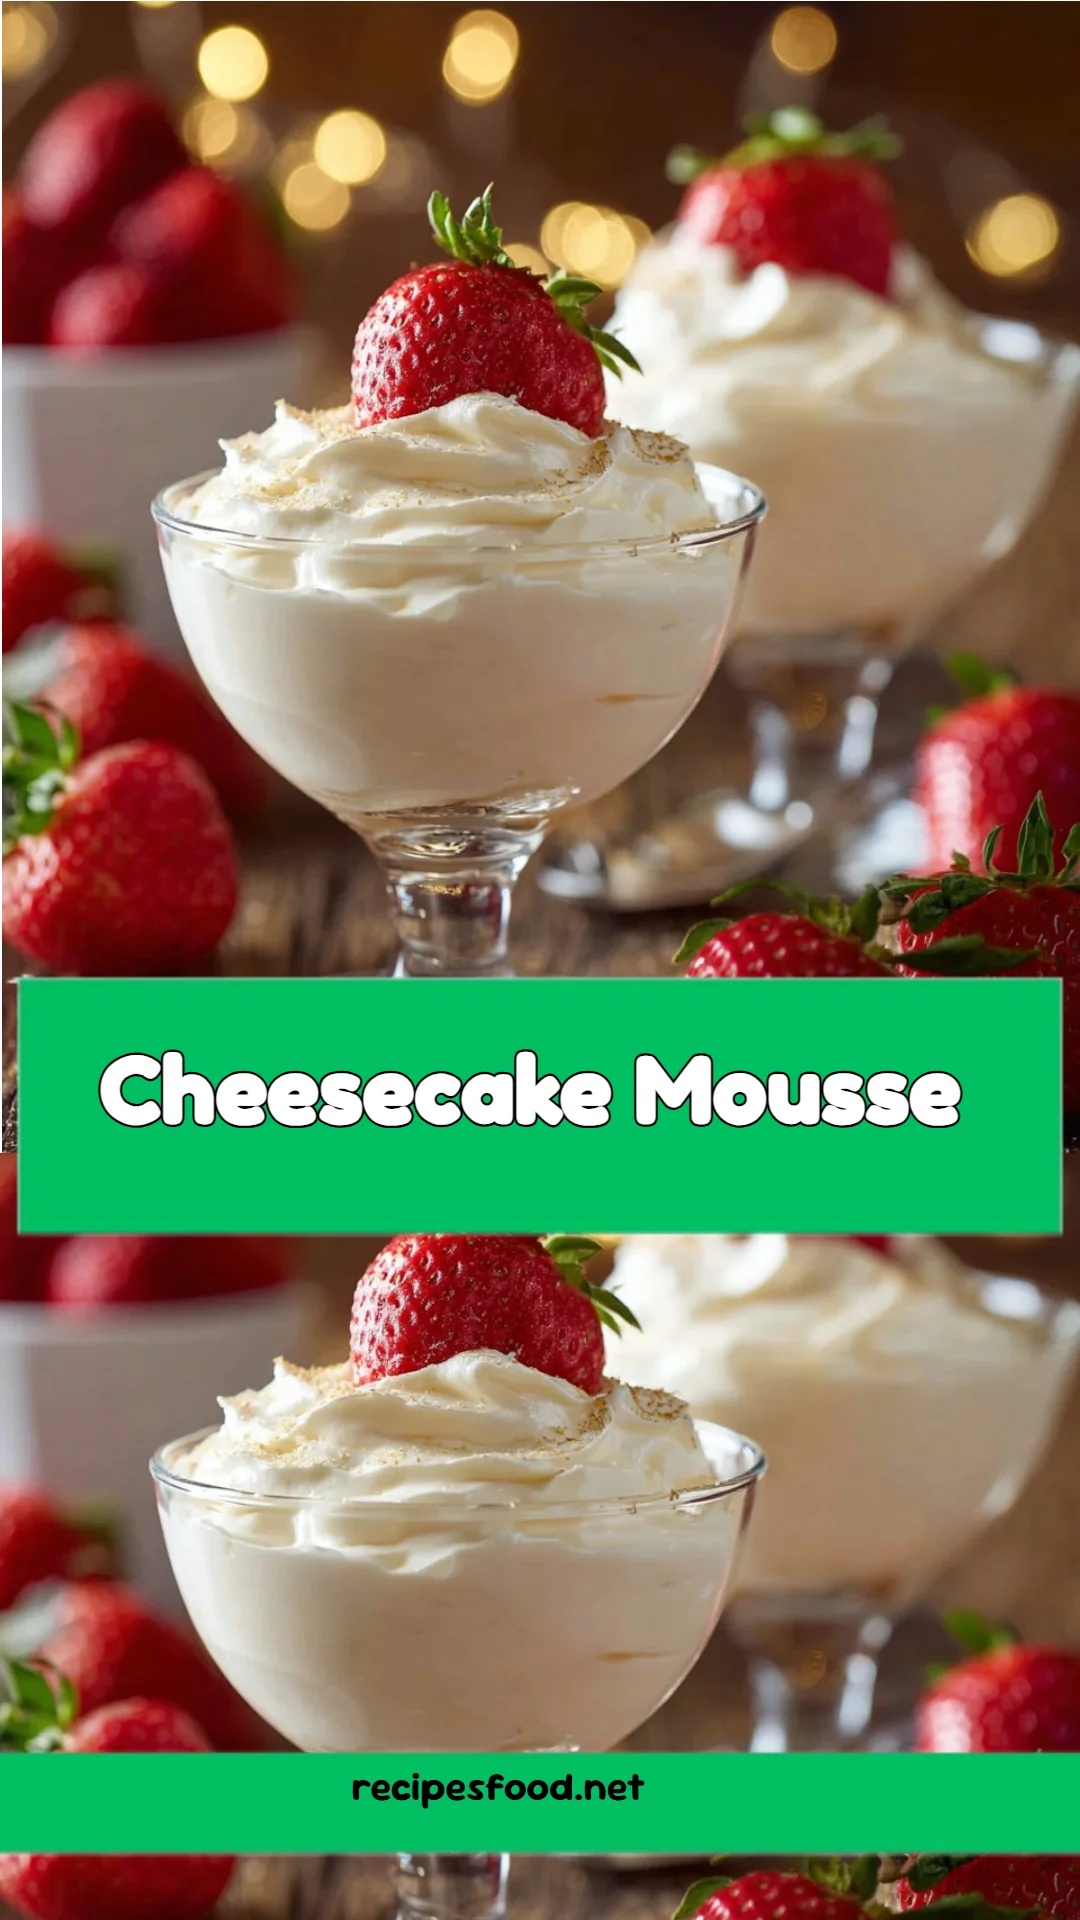
Heavenly Cheesecake Mousse: A Simple Indulgence
There’s something undeniably magical about dessert—especially when it involves a silky, creamy Cheesecake Mousse that dances on your palate and whispers sweet nothings to your soul. I’ll never forget the first time I crafted this delightful treat, an unexpected sweet fix during a summer family gathering. The joy that filled the room as everyone savored each luscious bite was everything I had hoped it would be, transforming a simple recipe into a cherished family memory.
This Cheesecake Mousse isn’t just any dessert; it possesses a lightness that sets it apart from traditional cheesecake while still delivering that rich, creamy flavor we all adore. Unlike the dense slices that can leave you feeling heavy, this mousse feels like a delicate cloud of sweetness. In this recipe, I’ve honed in on the perfect balance of creaminess and sweetness. Trust me, once you whip this up for your loved ones, they’ll be begging for seconds—and thirds!
In this post, you’ll learn how to create the perfect Cheesecake Mousse, gaining tips and tricks along the way to make it shine. Let’s get whisking!
What Are Cheesecake Mousse?
Cheesecake mousse is a delightful twist on classic cheesecake, originating from the blending of traditional whipped cream and cream cheese to create a light, airy dessert. The need for a lighter alternative came from many bakers looking to replicate the beloved creaminess of cheesecake sans the hefty crust. Think of it as cheesecake’s laid-back cousin that you can enjoy any time of the day—A go-to dessert for picnics, potlucks, or a cozy night in.
In terms of taste, this dessert offers a dreamy balance of sweet and tangy, with a velvety texture that practically melts in your mouth. Unlike its denser relative, the mousse provides a refreshing experience that pairs well with various toppings, from fruit to chocolate drizzle, making it an incredibly versatile dessert.
You’ll want to whip this up when you have guests over, after a long day at work, or even just as a reward for a job well done. It’s the kind of dessert that brings smiles—whether served on an elegant dinner table or enjoyed on the couch after a long week.
Why You’ll Love This Recipe
Simplicity & Ease: This Cheesecake Mousse is perfect even for beginner bakers! It requires no fancy techniques or special equipment beyond your trusty stand mixer. In about 15 minutes of active mixing and 1-2 hours of chilling, you’ll whip up a dessert that’s sure to impress.
Customization Options: One of my favorite parts about this recipe is that you can easily customize it. Want to add a seasonal twist? Try swirling in some pumpkin puree for autumn or a splash of mint extract for a refreshing summer mint mousse. The possibilities are endless!
Cost-Effectiveness: Ditch the overpriced store-bought desserts! I’ve crunched the numbers and making this Cheesecake Mousse at home is far more budget-friendly. Plus, you control the quality of ingredients—no mystery additives here.
Superior Taste: After making it numerous times for friends and family, they all rave about how much better it is than what they’ve tried at restaurants. The fresh cream, combined with quality cream cheese, creates a flavor profile that you just can’t replicate elsewhere.
Low-Maintenance & Versatile: Once you mix everything together, it’s hands-off! Pop it in the fridge and allow it to chill while you focus on your main course or enjoy a glass of wine. It’s a stress-free dessert option perfect for casual gatherings or formal events.
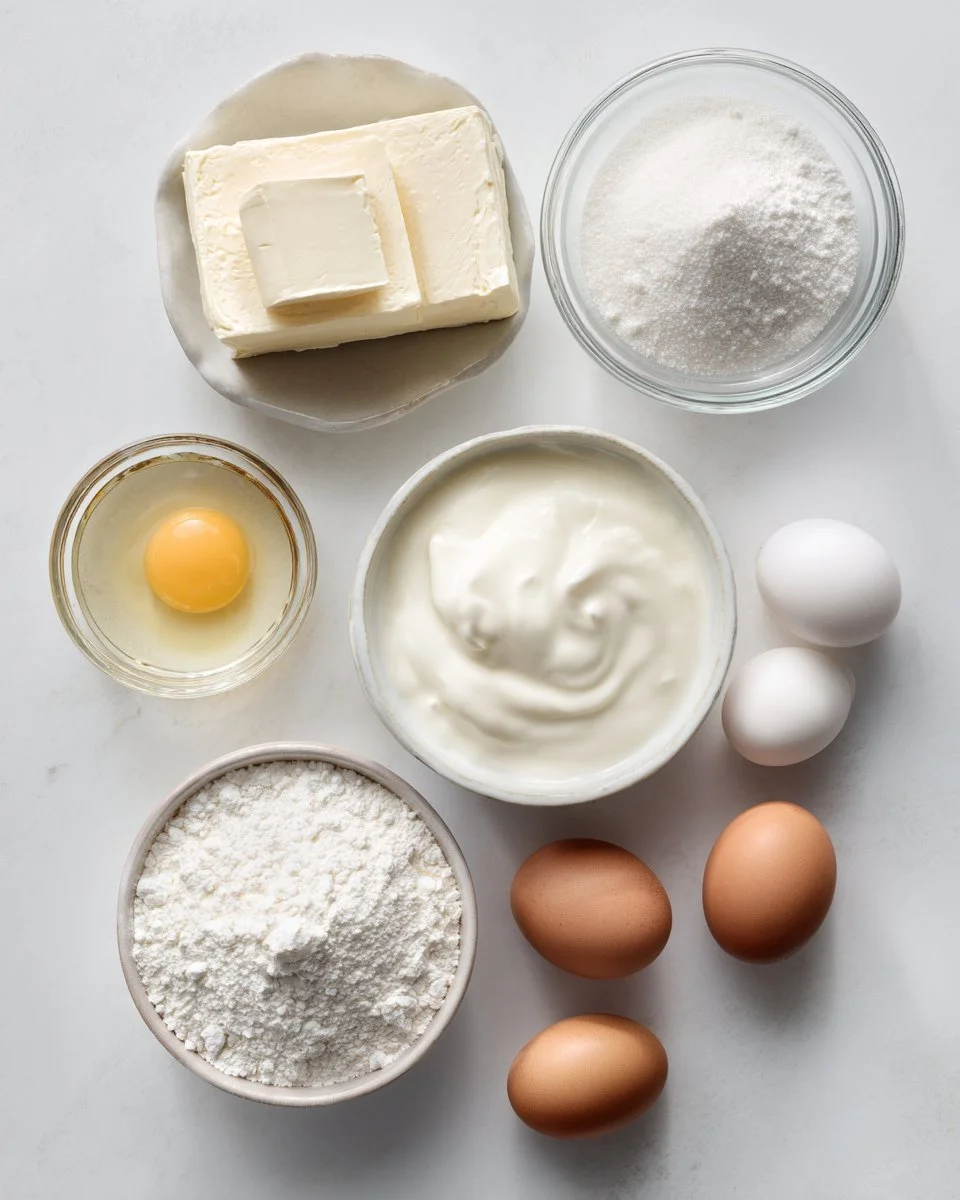
Ingredients
- 4 ounces cream cheese, softened: Make sure it’s softened to room temperature; this ensures a smooth, creamy consistency. I prefer using Philadelphia cream cheese for its rich flavor.
- 1/2 cup confectioners’ sugar: Sifted to avoid lumps—this will help sweeten the mousse without graininess.
- 2 cups heavy cream: Go for a high-fat content heavy whipping cream for ultimate fluffiness. Organic brands often yield the best results; I like using Horizon Organic for its taste.
- 1/2 teaspoon vanilla extract: Real vanilla extract brings warmth to the flavor profile. Avoid imitation for the best results.
- 1 pinch kosher salt: Just a touch elevates the sweetness and balances the flavors.
- 4 large egg whites, room temperature: Fresh egg whites, whipped to stiff peaks, add a delightful lift to your mousse.
Note: Ensure all your dairy ingredients are at room temperature for better incorporation and fluffiness.
Step-by-Step Instructions
Chill Your Tools: Place the bowl and whisk attachment from your stand mixer into the freezer to chill for about 15 minutes. This will help the cream whip up faster and maintain its structure.
Mix the Base: In the chilled bowl, add the softened cream cheese and confectioners’ sugar. Mix on medium-high speed until fully combined and smooth—no lumps should remain. This should take about 2-3 minutes.
Whip the Cream: Gradually pour in the heavy cream, followed by the vanilla extract and a pinch of salt. Mix slowly at first and then increase the speed until stiff peaks form, scraping down the sides of the bowl as necessary. You’ll know it’s done when you can pull the beater out and the cream holds its shape (about 4-5 minutes).
Beat the Egg Whites: In a separate clean, dry bowl, beat the egg whites until stiff peaks form, which generally takes around 3-4 minutes. They should stand tall with a glossy appearance.
Combine Mixtures: Gently fold the whipped egg whites into the whipped cream cheese mixture. Use a spatula and do this in batches to keep the mixture light and airy. This requires a delicate touch—avoid over-mixing.
Chill and Set: Transfer the mousse into serving dishes or a large bowl, cover with plastic wrap, and chill in the refrigerator for 1-2 hours before serving. This allows it to set and develop flavors.
Chef’s Tip: If you want to avoid lumps in your cream cheese, cut it into cubes before softening and beat it a little longer to ensure a smooth mixture.
Expert Tips & Tricks
Ingredient Quality: Always use high-quality ingredients, especially your cream and cream cheese. Even small choices make a big difference in taste!
Storage: Store leftovers covered in the fridge. It’s best consumed within 2-3 days, but it holds well for up to a week. If you need it to last longer, consider freezing it (though texture may slightly change).
Make-Ahead: Perfect for busy schedules, you can easily prep this dessert a day ahead. Just cover tightly and chill; it’ll be ready to serve when your guests arrive.
Troubleshooting: If your mousse doesn’t set properly, ensure those egg whites are whipped to stiff peaks and that you’re folding gently but thoroughly to incorporate air.
Serving Temperature: For the best flavor, serve cheesecake mousse slightly chilled, not ice-cold. About 10-15 minutes out of the fridge is ideal.
Serving Suggestions
This Cheesecake Mousse shines beautifully all on its own, but why not elevate your presentation? Top it with fresh berries, a drizzle of chocolate sauce, or a sprinkle of graham cracker crumbs to mimic classic cheesecake. Pair with a crisp homemade gingersnap or a light biscotti for an extra touch of elegance.
This dessert is perfect for celebrations—think birthday parties, holiday gatherings, or as a light finish to a romantic dinner. Trust me, your guests will be clamoring for your secret!
Variations & Substitutions
Fruit Lovers: Add a swirl of berry puree or crushed pineapple for a fruity twist. Berries mixed into the mousse provide a delightful, tart contrast.
Chocolate Lovers: Substitute 4 ounces of melted chocolate for part of the cream cheese for a rich chocolate cheesecake mousse. You can also fold in cocoa powder for a lighter version.
Dietary Needs: For a gluten-free option, just ensure that your chocolate or graham cracker crumbs (if used) are certified gluten-free.
Seasonal Flavors: In fall, swap in pumpkin puree and spice things up with cinnamon for a comforting autumnal dessert.
Nutrition & Storage Info
- Prep Time: 15 minutes
- Chill Time: 1-2 hours
- Total Time: Approx. 2 hours
- Yield: 4 servings
- Estimated Calories: 360 calories per serving (varies based on toppings).
Storage Instructions: Keep any leftovers covered in the fridge for up to 3 days. Can be frozen for about 2 months, but be aware of potential texture changes upon thawing.
FAQ Section
- Can I use low-fat cream cheese?
- Can I substitute the egg whites for anything else?
- How do I ensure there are no lumps in my mousse?
- Can this recipe be doubled easily?
- How can I make this mousse vegan?
- What can I do if my mousse is too runny?
- Can I add alcohol to the mousse?
- What’s the best way to fold in the egg whites?
- How can I make a colorful layered cheesecake mousse?
- Is it possible to infuse flavors into the mousse?
Conclusion
This Cheesecake Mousse is more than just a dessert; it’s a celebration of sweet moments and indulgent flavors. I encourage you to make it for your next gathering or enjoy it as a self-care treat—either way, you won’t be disappointed! Your family and friends will marvel at the delightful texture and flavor that sets this dessert apart from traditional cheesecakes.
I’d love to hear how your Cheesecake Mousse turns out, so please share your thoughts or modifications in the comments below! And if you’re looking for other delicious dessert recipes, be sure to check out my blog for more sweet inspiration. Happy baking!