

Irresistible No Churn Salted Caramel Ice Cream: A Sweet Escape
As summertime graces us with its warm embrace, nothing beats a scoop of ice cream to cool off and invigorate the spirit. I’ll never forget the first time I made No Churn Salted Caramel Ice Cream for a family gathering. It was sweltering outside, and my kids were running wild, sweaty and sticky — an ice cream treat felt like the perfect answer. The moment I served up that luscious, creamy dessert, with its ribbons of salted caramel glistening in the summer sun, the chaos melted away. Suddenly, smiles and laughter filled our backyard, all thanks to that glorious concoction of sweet and salty goodness.
What sets my No Churn Salted Caramel Ice Cream apart from the others? It’s the crispness of the homemade caramel combined with the velvety smooth cream that makes every bite a comforting reminder of joyous family moments. Unlike store-bought versions, which often come with a distant aftertaste of preservatives, this recipe is pure love in a loaf pan. Trust me, once you try this recipe, you’ll never look back.
So, roll up your sleeves and prepare for some magic in the kitchen! In this post, I’ll guide you through creating this delicious summer favorite, with tips and tricks that will make you feel like a pro.
What Are No Churn Salted Caramel Ice Cream?
No Churn Salted Caramel Ice Cream is a delightful twist on classic ice cream that requires no ice cream maker! Born out of necessity during hotter months when standing over a hot stove is the last thing anyone wants to do, this dessert has become a beloved staple in my kitchen.
The rich, smooth texture is a party for your taste buds, boasting a silky creaminess that dances between sweet and salty. Each spoonful melts effortlessly in your mouth, leaving hints of deep caramel flavor with a tantalizing salty finish.
This dreamy treat is perfect for any occasion — whether you’re hosting a backyard barbecue, cooling off after a long day, or simply indulging yourself on a quiet evening. It’s as versatile as it is delicious and will surely become a cherished family recipe for years to come.
Why You’ll Love This Recipe
Easily attainable ingredients: Unlike fancy ice creams that require a lengthy list of esoteric ingredients, my No Churn Salted Caramel Ice Cream uses simple pantry staples. Cold heavy whipping cream, a can of sweetened condensed milk, and some caramel sauce make this a breeze to whip up.
Cost-effective indulgence: Making ice cream at home can save you quite a bit compared to the prices of high-quality store-bought varieties. Plus, you’ll have full control over the flavor and sweetness.
Customizable options: Want to add a touch of chocolate or swirl in some crushed cookies? The possibilities are as endless as your imagination! You can adjust flavors to cater to your family’s preferences.
Easy-peasy: This no-churn recipe is incredibly user-friendly. With minimal tools and effort, you can achieve the same (if not better) results than any ice cream shop. Ideal for newbie bakers, this one won’t have you sweating over a complicated process.
Fun bonding activity: Simple recipes like this make for delightful kitchen adventures. Grab your kids or friends, and let them join in the fun! They’ll love helping with the mixing and the inevitable taste testing.
Ingredients
To make a delectable No Churn Salted Caramel Ice Cream, gather the following:
- 2 cups heavy whipping cream, cold: Always a fan of fresh cream! For the best volume, ensure your cream is well-chilled before whipping.
- 1 can sweetened condensed milk: This sweet nectar adds richness and a lovely texture. Don’t skip this; it’s the secret to the creaminess!
- 1 teaspoon vanilla extract: Try using high-quality extract for a deeper flavor; I love Nielsen-Massey or Simply Organic.
- 1/4 teaspoon kosher salt: This little pinch elevates the entire ice cream, enhancing the sweetness of the caramel.
- 1 cup caramel sauce: Go for homemade if you’re feeling adventurous, but store-bought sauces, like Smucker’s or Ghirardelli, work just perfectly!
Prep notes: Getting your ingredients to room temperature (but especially the butter for any optional add-ins) can make a world of difference in mixing and texture.
Step-by-Step Instructions
Prep the Pan: Place a 9×5-inch loaf pan in the freezer to chill for about 10 minutes while you prepare the ice cream base. The chilled pan helps the ice cream freeze properly.
Whip the Cream: In a large mixing bowl, begin whipping the cold heavy cream with a hand mixer or stand mixer on medium-high speed. You’re aiming for stiff peaks, which should take about 2-3 minutes. You’ll know it’s ready when you can flip the bowl upside down without any of the cream moving!
Chef’s Tip: Ensure not to over-whip your cream, as this can lead to a grainy texture. Stop as soon as stiff peaks form.
Mix the Condensed Milk Mixture: In another bowl, combine the sweetened condensed milk, vanilla extract, and kosher salt. Stir gently until the mixture is thoroughly combined.
Fold Together: Grab your whipped cream and fold about one cup of it into the condensed milk mixture using a rubber spatula. Be gentle during this step; we want to maintain the airiness of the cream.
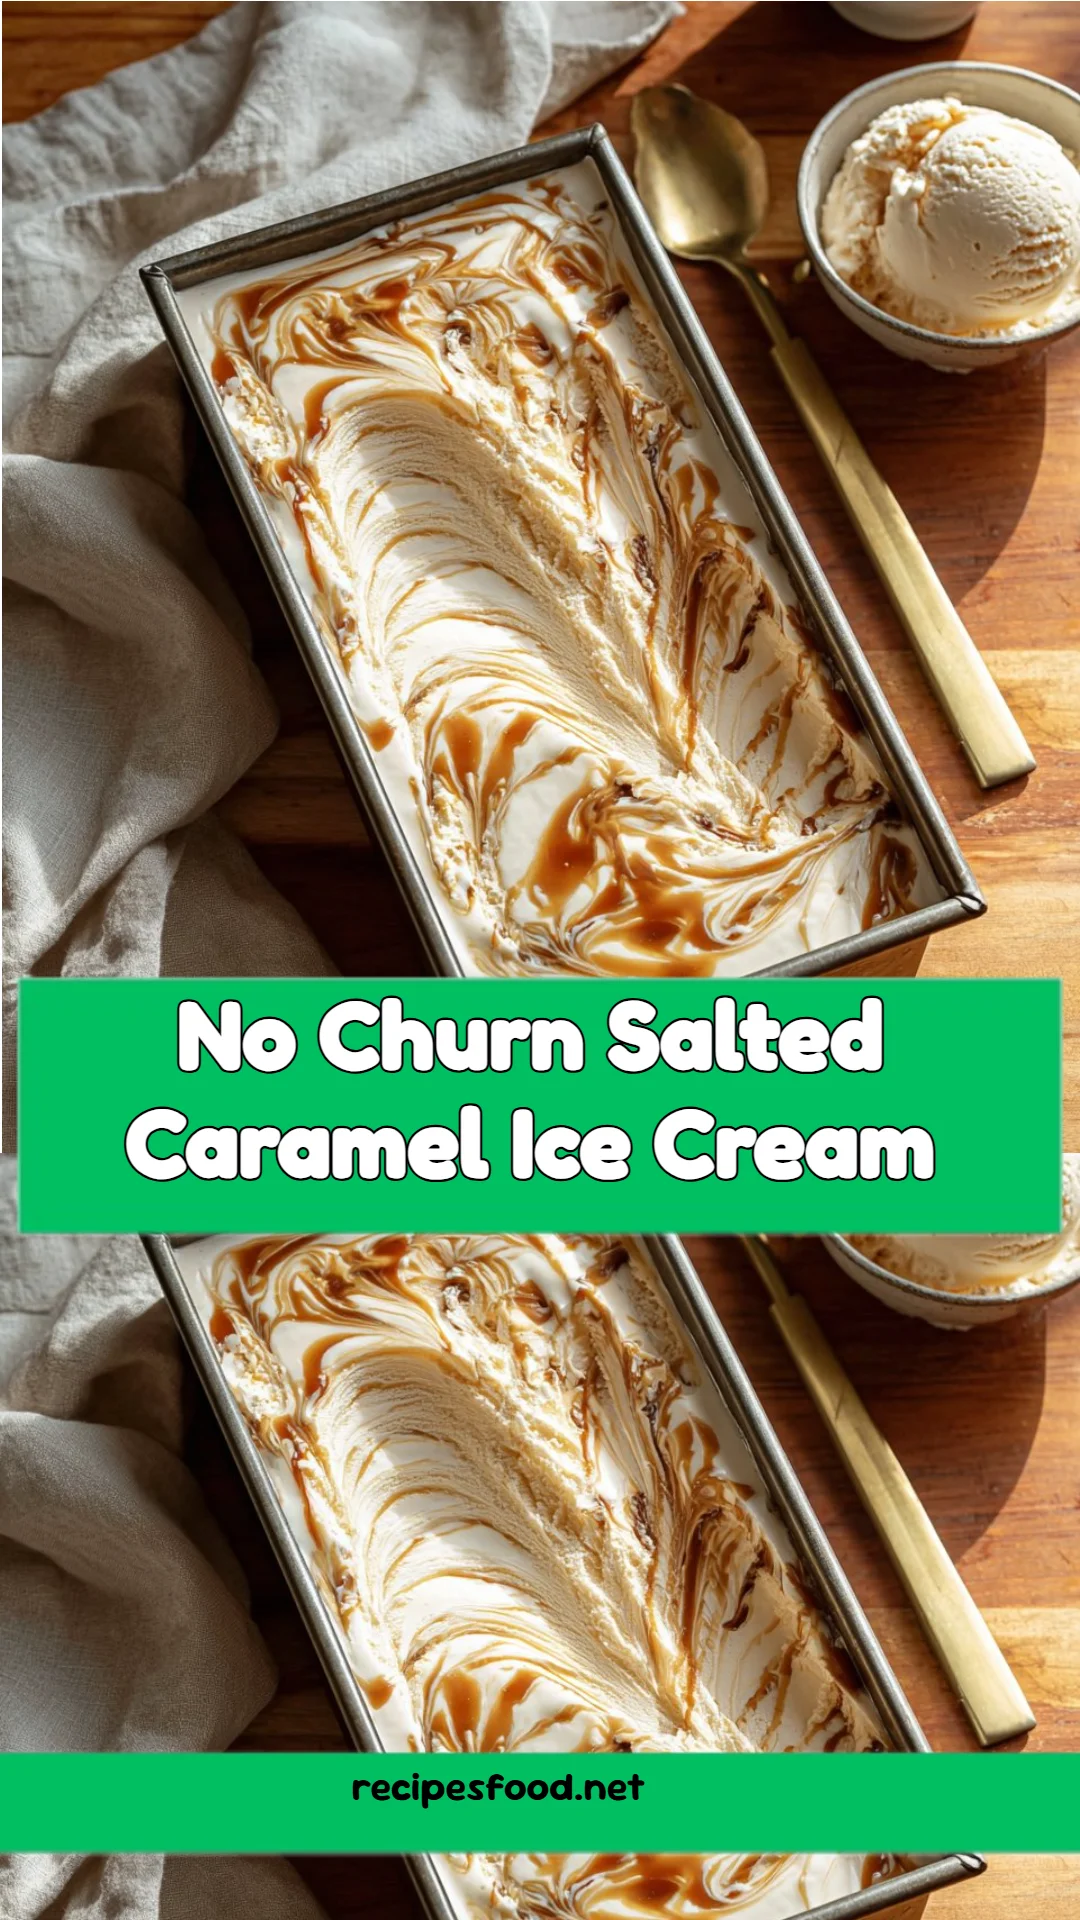
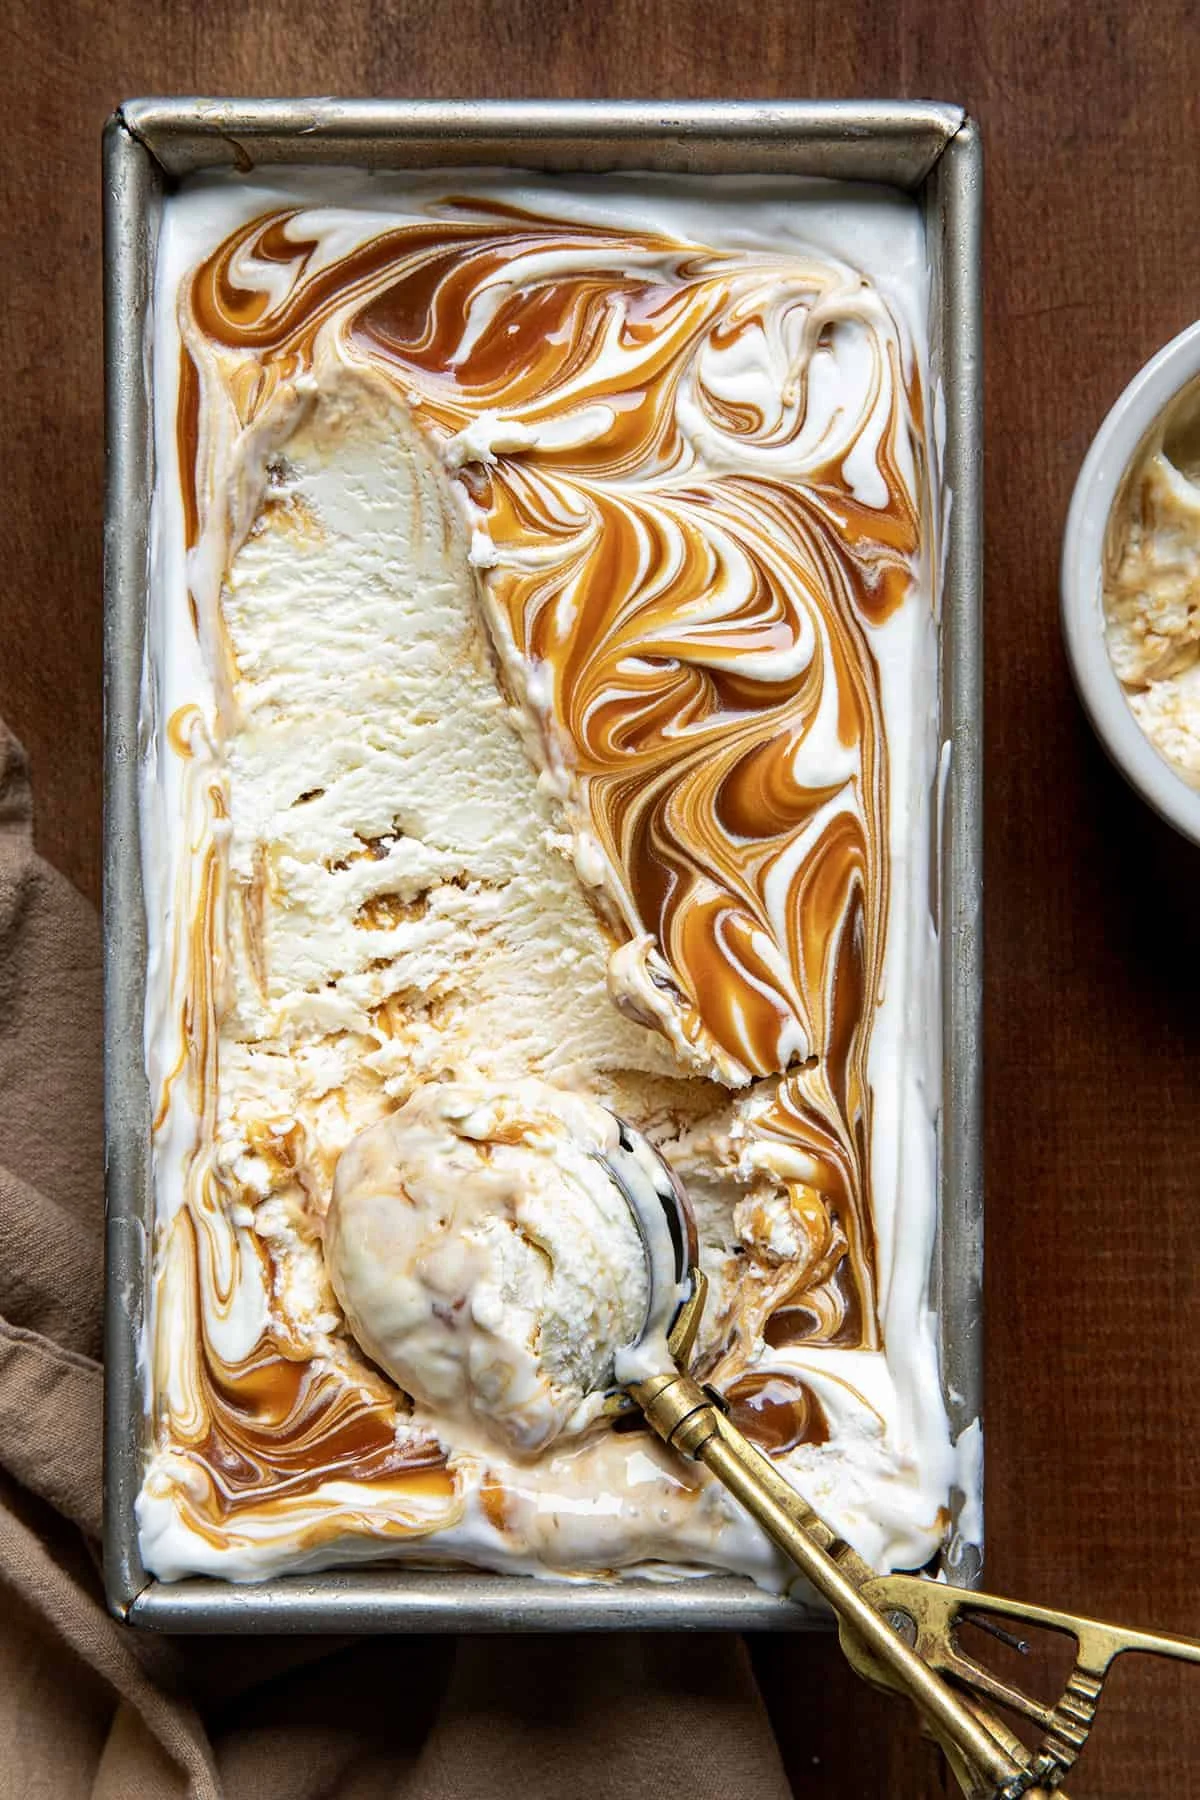
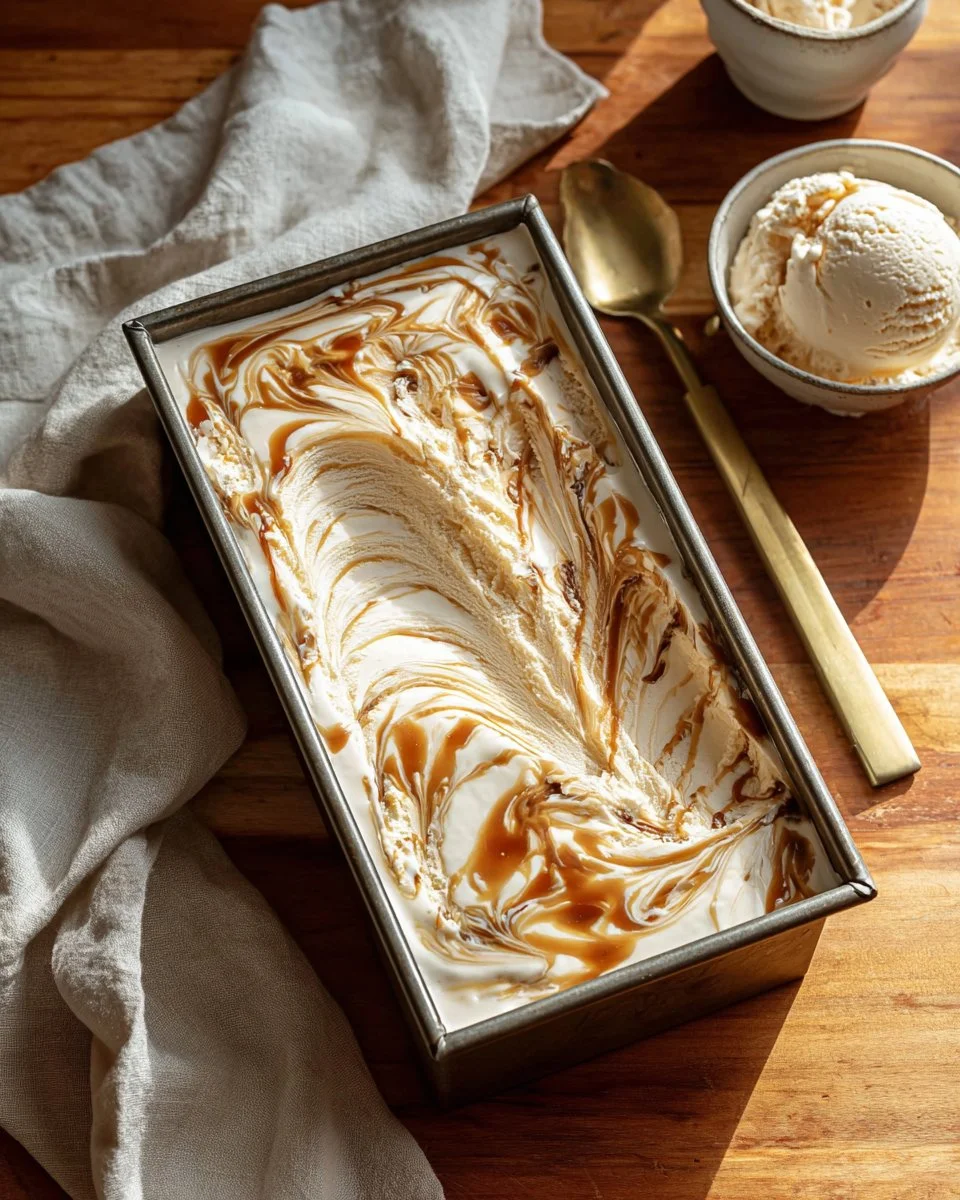
Layer the Mixture: Pour half of the combined mixture into the ice cream loaf pan. Drizzle half of the caramel sauce over the top, then cover it with the remaining ice cream mixture. Finish with the rest of the caramel sauce.
Create a Swirl: Using a skewer or a knife, gently swirl the caramel into the mixture to create a marbled effect.
Freeze: Cover the loaf pan tightly with plastic wrap or a lid, then freeze for at least 5-6 hours or until firm.
Serve & Enjoy: When you’re ready to indulge, scoop out generous portions and don’t forget to drizzle extra caramel on top if you dare!
Common Mistake Alert: Be sure to freeze for long enough. If not set properly, your ice cream may be too soft and difficult to scoop.
Expert Tips & Tricks
Ingredient Quality Matters: For the best flavor, seek out premium brands when it comes to your cream and caramel. Small differences can greatly enhance the final product!
Storage Recommendations: To keep your ice cream fresh, store it in a sealable container in the freezer. Use parchment paper or plastic wrap to cover the surface before sealing to limit ice crystals from forming.
Make-Ahead Instructions: This ice cream can be made up to a week ahead of time. Just remember to check the freezer space beforehand!
Troubleshooting: If your mixture is too soft, freeze for a little longer. If it’s too hard, let it sit at room temperature for a few minutes before scooping.
Revisit Your Swirl: For an even prettier presentation, swirl in some chopped chocolate, nuts, or cookie pieces alongside the caramel.
Flavor Variations: Fold in toasted nuts or cookie crumbles into the base and adjust the level of caramel to cater to your preferences.
Serving Suggestions
Pair your No Churn Salted Caramel Ice Cream with freshly baked cookies or brownies for an irresistible sundae experience. A drizzle of additional caramel or a light sprinkle of sea salt on top will heighten that sweet-salty contrast. Perfect for outdoor summer parties, cozy date nights, or just some much-deserved ‘me’ time!
Variations & Substitutions
Flavor Explorations: For a twist, try making a chocolate salted caramel by adding cocoa powder to the whipped cream or folding in melted chocolate.
Dietary Adaptations: Vegan? Swap the heavy cream for coconut cream and the sweetened condensed milk for coconut milk sweetened with maple syrup!
Seasonal Adjustments: In autumn, mix in pumpkin puree and spices for a pumpkin salted caramel treat. Fresh berries in spring can create a delightful berry swirl.
Nutrition & Storage Info
- Prep Time: 15 minutes
- Freeze Time: 5-6 hours
- Total Time: Approximately 6 hours
- Yield: About 8 servings
- Estimated Calories: 300-350 calories per serving (depending on caramel sauce and other variations)
- Storage Instructions: Keep in an airtight container; lasts up to two weeks in the freezer.
FAQ Section
Can I use low-fat cream?
Yes, but it may not whip as well and can affect the creaminess of the final product.How can I make it less sweet?
Reduce the amount of caramel sauce used or opt for a low-sugar version.Is it possible to make this without sweetened condensed milk?
Not really! Sweetened condensed milk is key for both texture and sweetness.Can I add nuts?
Absolutely! Chopped pecans or walnuts combined with the caramel give a beautiful crunch.How do I get the ice cream out of the pan?
Dip the bottom of the pan in warm water for a few seconds for easy removal.Can I use a different flavor of extract?
Yes! Almond extract or even coffee flavor extracts can create unique variations.Why is my ice cream icy?
If it hasn’t been mixed enough or was kept in the freezer for too long without proper sealing, it can become icy.Is there a dairy-free version?
Absolutely! Substitute heavy cream with coconut cream and sweetened condensed milk with coconut milk.How long will it last in the freezer?
It should retain good quality for up to two weeks.Can I add chocolate chips?
Yes! Fold them in gently before transferring the mixture to the loaf pan.
Conclusion
With its rich flavors and smooth texture, my No Churn Salted Caramel Ice Cream promises an unforgettable indulgence for family and friends alike. It’s not just dessert; it’s a delicious bit of summertime joy. I invite you to give this recipe a try and bask in the joy of home-made ice cream.
I would love to hear about your experiences and variations! Feel free to leave feedback or share your own spin on this recipe. And don’t forget to check out my other delicious ice cream recipes for more tasty treats year-round!